Capture setup and best practices
Capture identifies visitor email addresses when configured conditions are met and associates them with the visitor's behavior. The source guide says trial identification uses Add to cart or Checkout started as triggers, and recommends monitoring opens, clicks, unsubscribes and complaints: opens and clicks at least 50% of actively subscribed users, and complaints below 0.3%.
Configure Capture
Use the setup flow
- On the Capture page click Start setup.
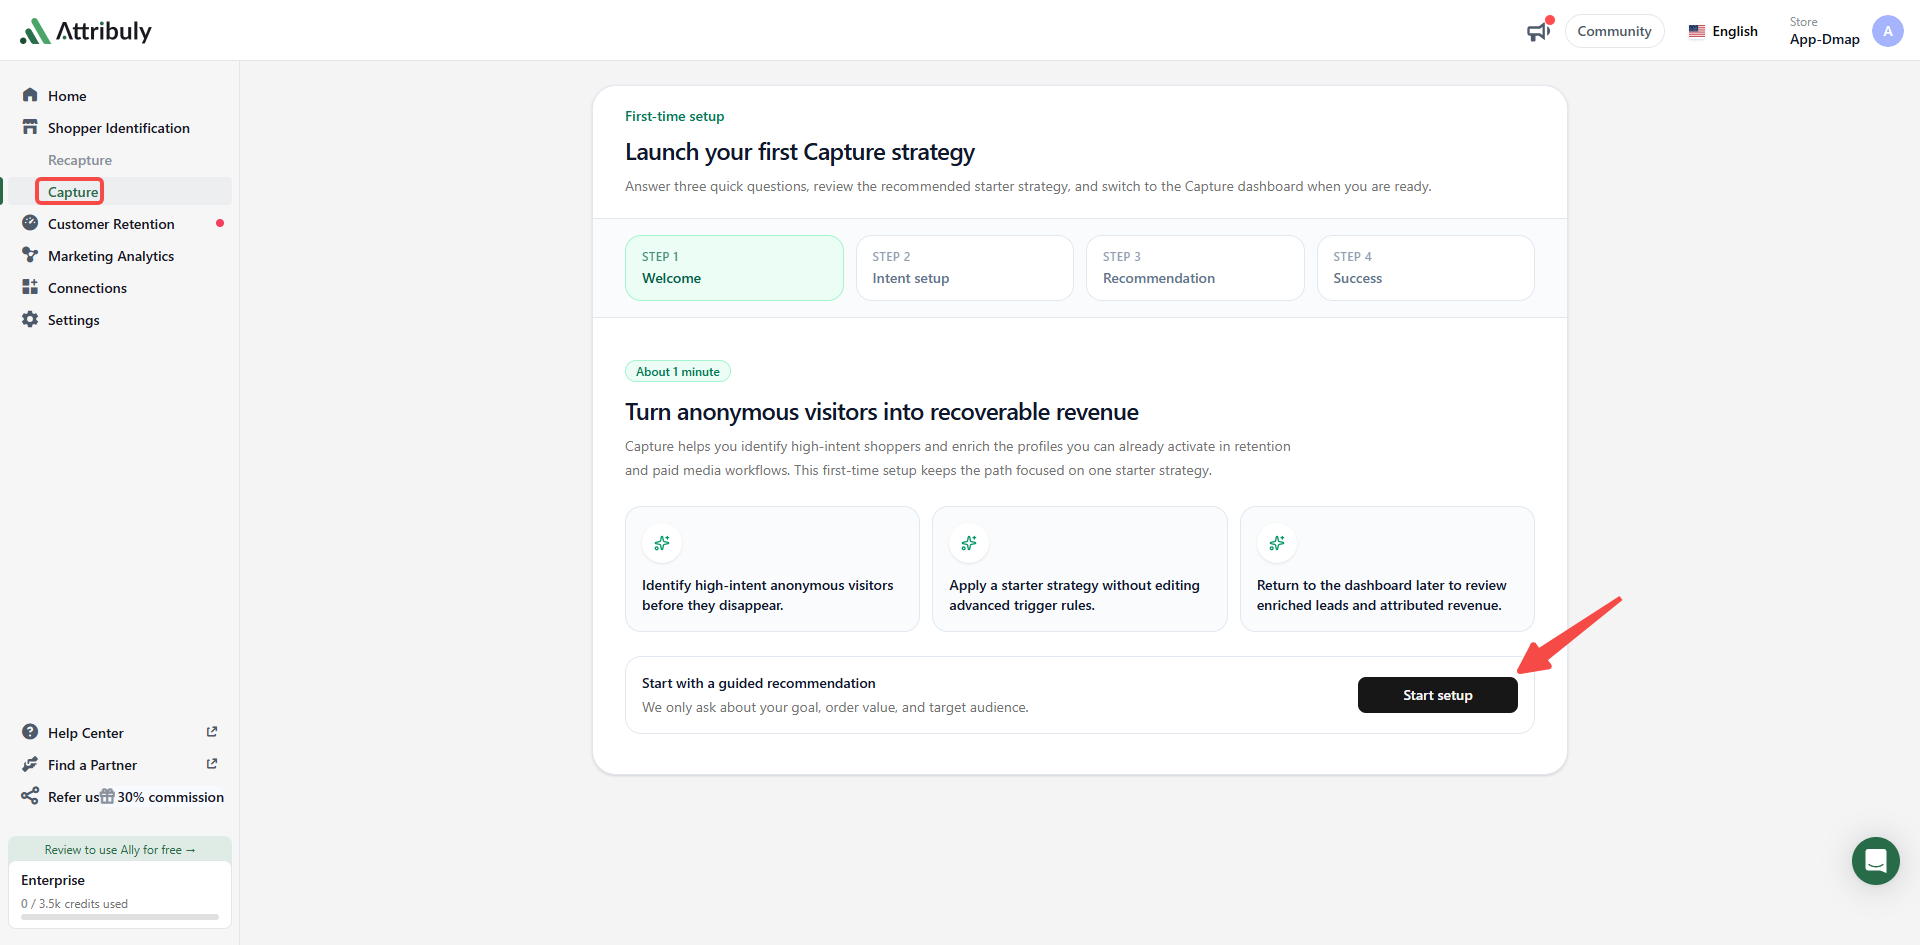
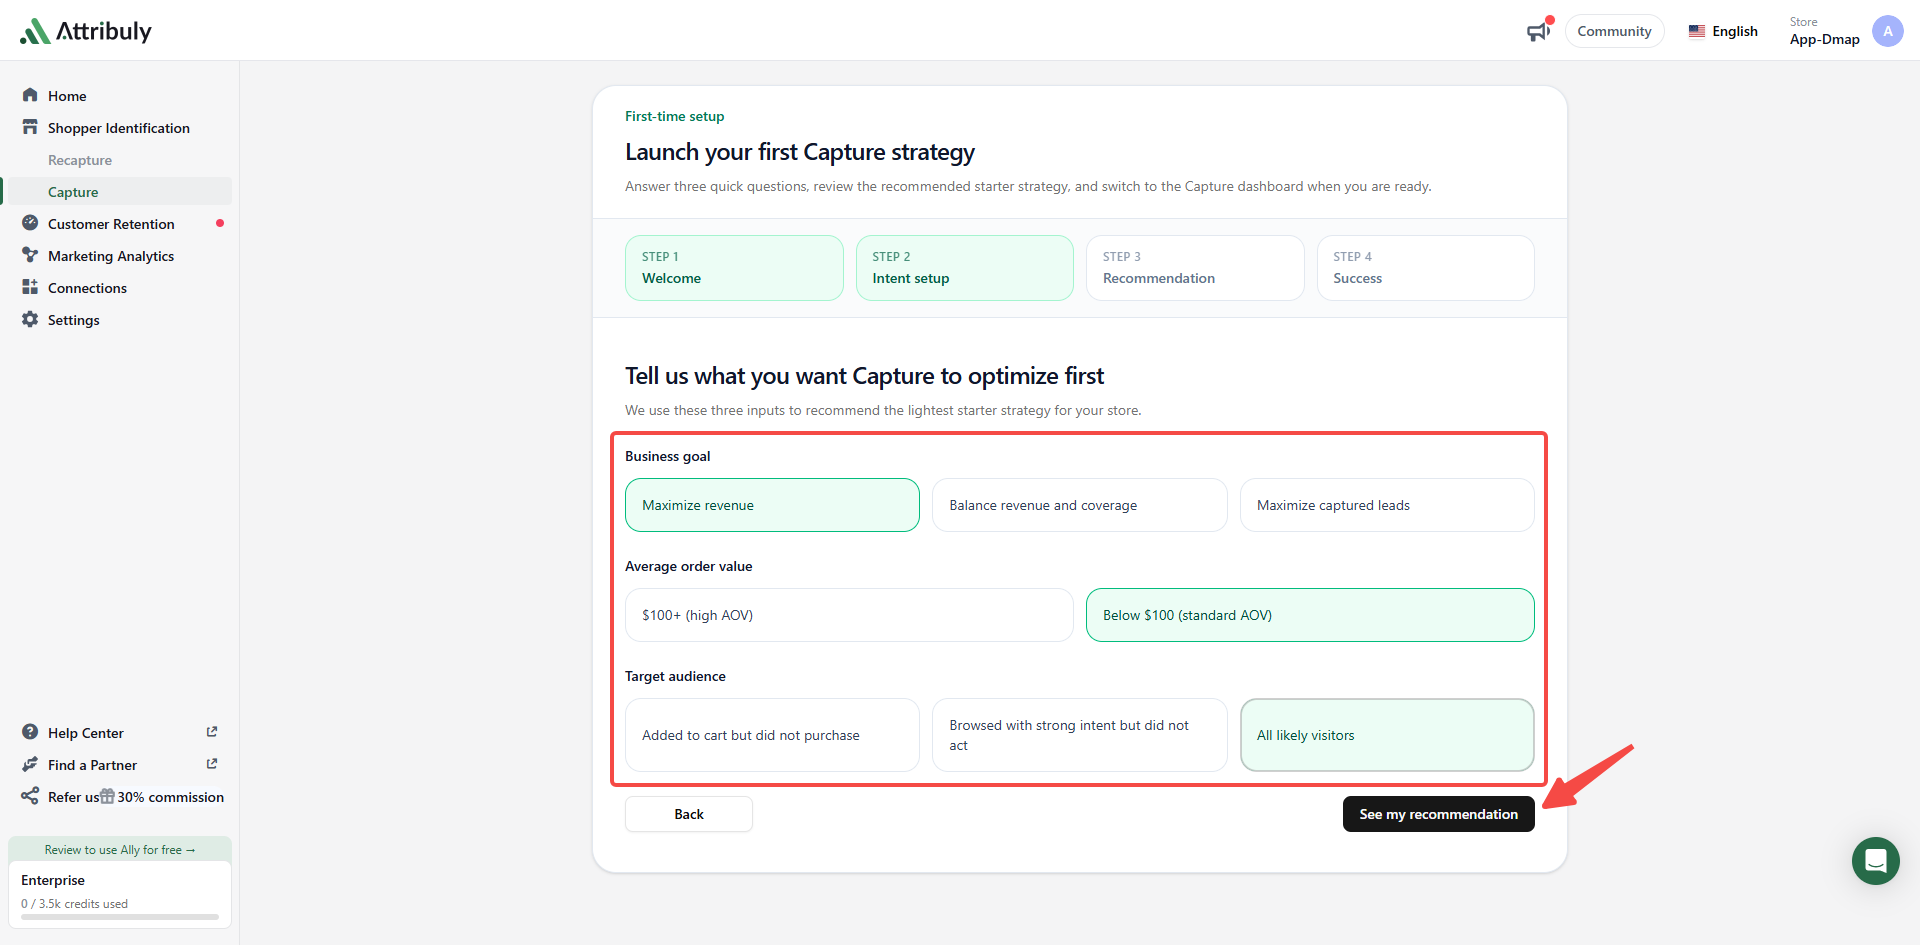
- Choose the conditions and click See my recommendation.
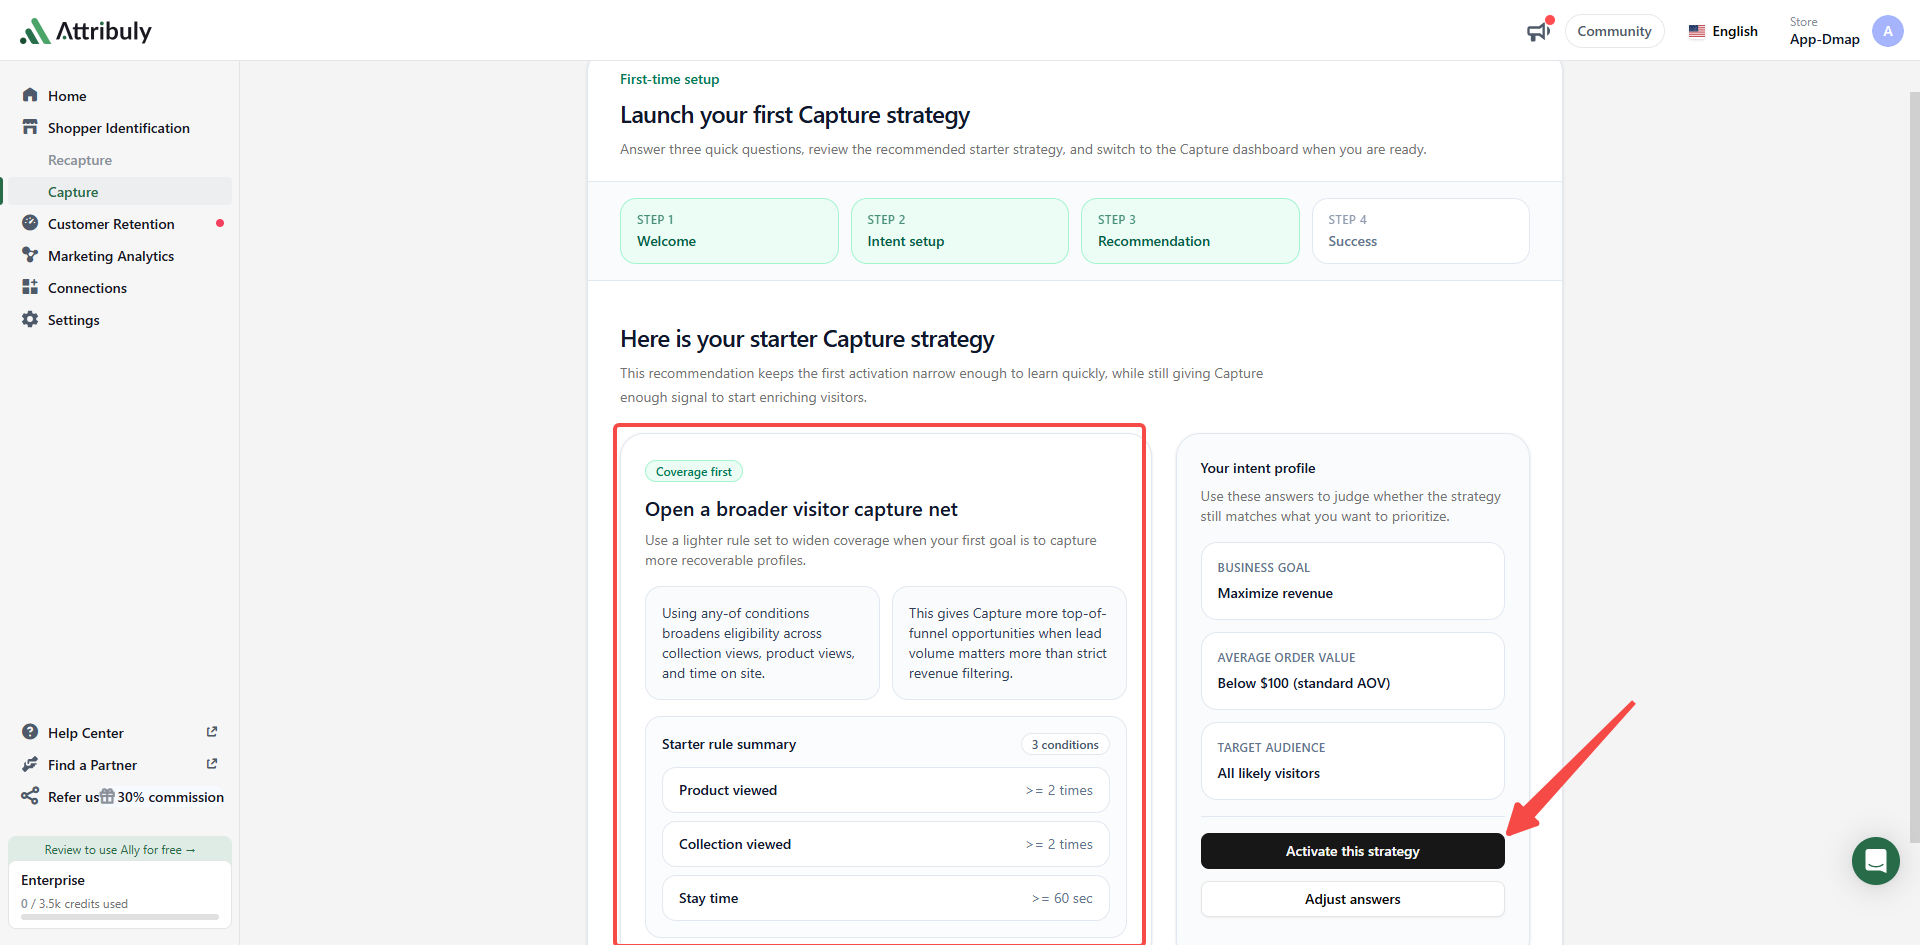
- Review the recommendation. Click Activate this strategy to use it, or Adjust answers to return to the previous step.
- If this is your first activation, contact us to enable Capture after setting the rules. Existing users changing rules do not need to contact us.
Set conditions manually
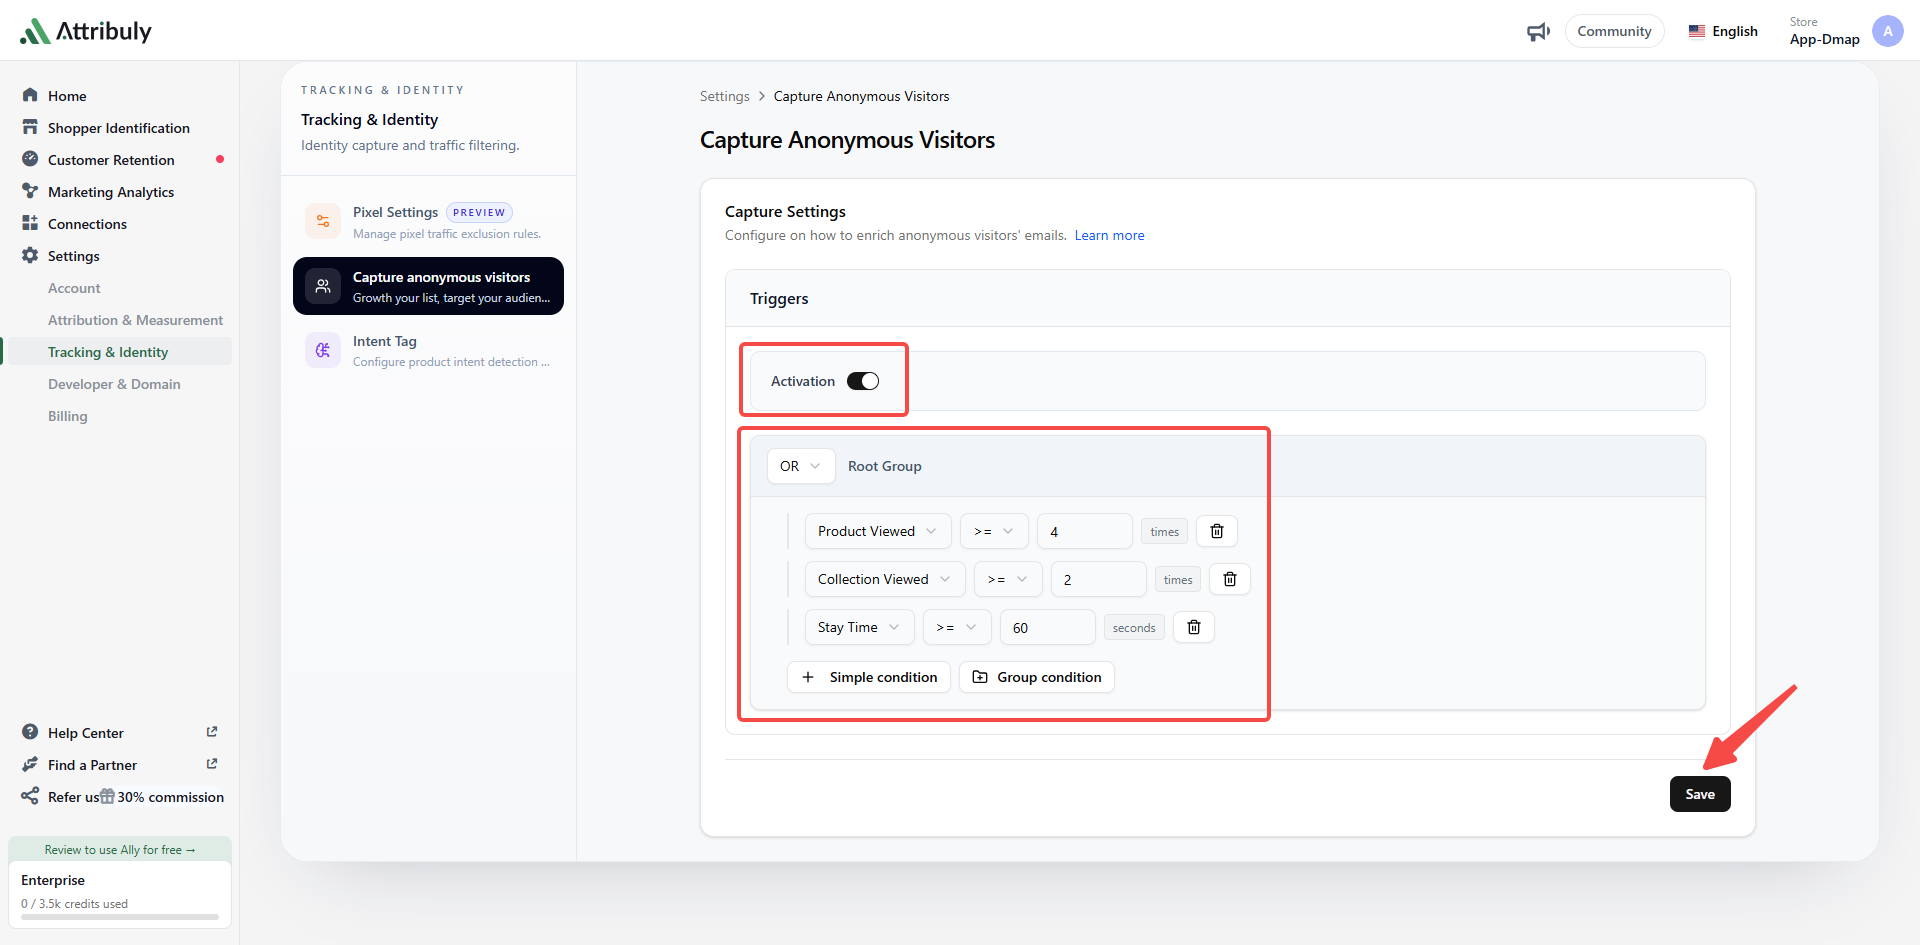
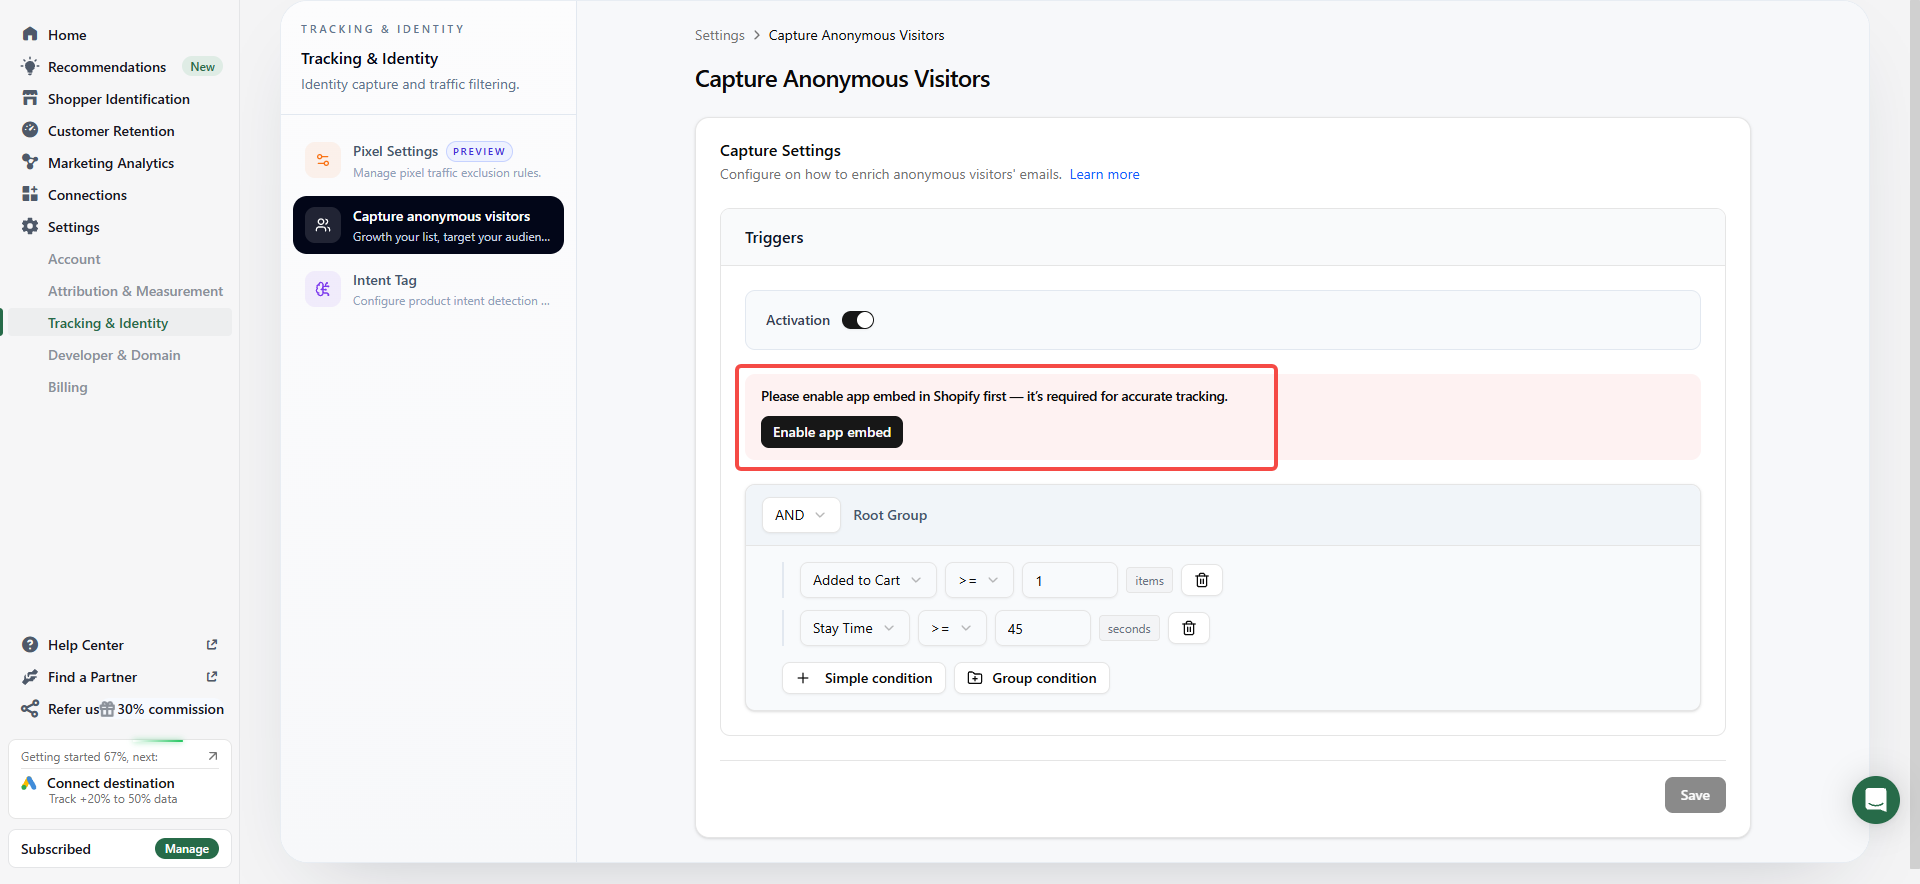
Open Settings → Tracking & Identity → Capture Anonymous Visitors, turn on Activation, set or change conditions and click Save. Contact us for first activation.
Review results
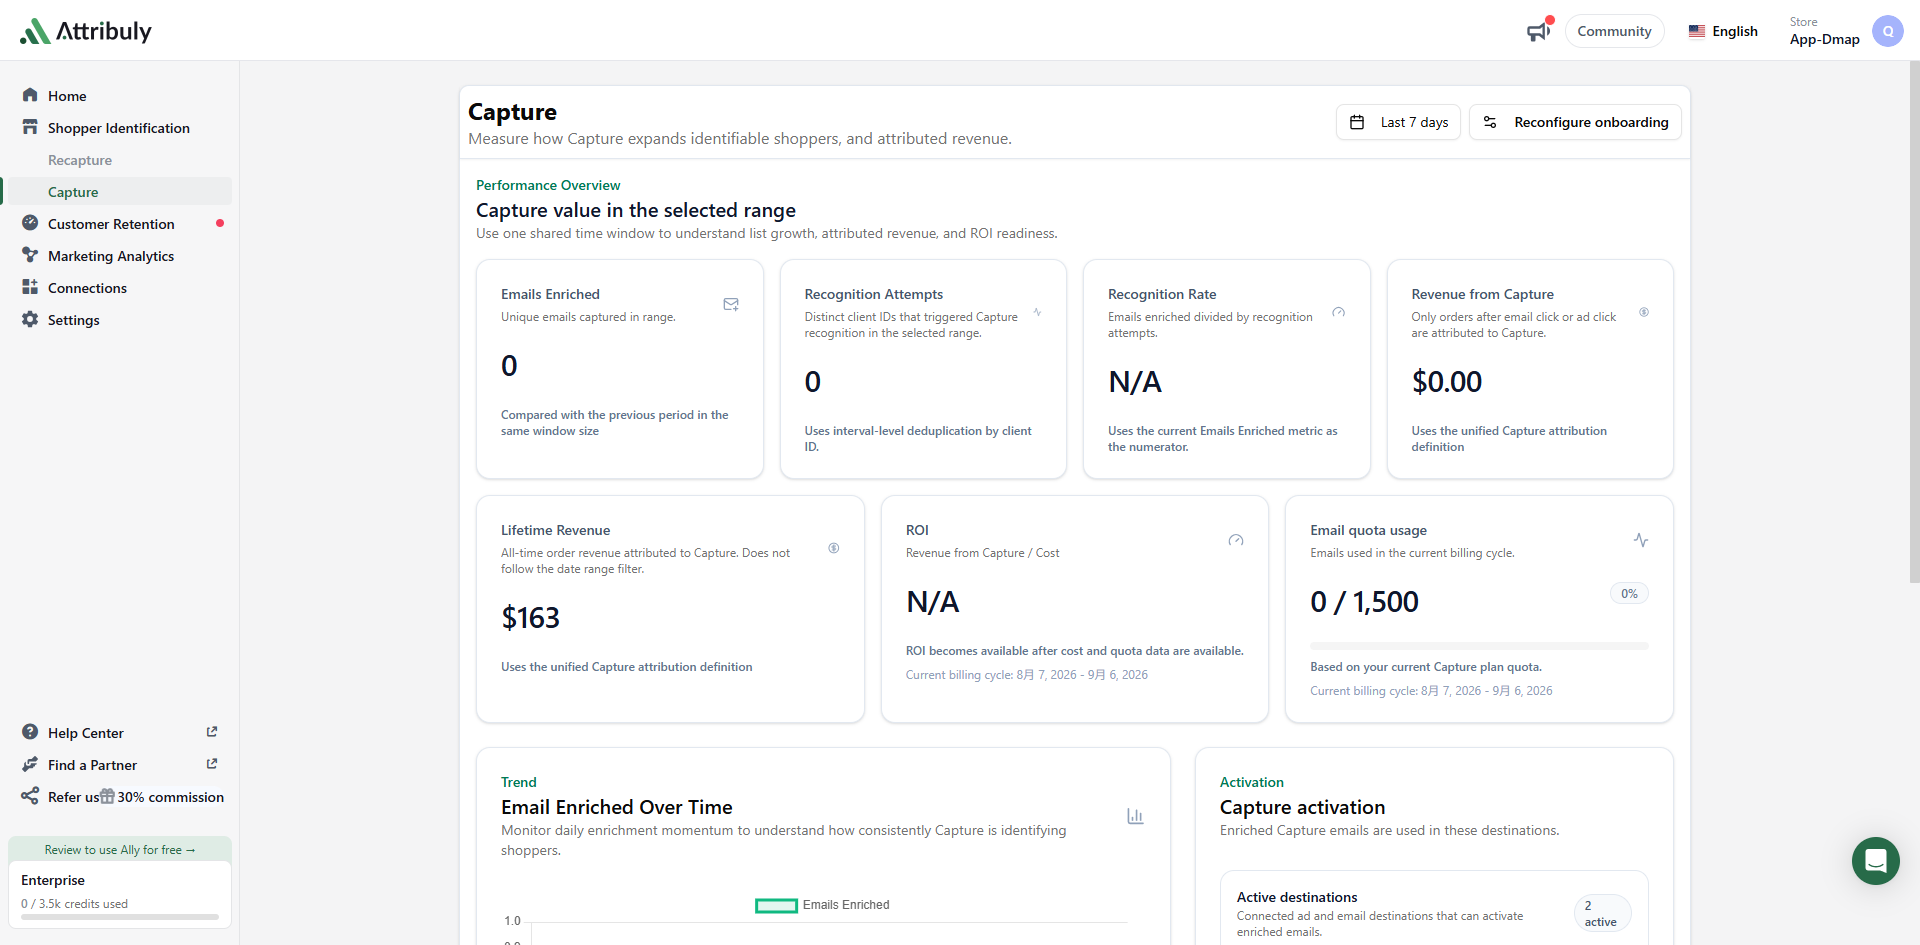
Capture page data updates in real time.
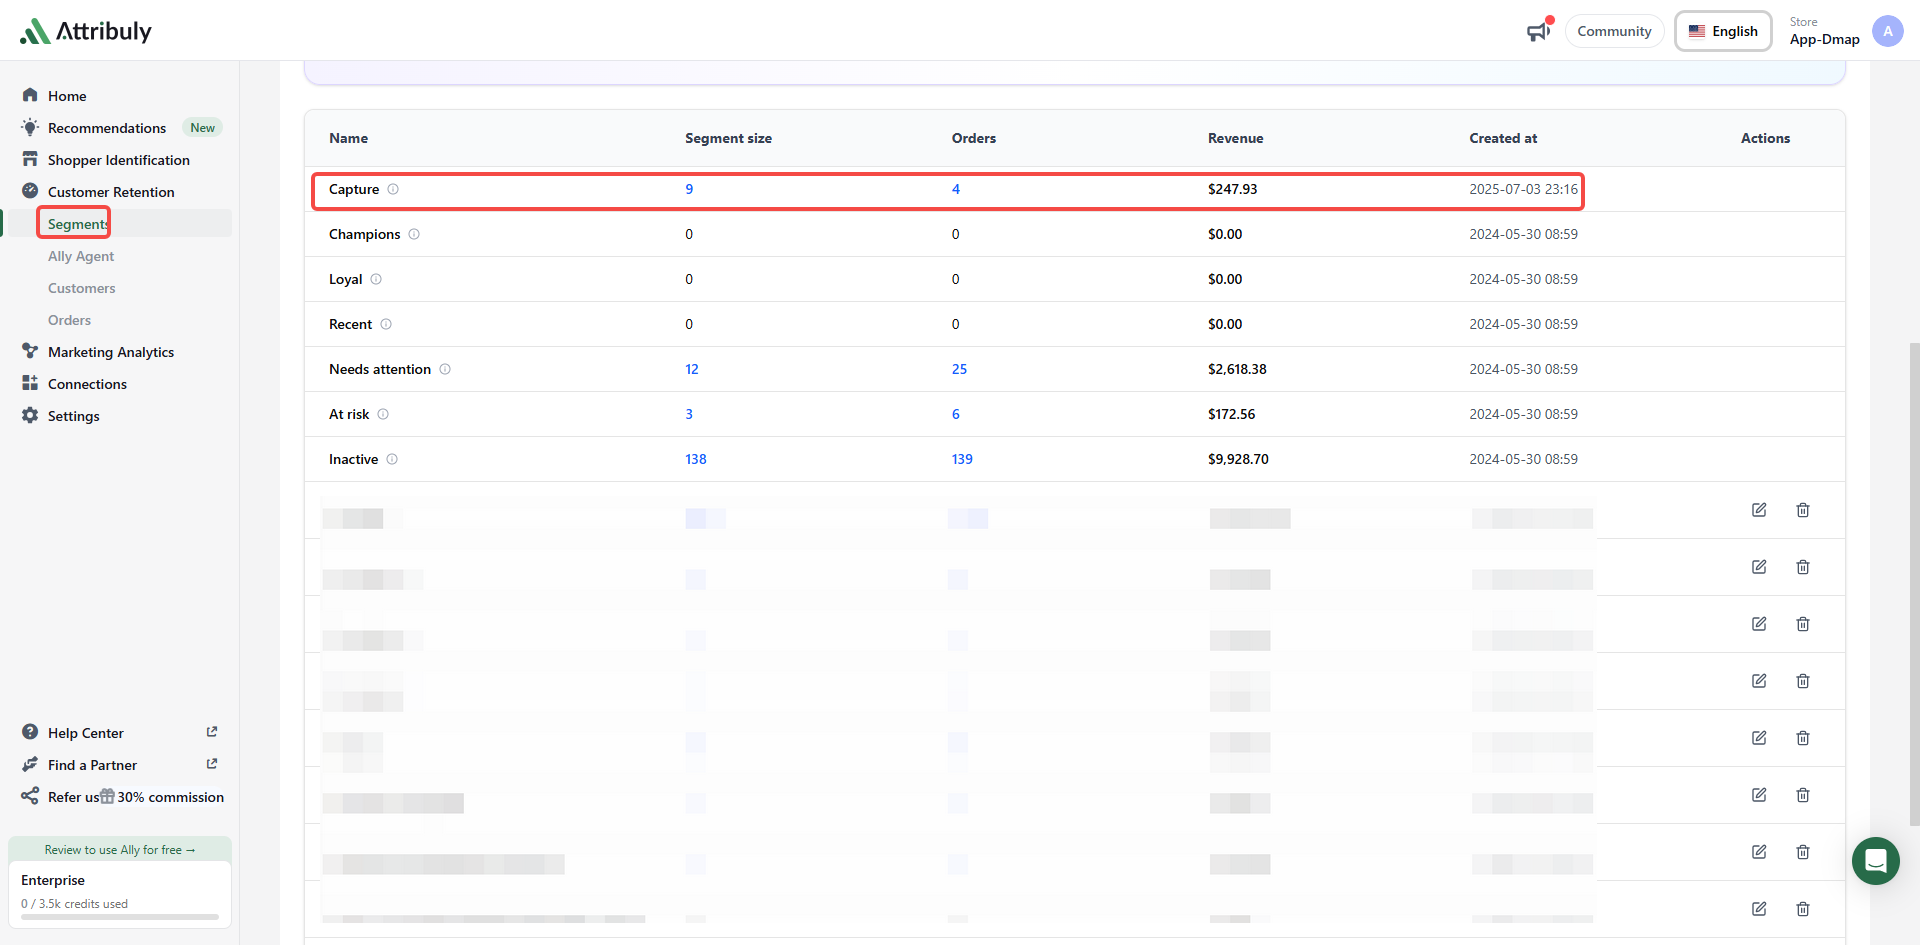
 The Capture segment on the Segments page updates daily.
Use identified emails
Send events to ad platforms
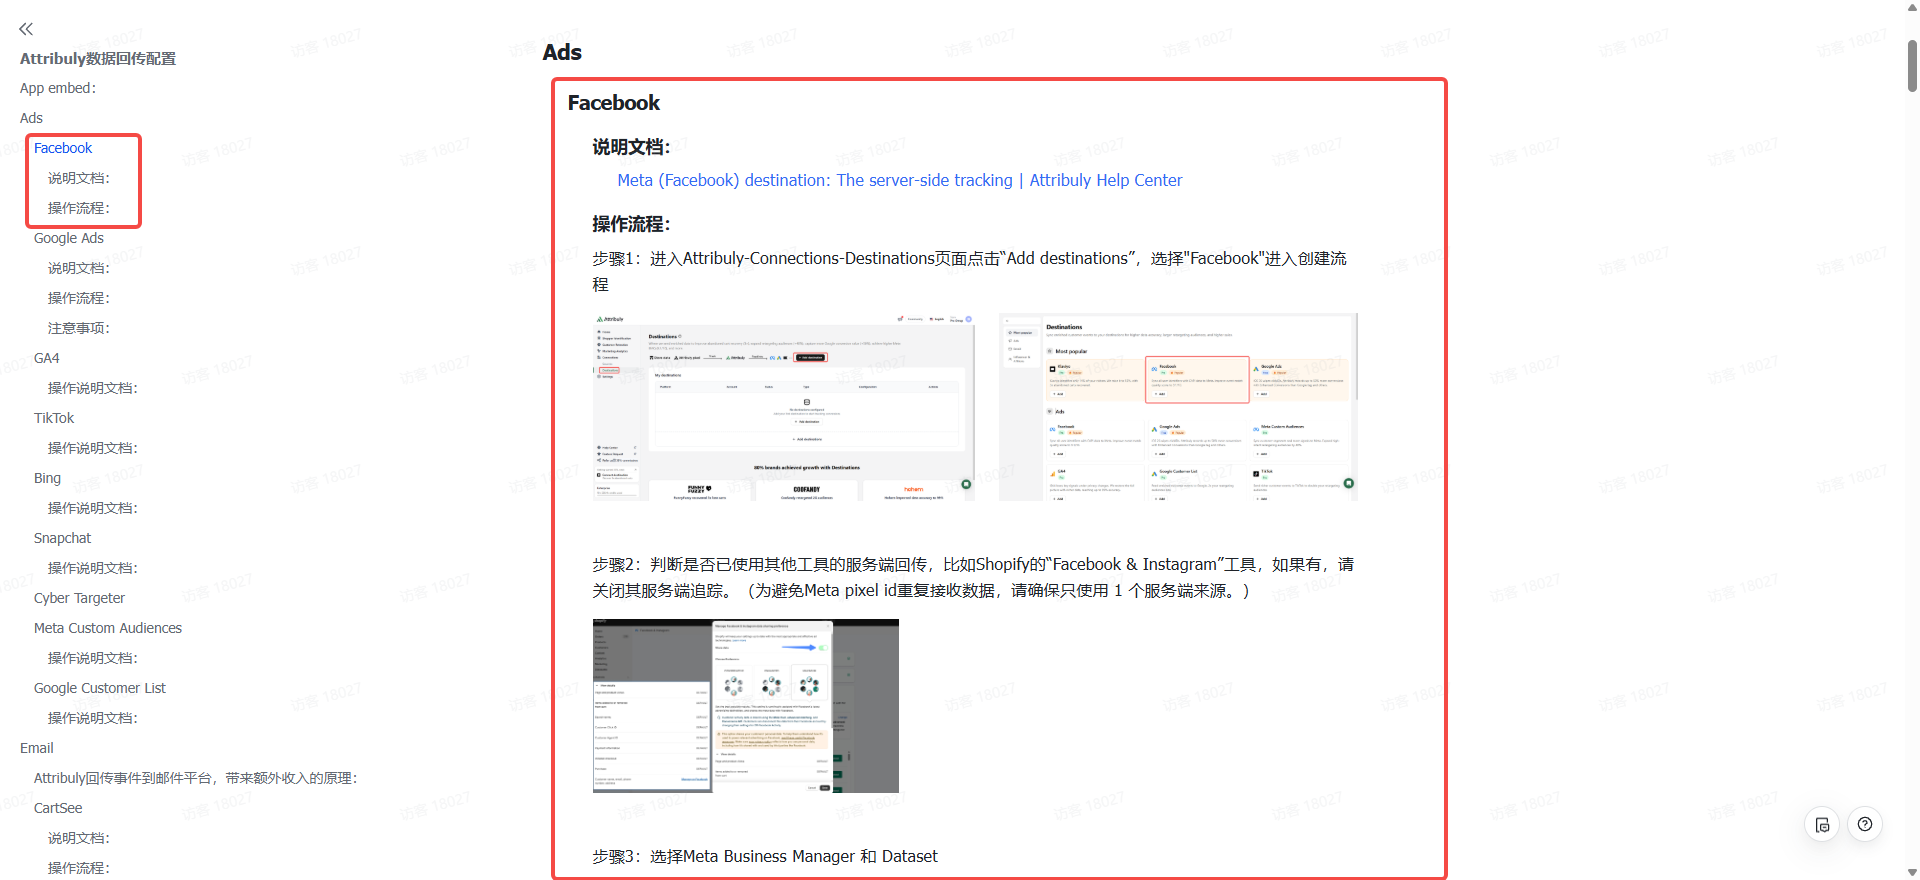
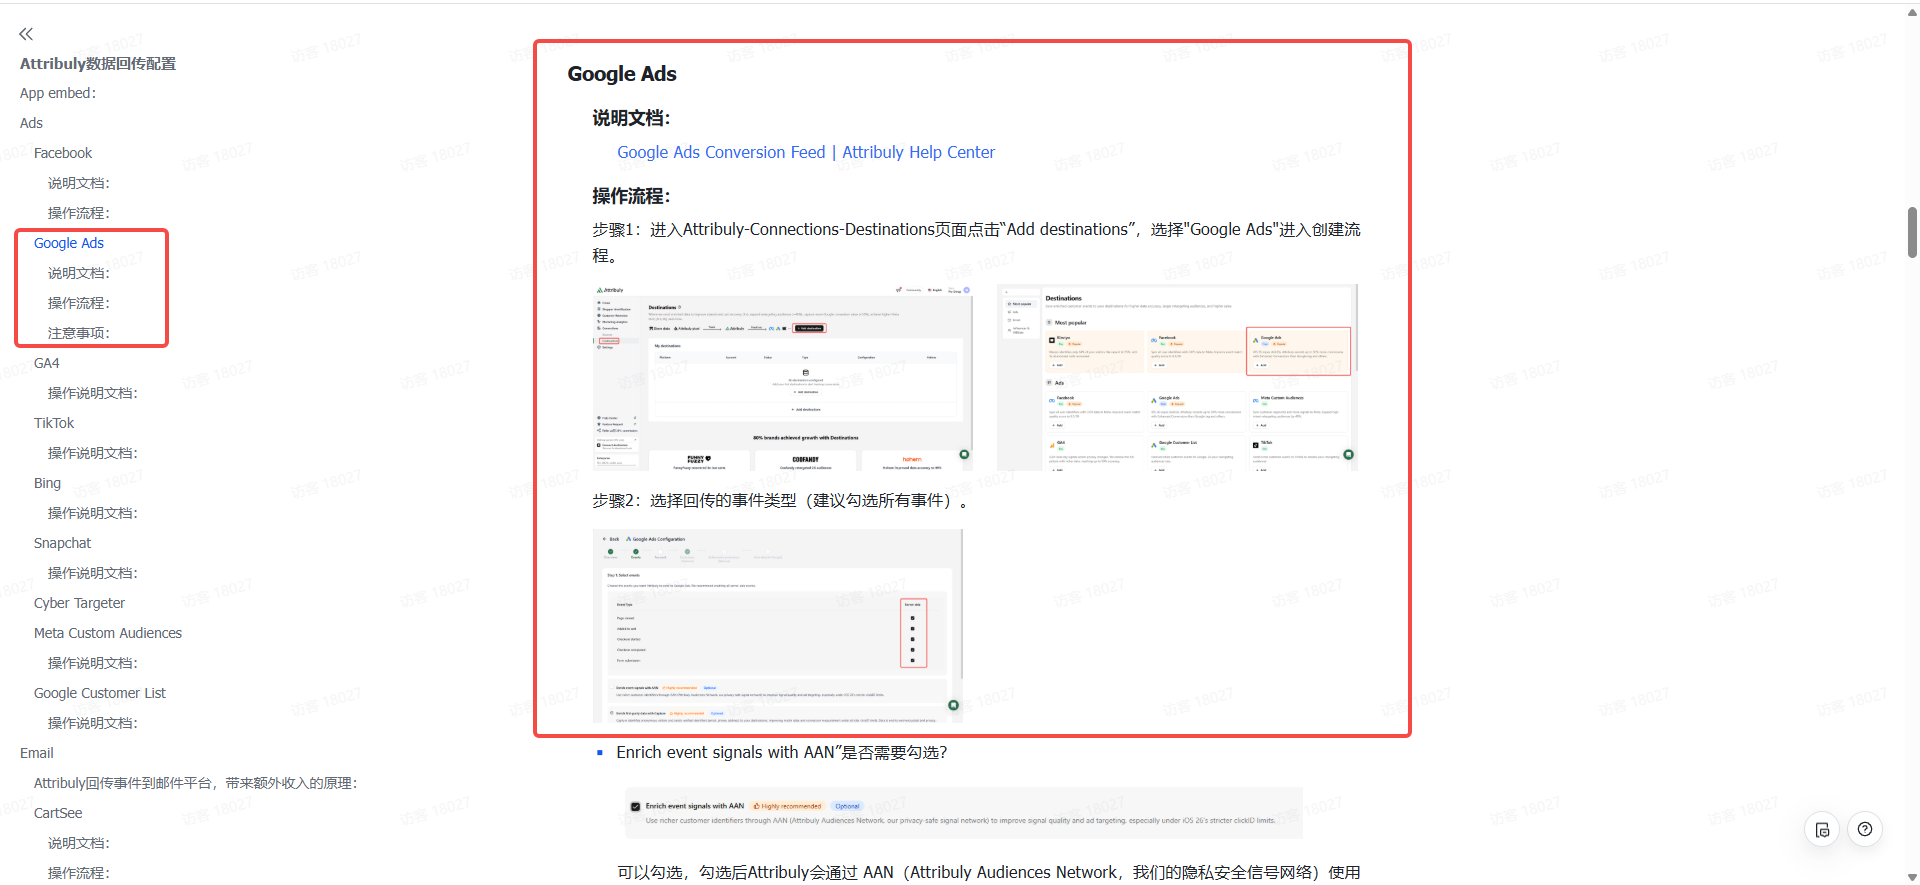
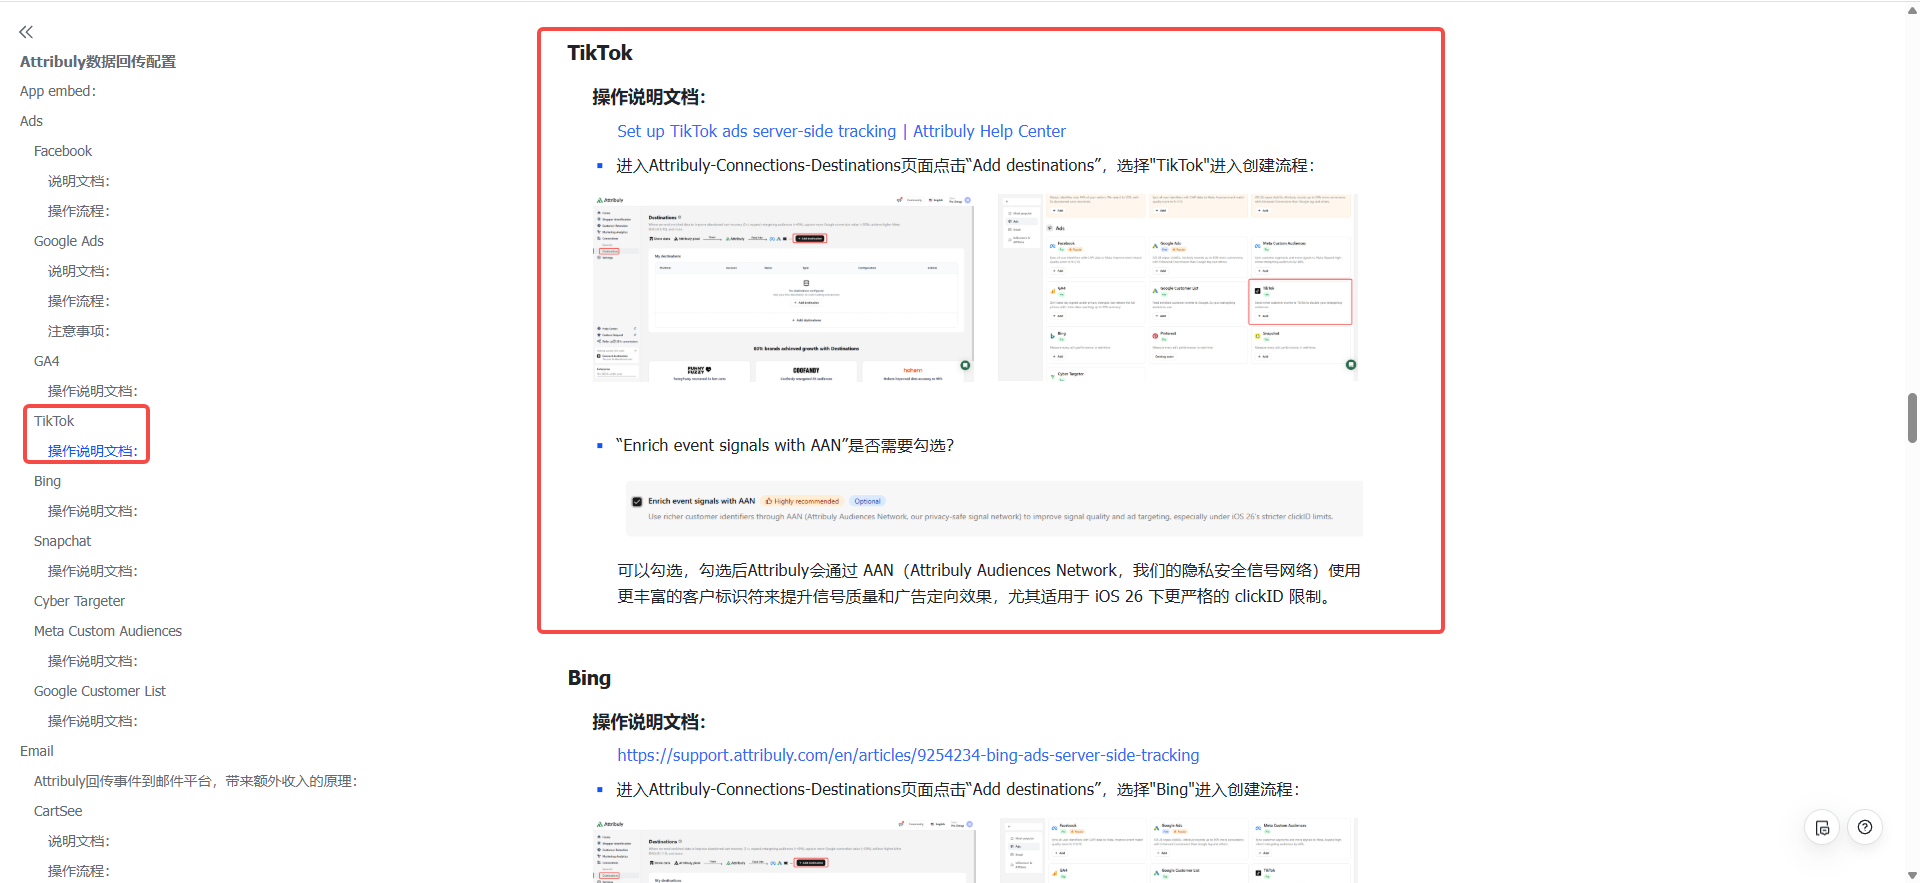
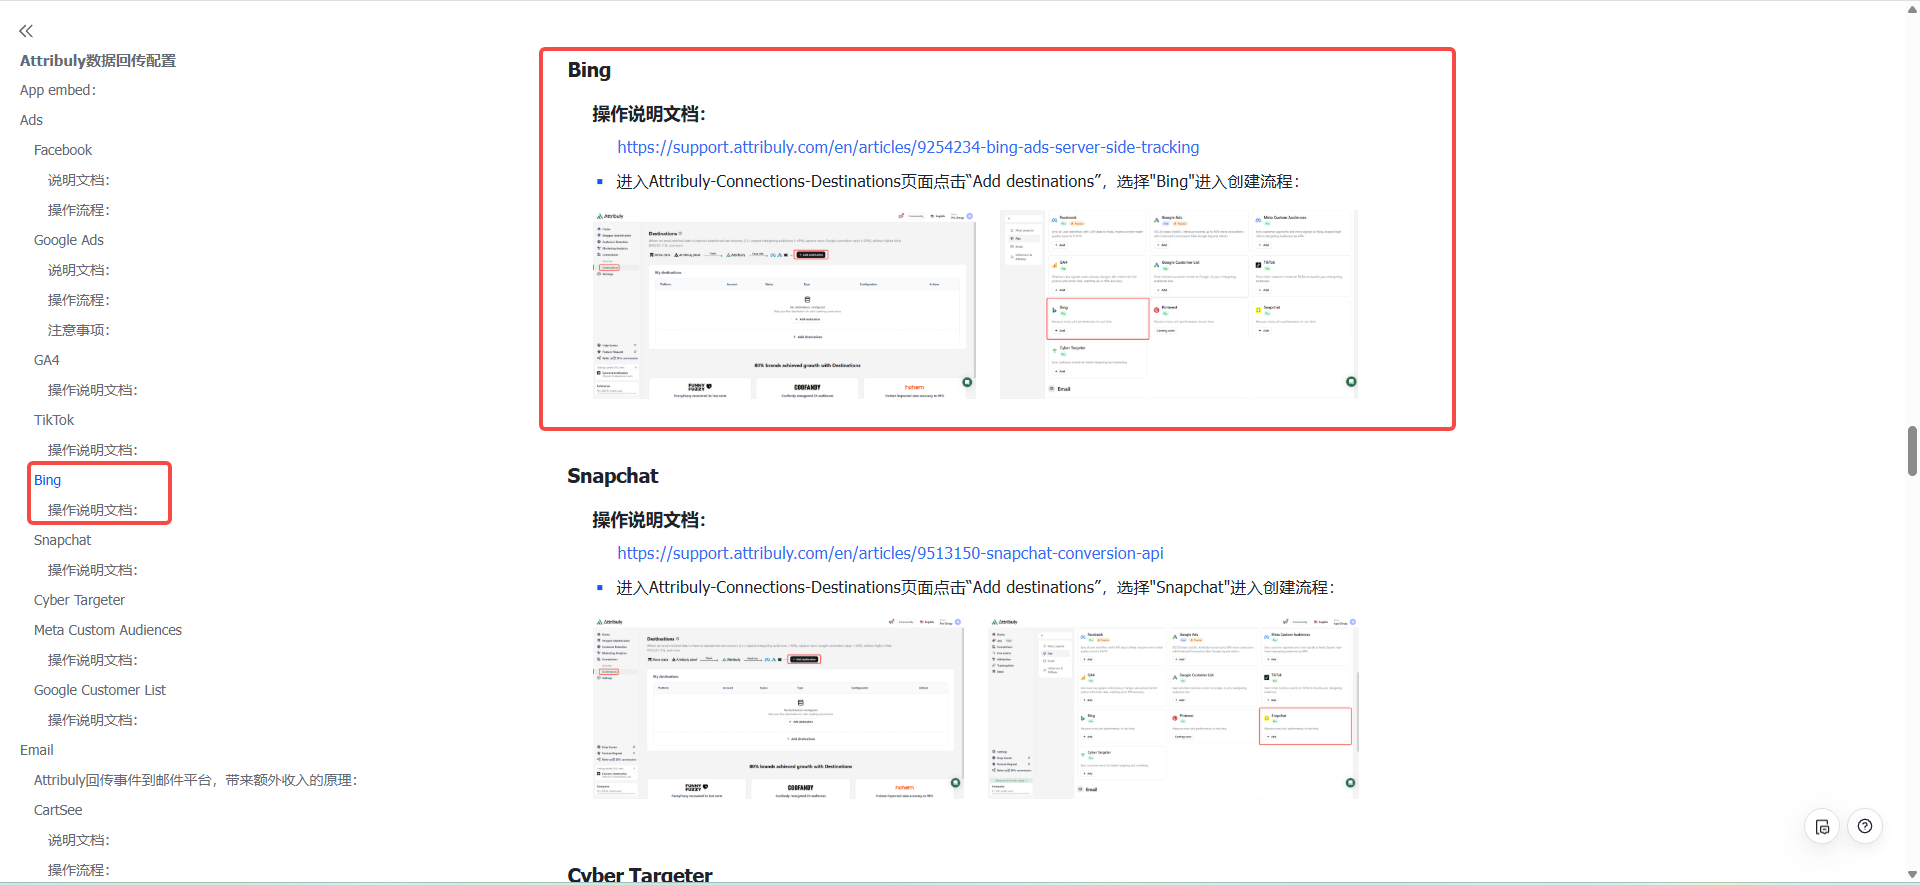
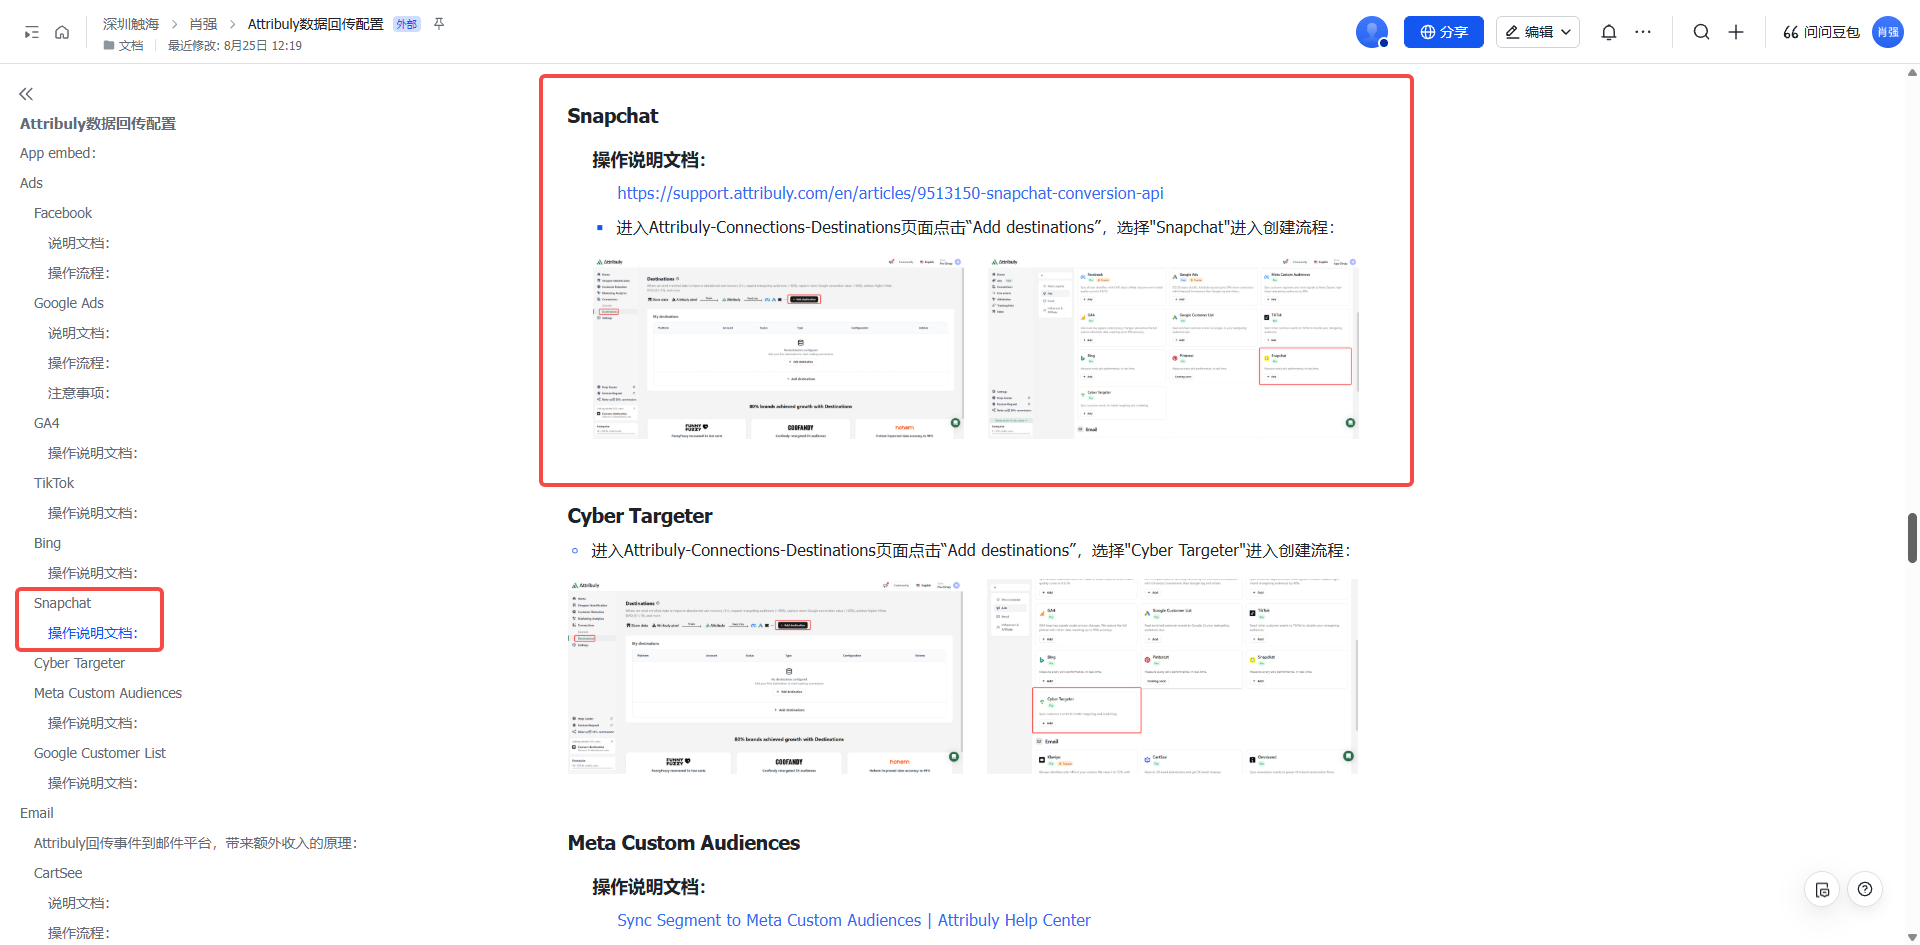
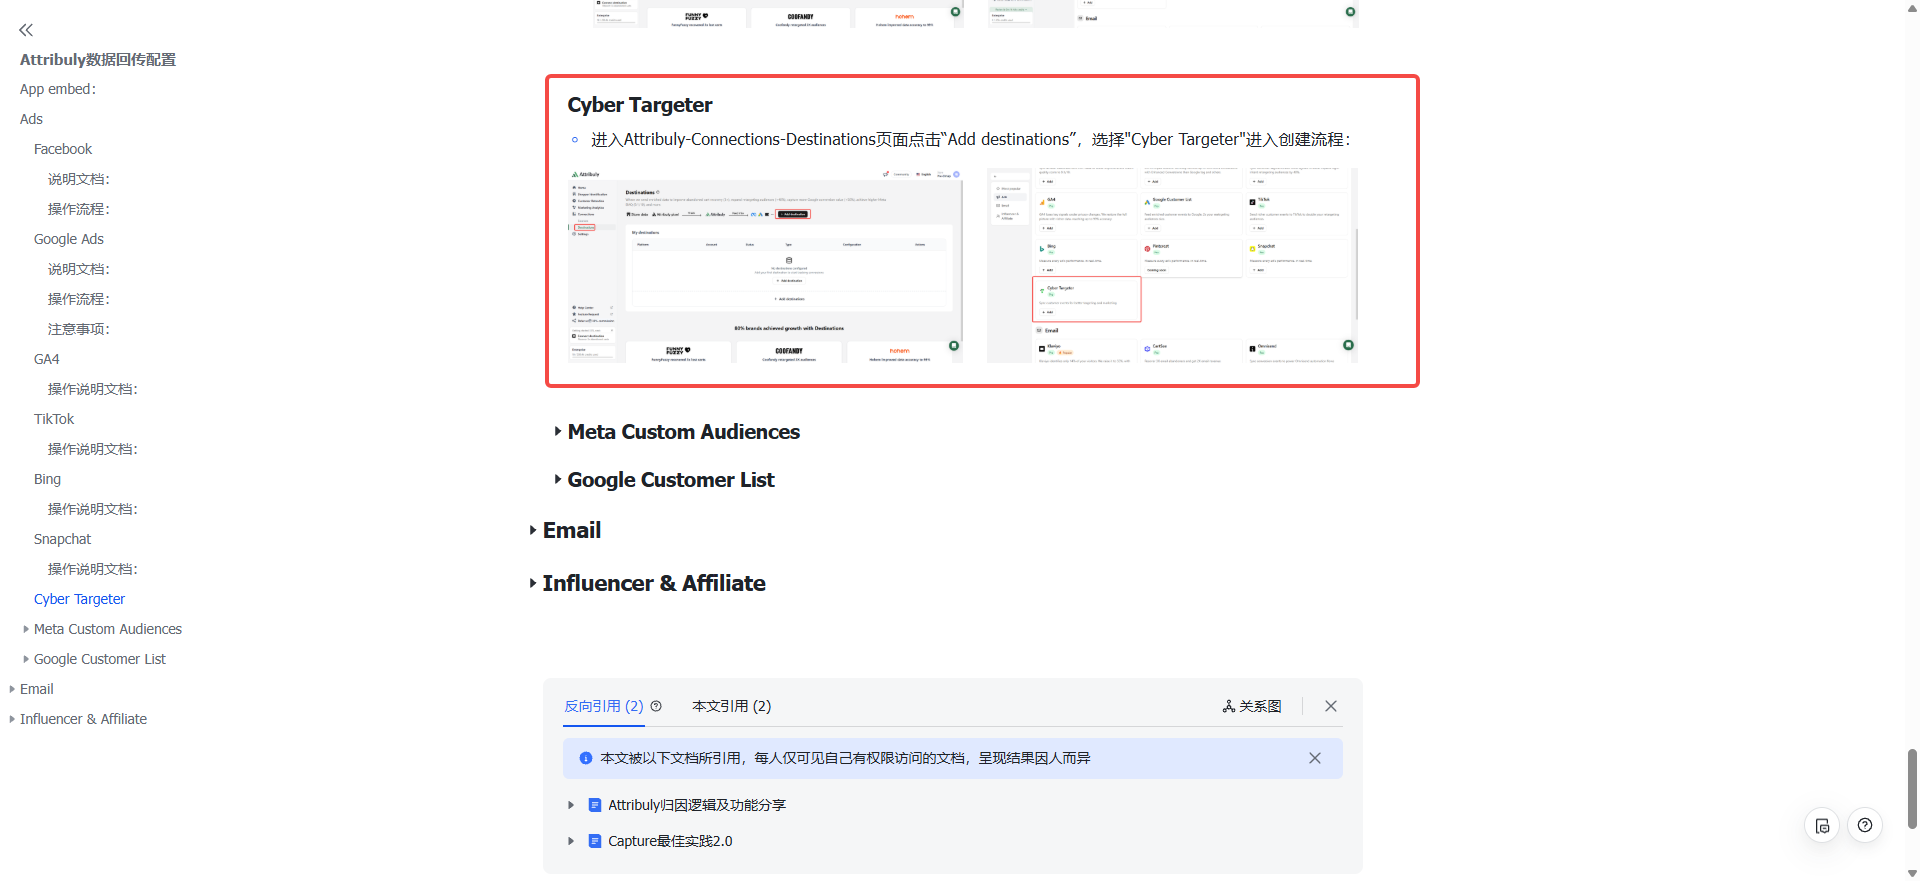
Create an ad destination to send visitor events and associated identifiers to Meta, Google, TikTok, Bing, Snapchat or Cyber Targeter. Review the destination guide for each platform. The source guide advises checking for another Meta server-side feed before creating one; Google supports multiple data sources.
Build ad audiences
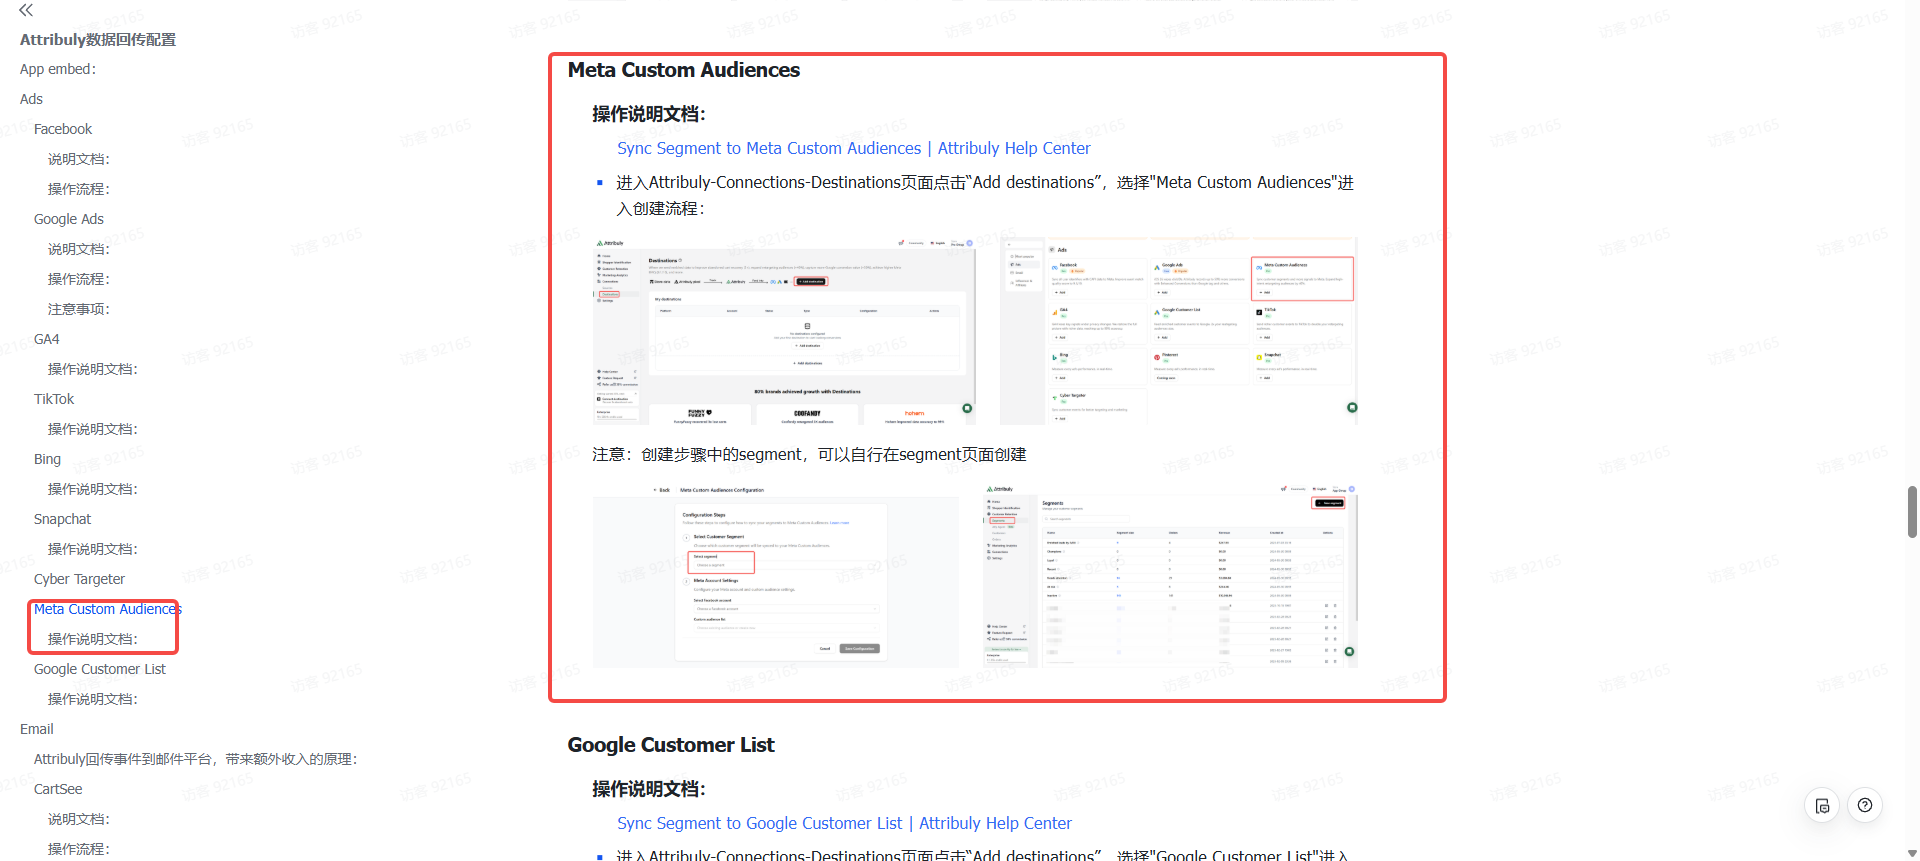
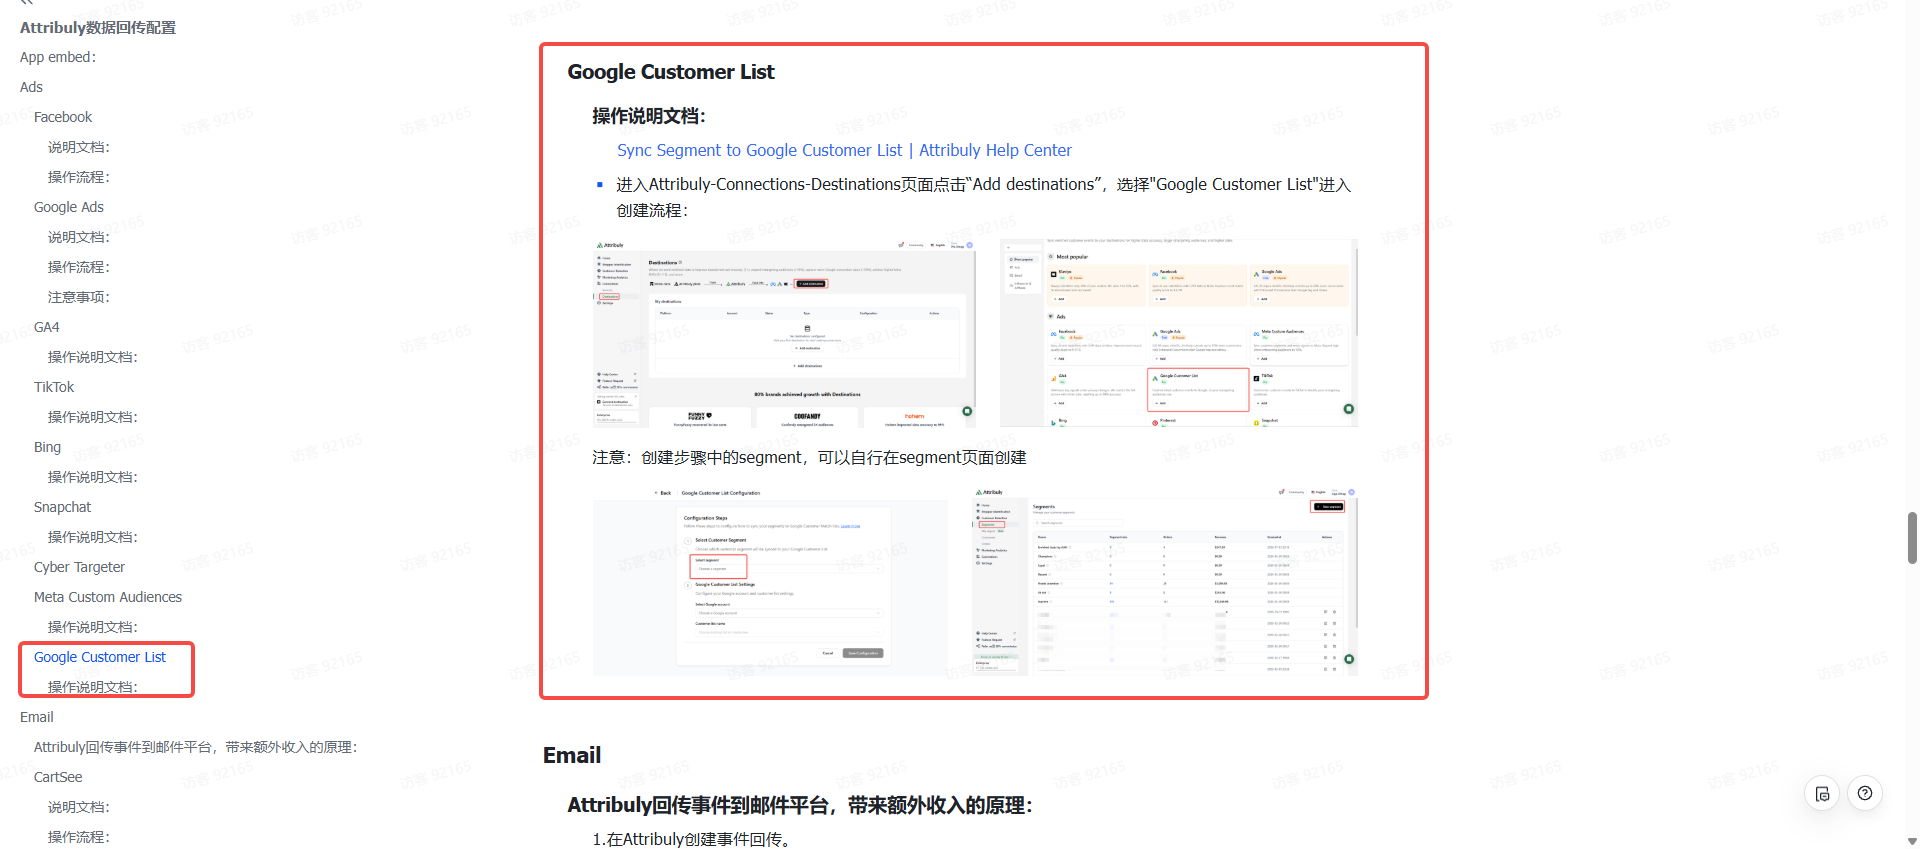
Use Meta Custom Audiences or Google Customer List to sync a segment for targeting and lookalike audiences. The source guide recommends waiting until you have more than 10,000 email addresses, citing a typical platform match rate of 30–60%; results vary.
Connect an email platform
Send visitor events and identified email addresses to the platform. A copied recovery workflow can use Attribuly events, and a separate welcome flow can invite recipients to subscribe. Review the Capture privacy information and your consent and messaging requirements before contacting identified visitors.
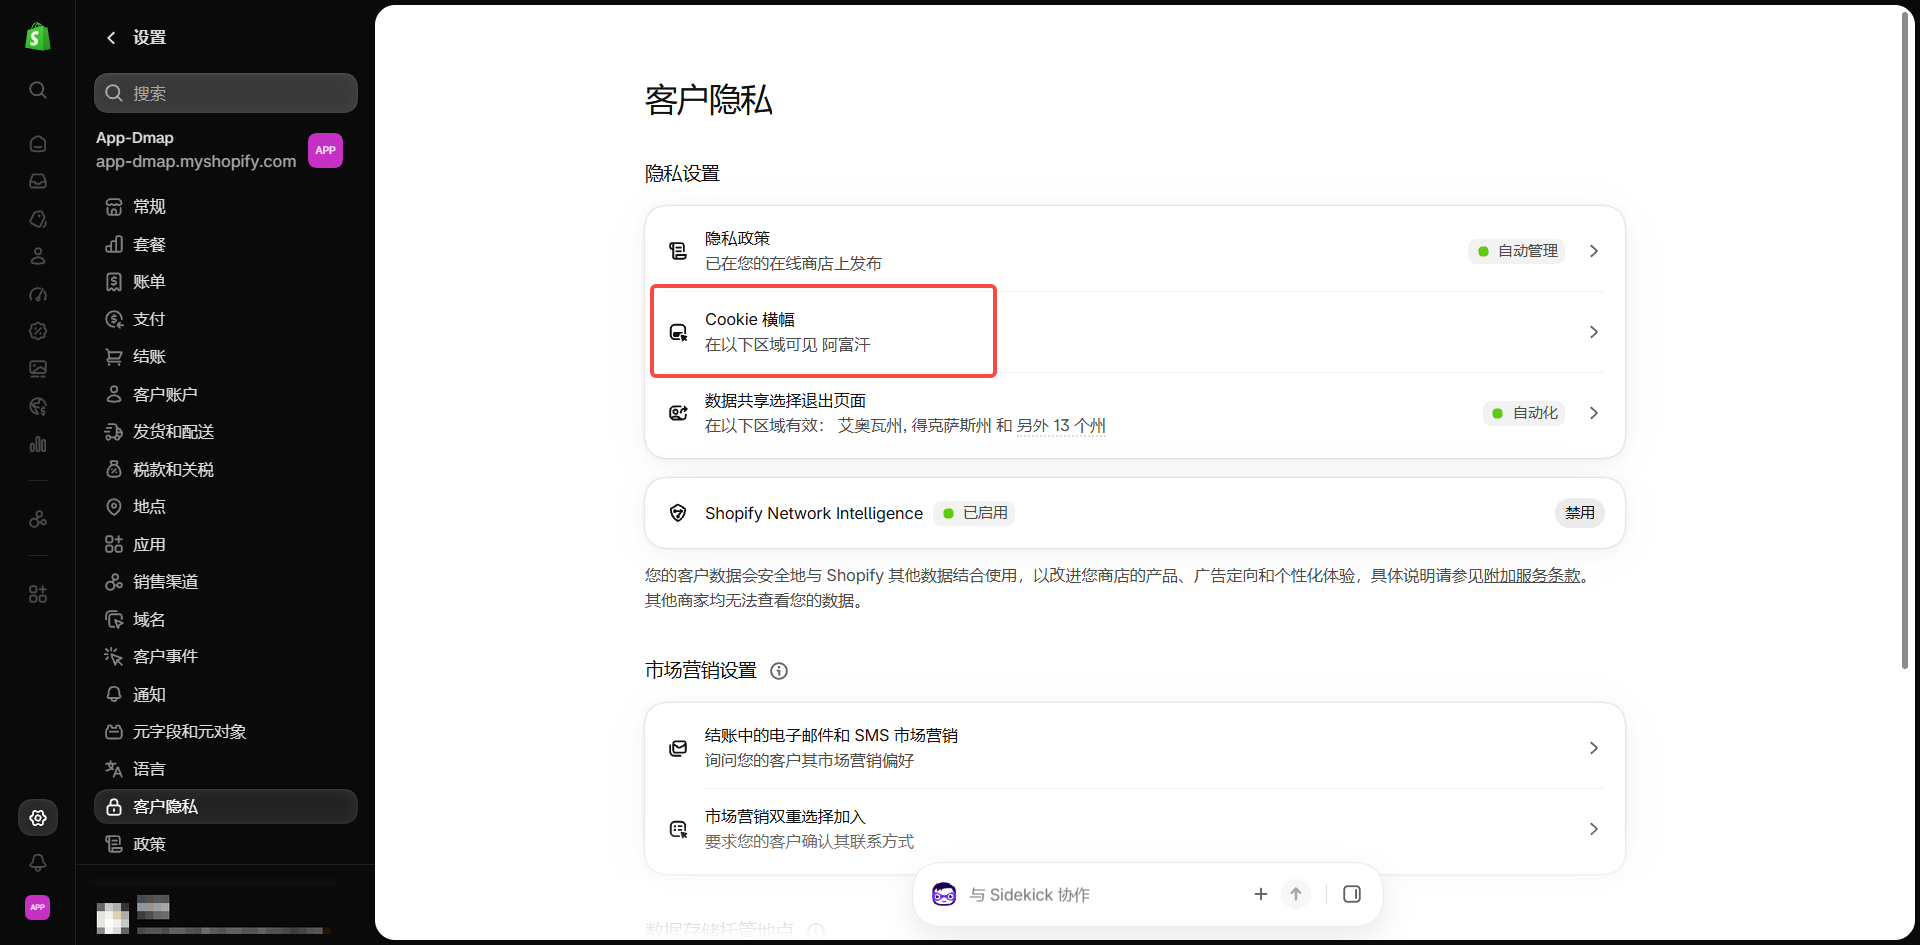
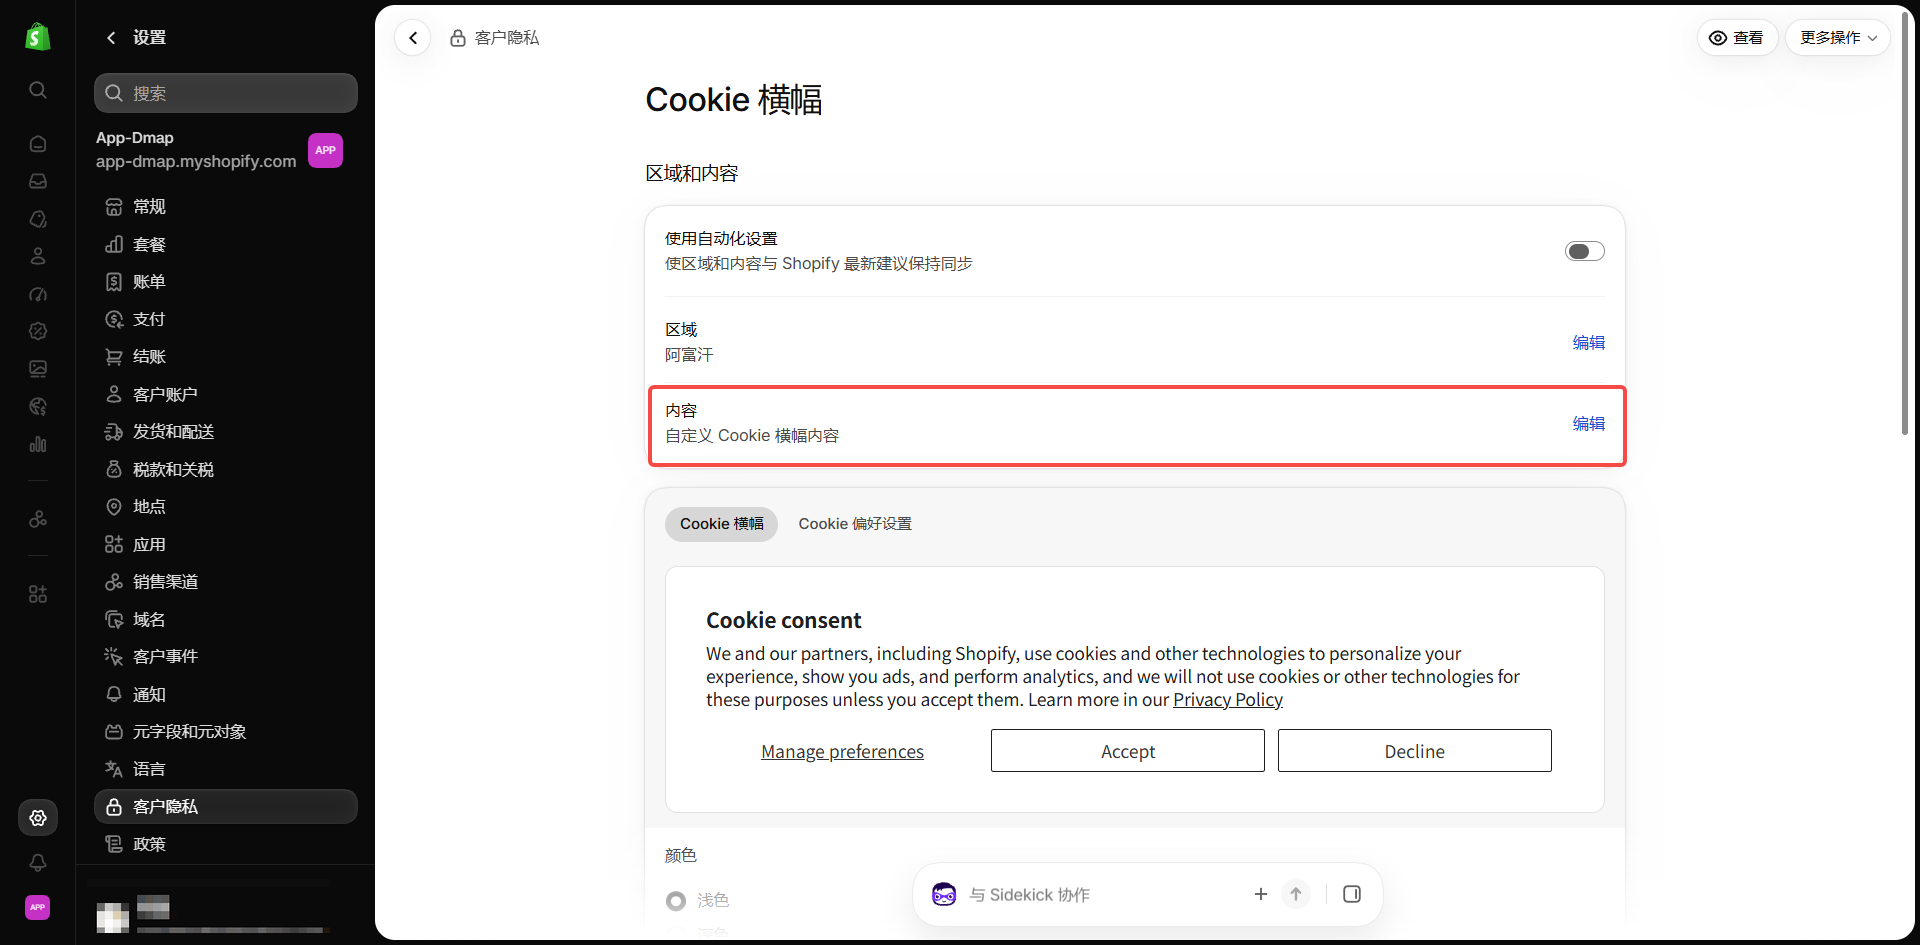
The source document includes an optional cookie-banner example and says shoppers can decline. Review the example against your own privacy policy and applicable requirements.
Welcome email structure
The source suggests a brand header with 3–4 category links, an invitation to subscribe, 6–8 category cards, a brand introduction, an opt-out link and trust/footer details. Use neutral wording such as “Thanks for stopping by” rather than saying someone subscribed when they did not. Its example sequence is a brand introduction immediately, product highlights 2–3 days later for non-subscribers, and an optional final incentive 3–4 days later for non-subscribers. Ensure the recipient can subscribe or opt out.
Choose workflows to copy
Copy the flows corresponding to your Capture conditions: an add-to-cart flow if Add to cart is required, or a checkout-abandonment flow if Checkout started is required. Add exclusions so recipients do not enter both native and copied flows.
Klaviyo
- Connect Klaviyo under Sources; identified Capture emails sync to its list. Create a Klaviyo destination for events.
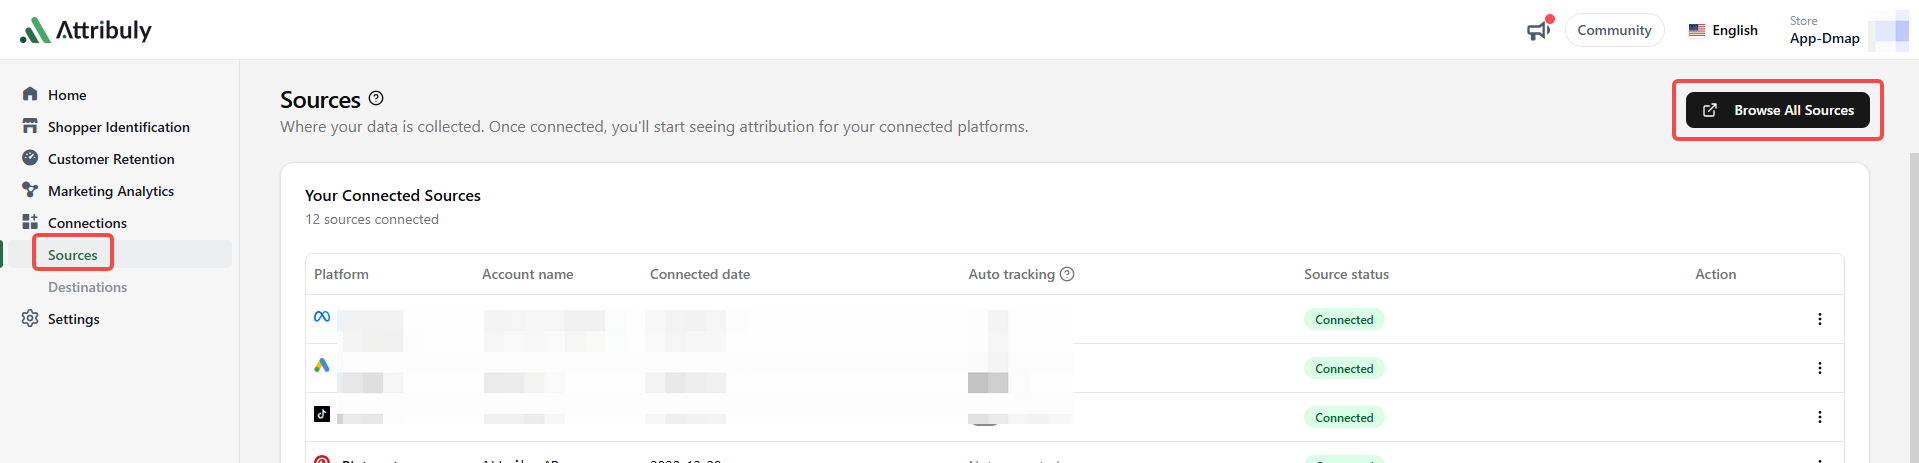
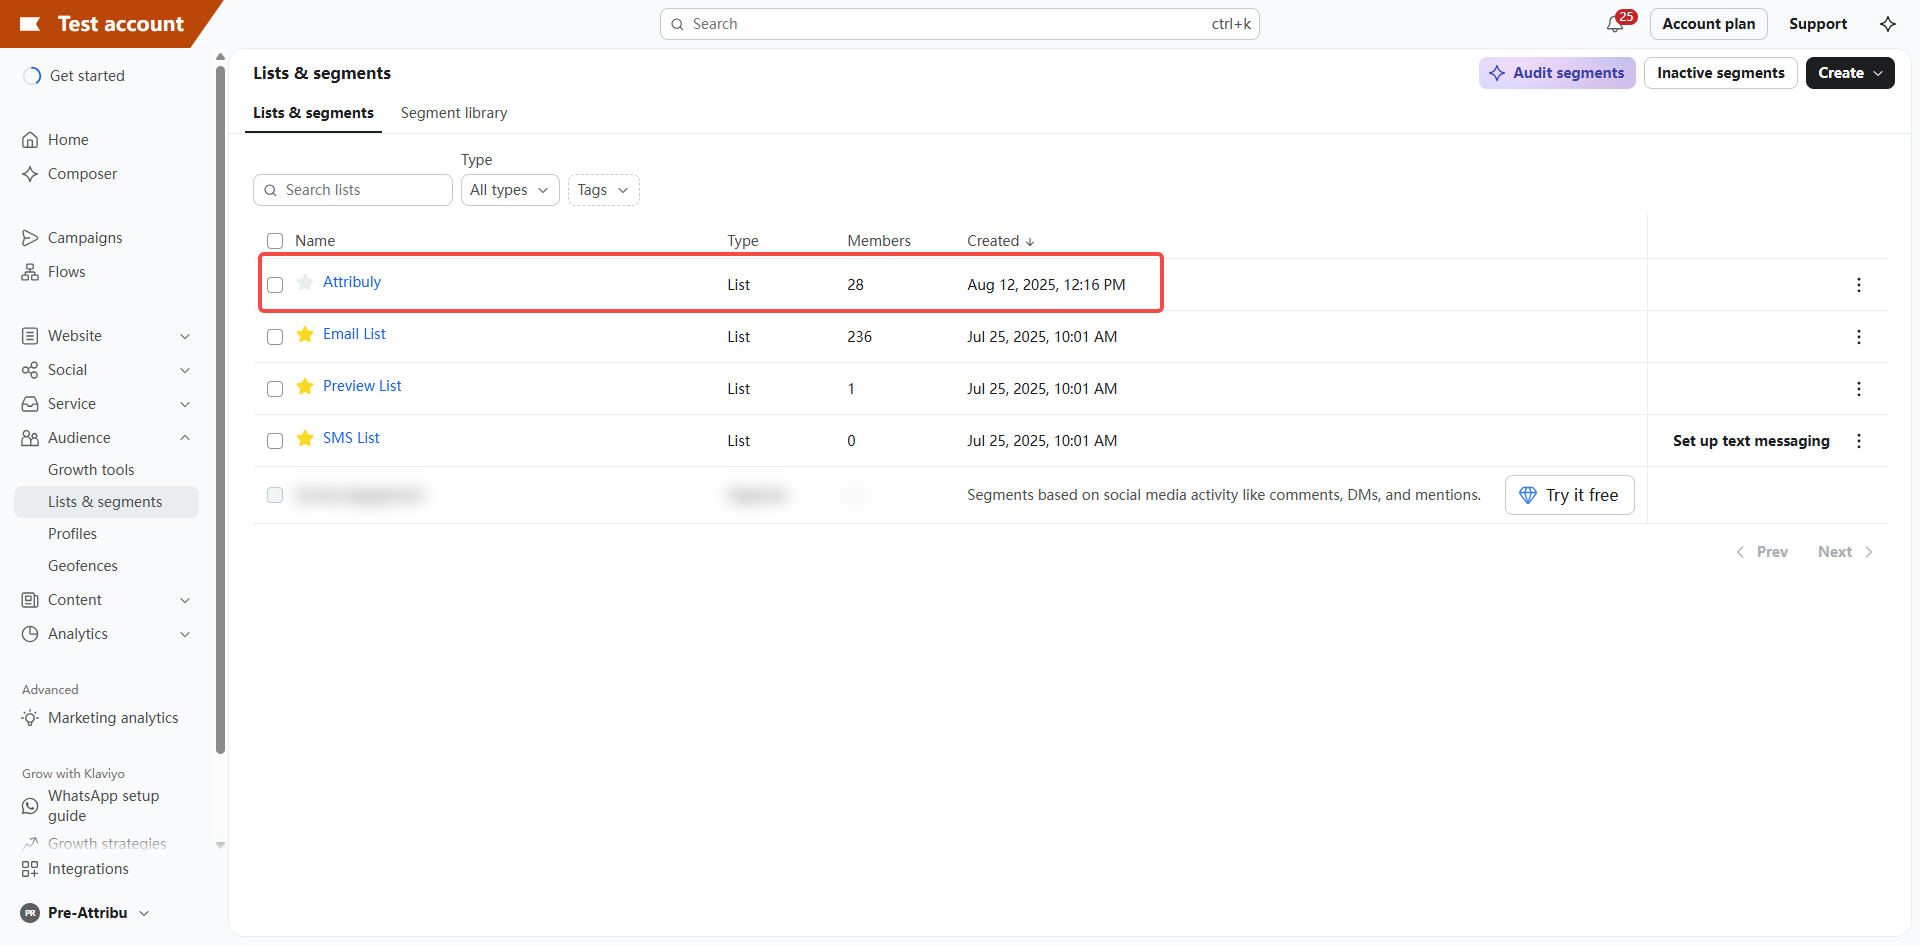
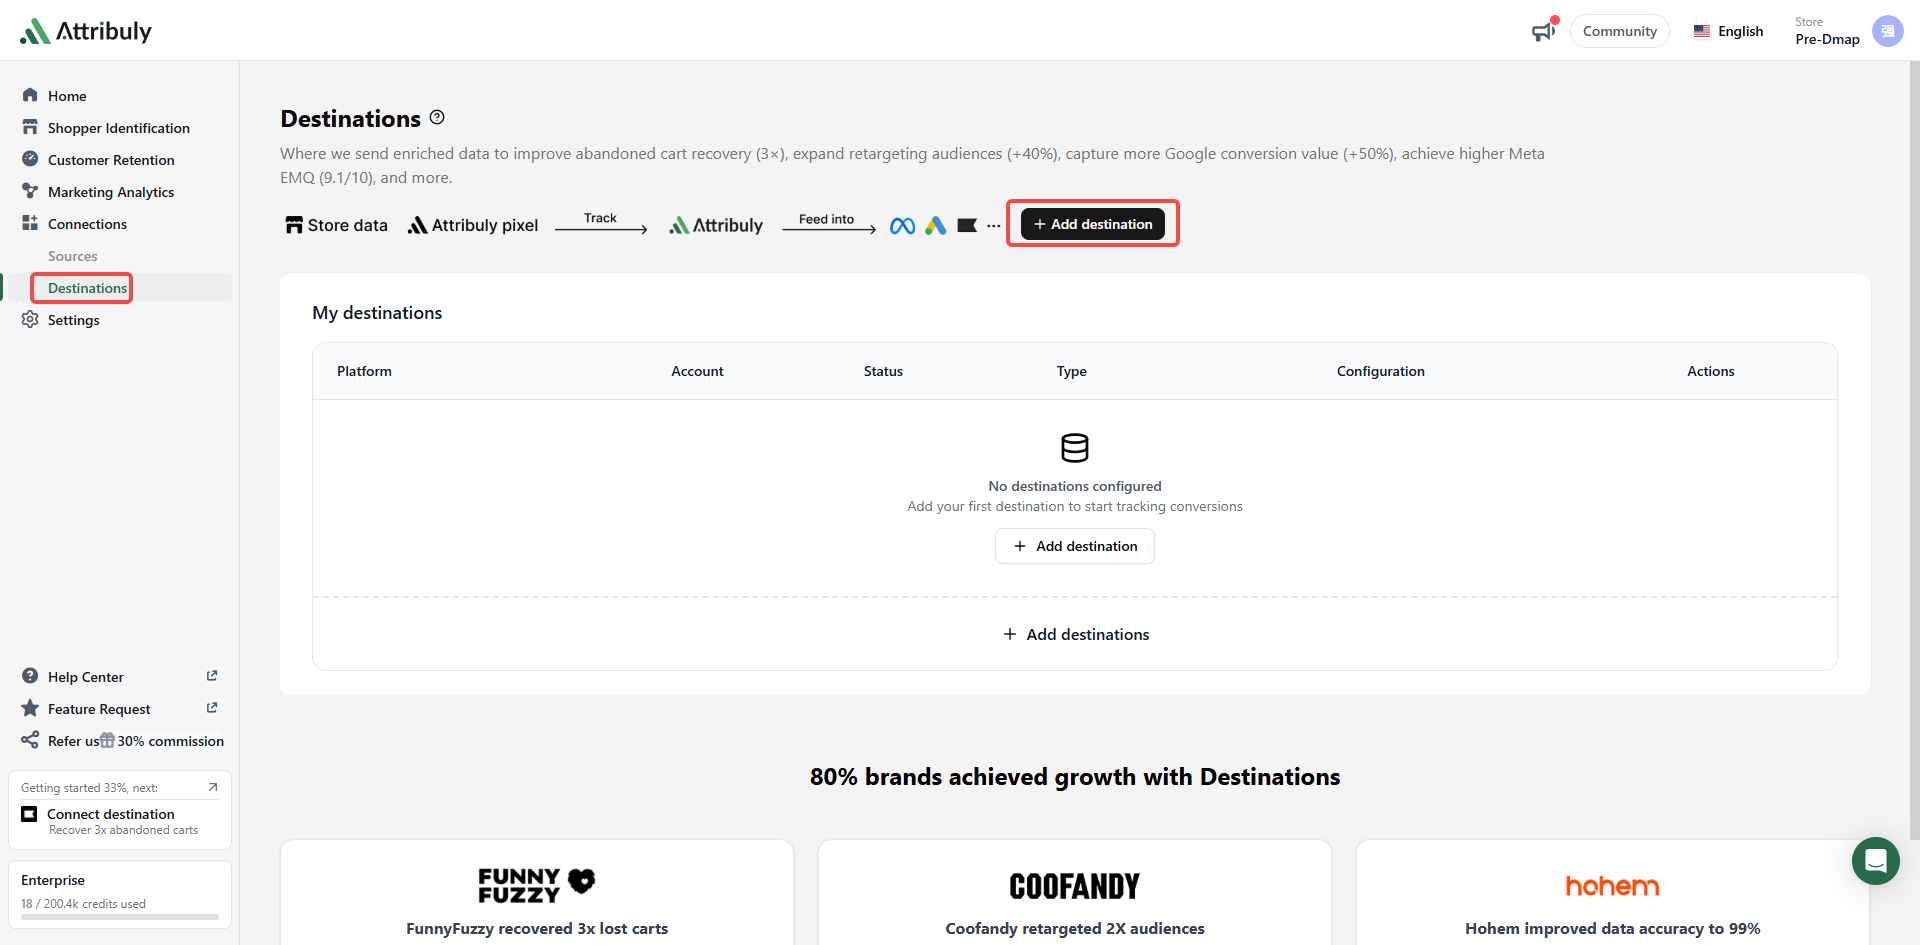
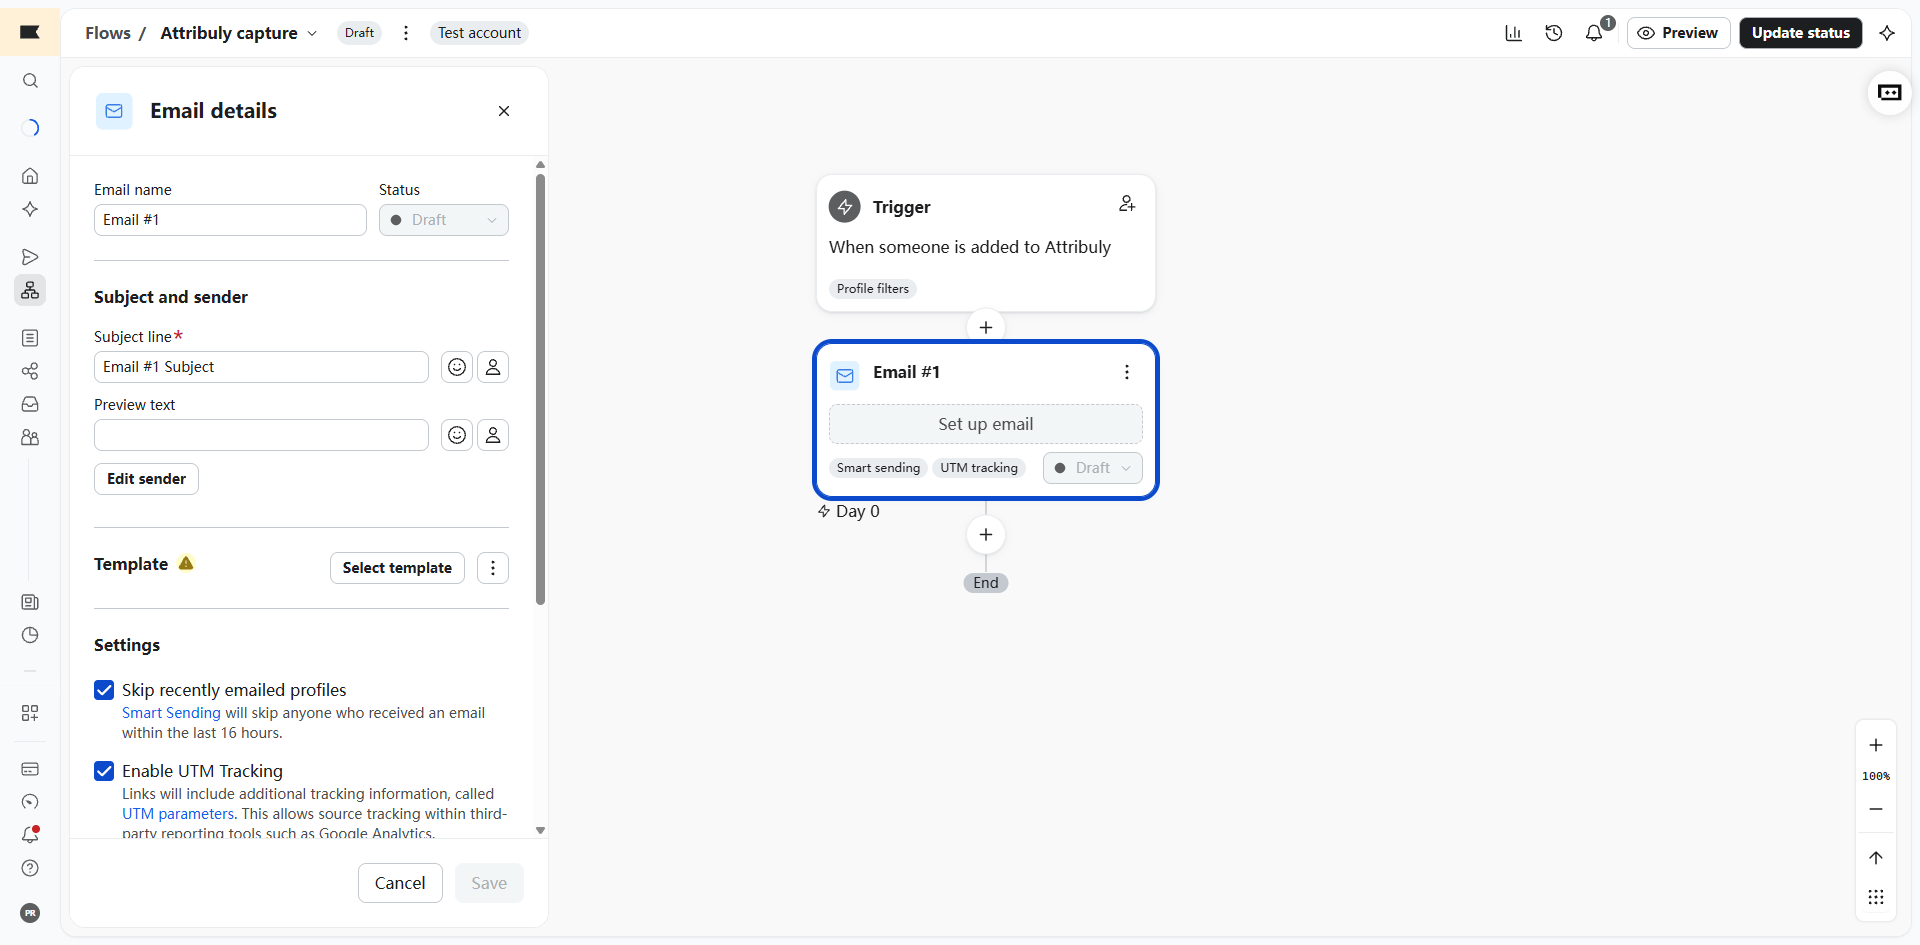
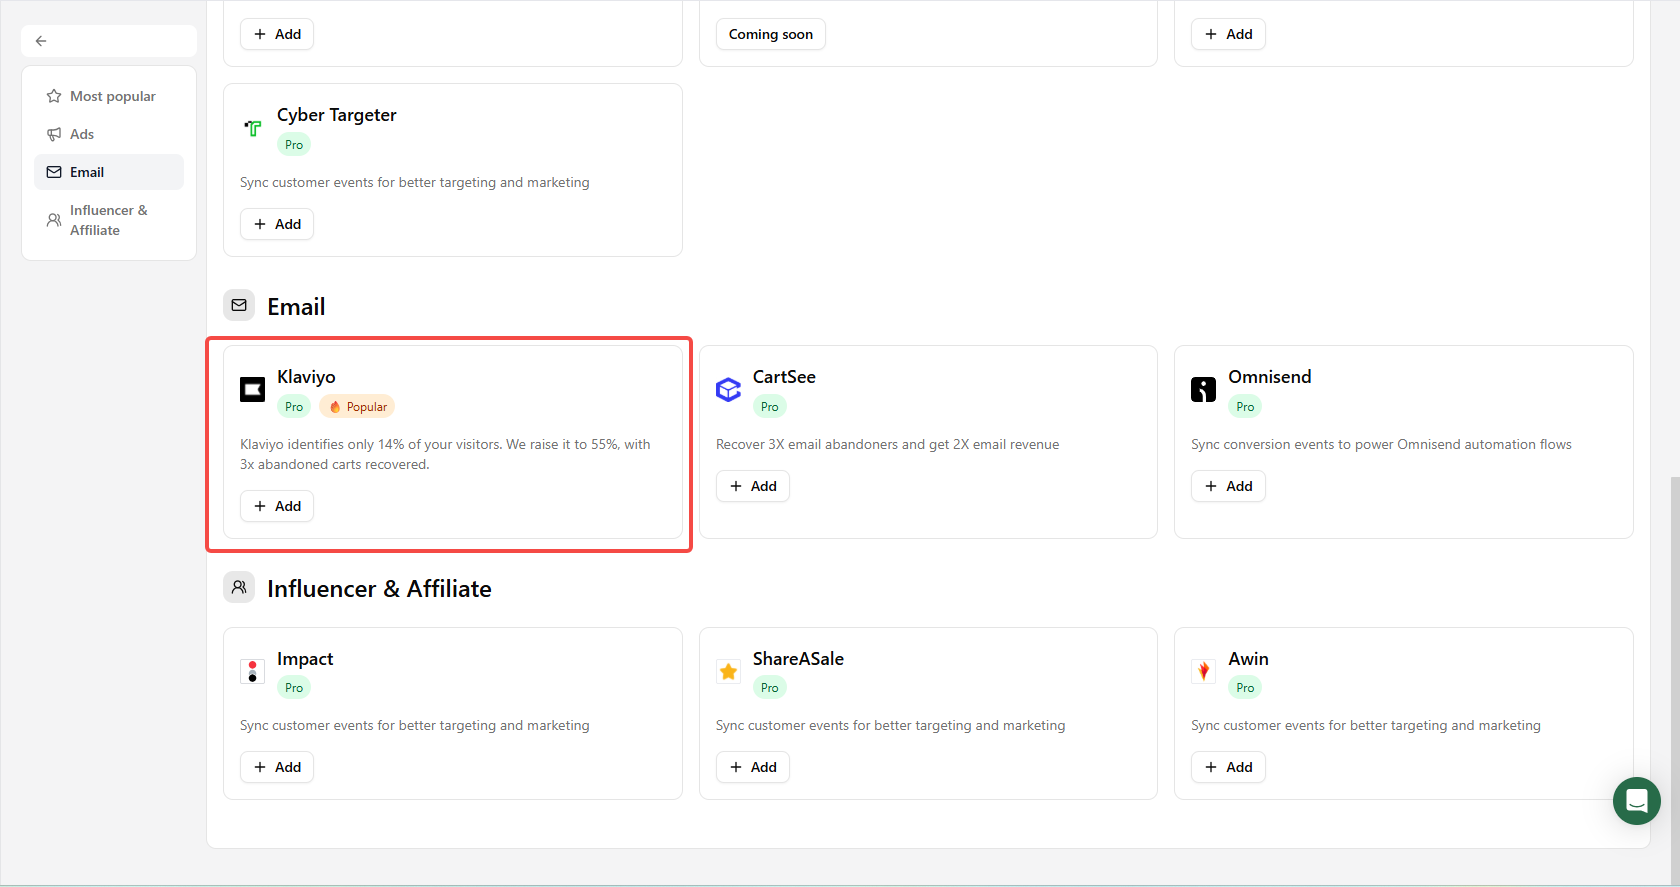 2. Clone the existing abandonment flow, use the Attribuly event as trigger, add a split to exclude native events, and increase the first wait by 20 minutes. See the clone and deduplication walkthroughs.
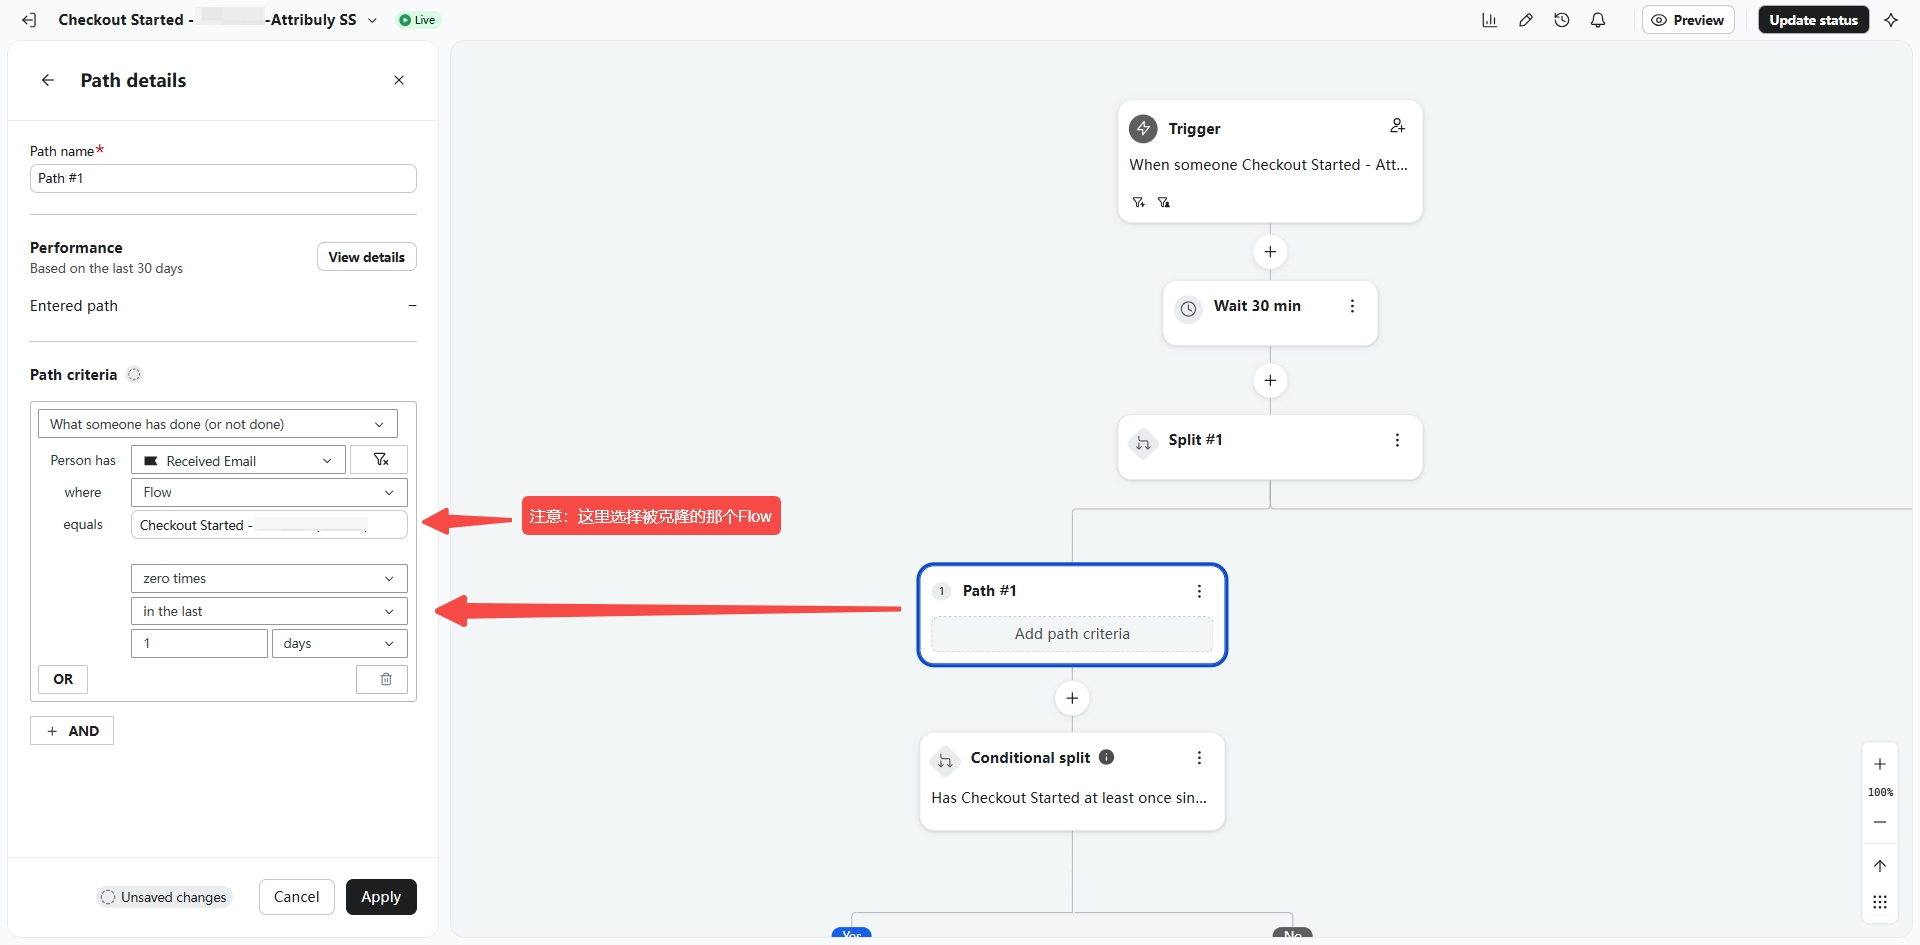 Select the original flow here
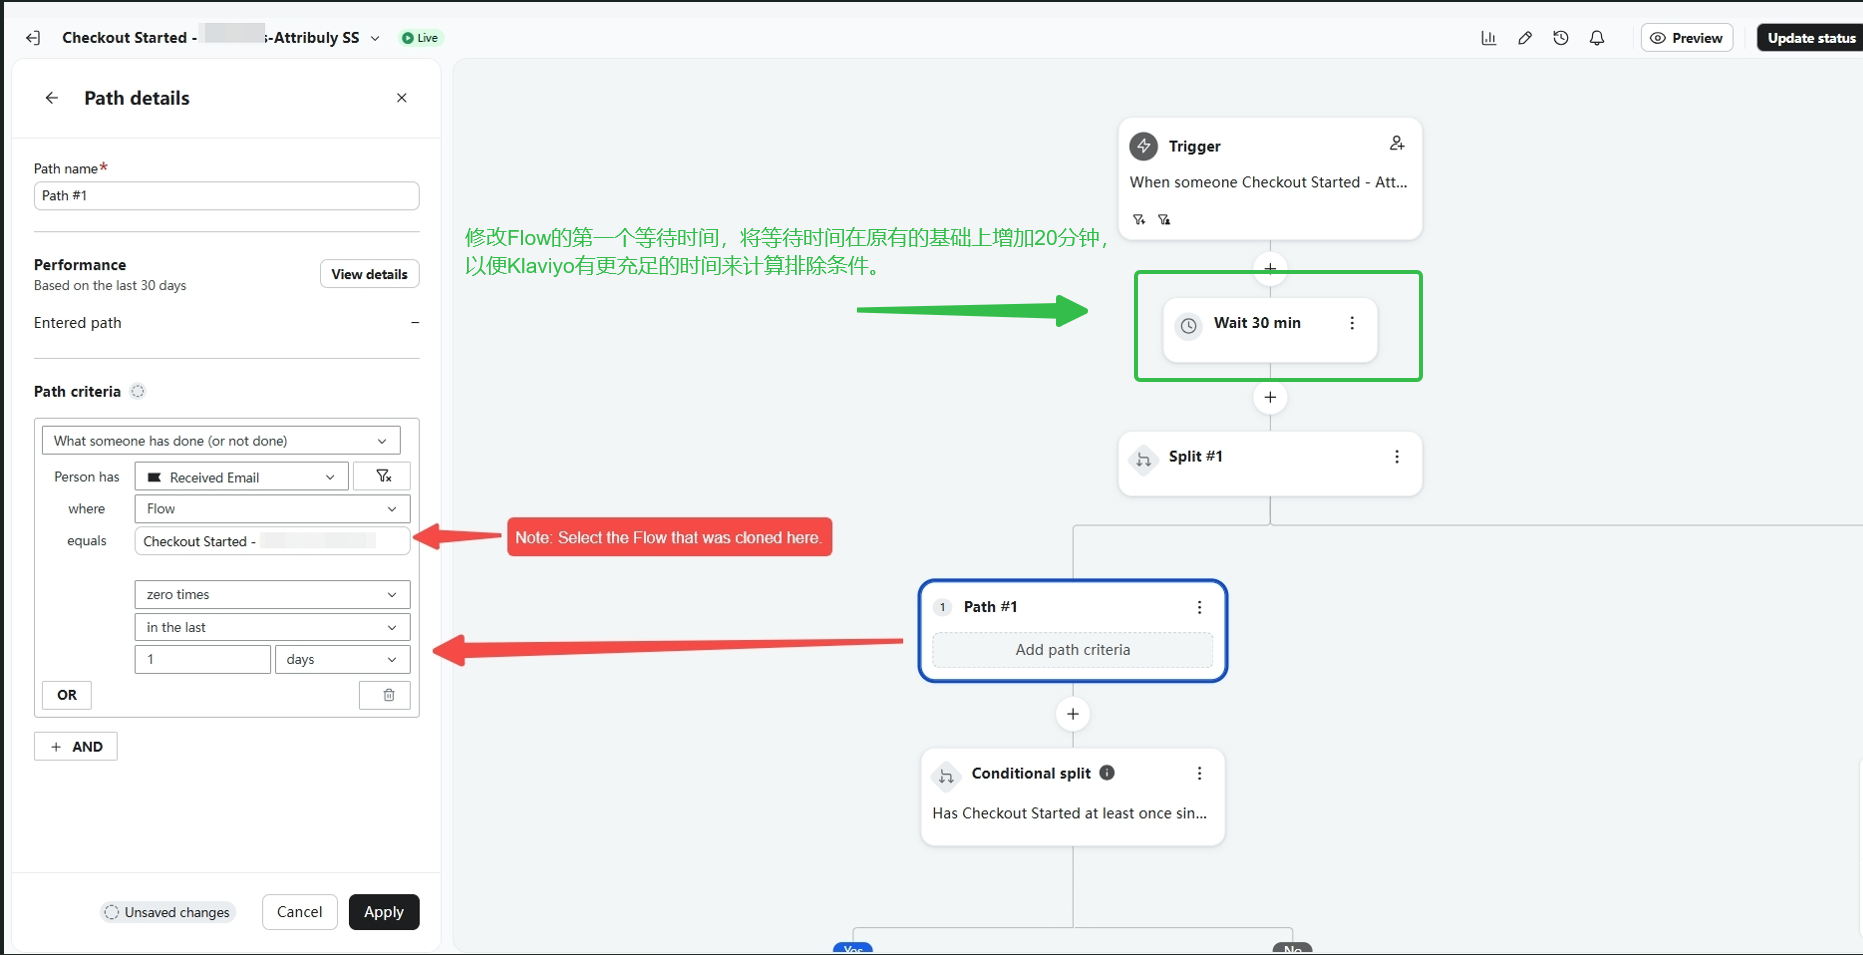 Add 20 minutes to the first delay to allow time for exclusion checks.
3. Create a welcome flow. Set its trigger and profile filters to exclude profiles with a Placed Order event and profiles already in your newsletter or master list. Edit the invitation email so recipients can subscribe.
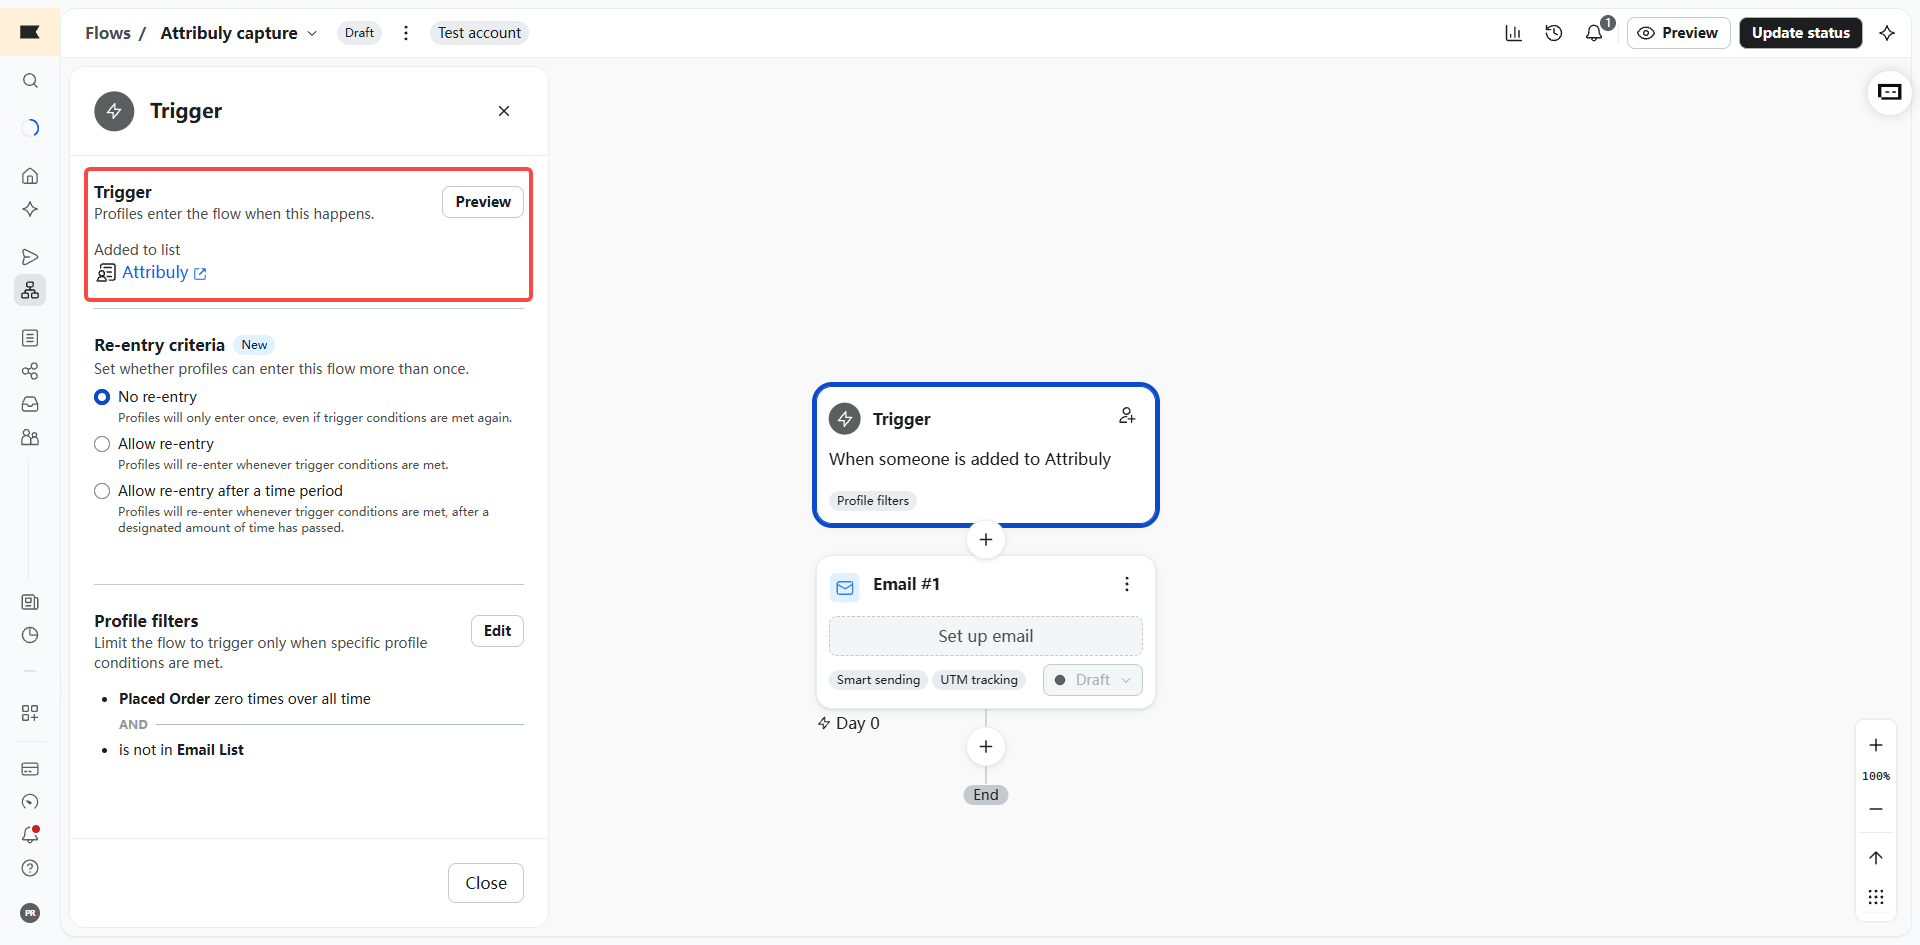
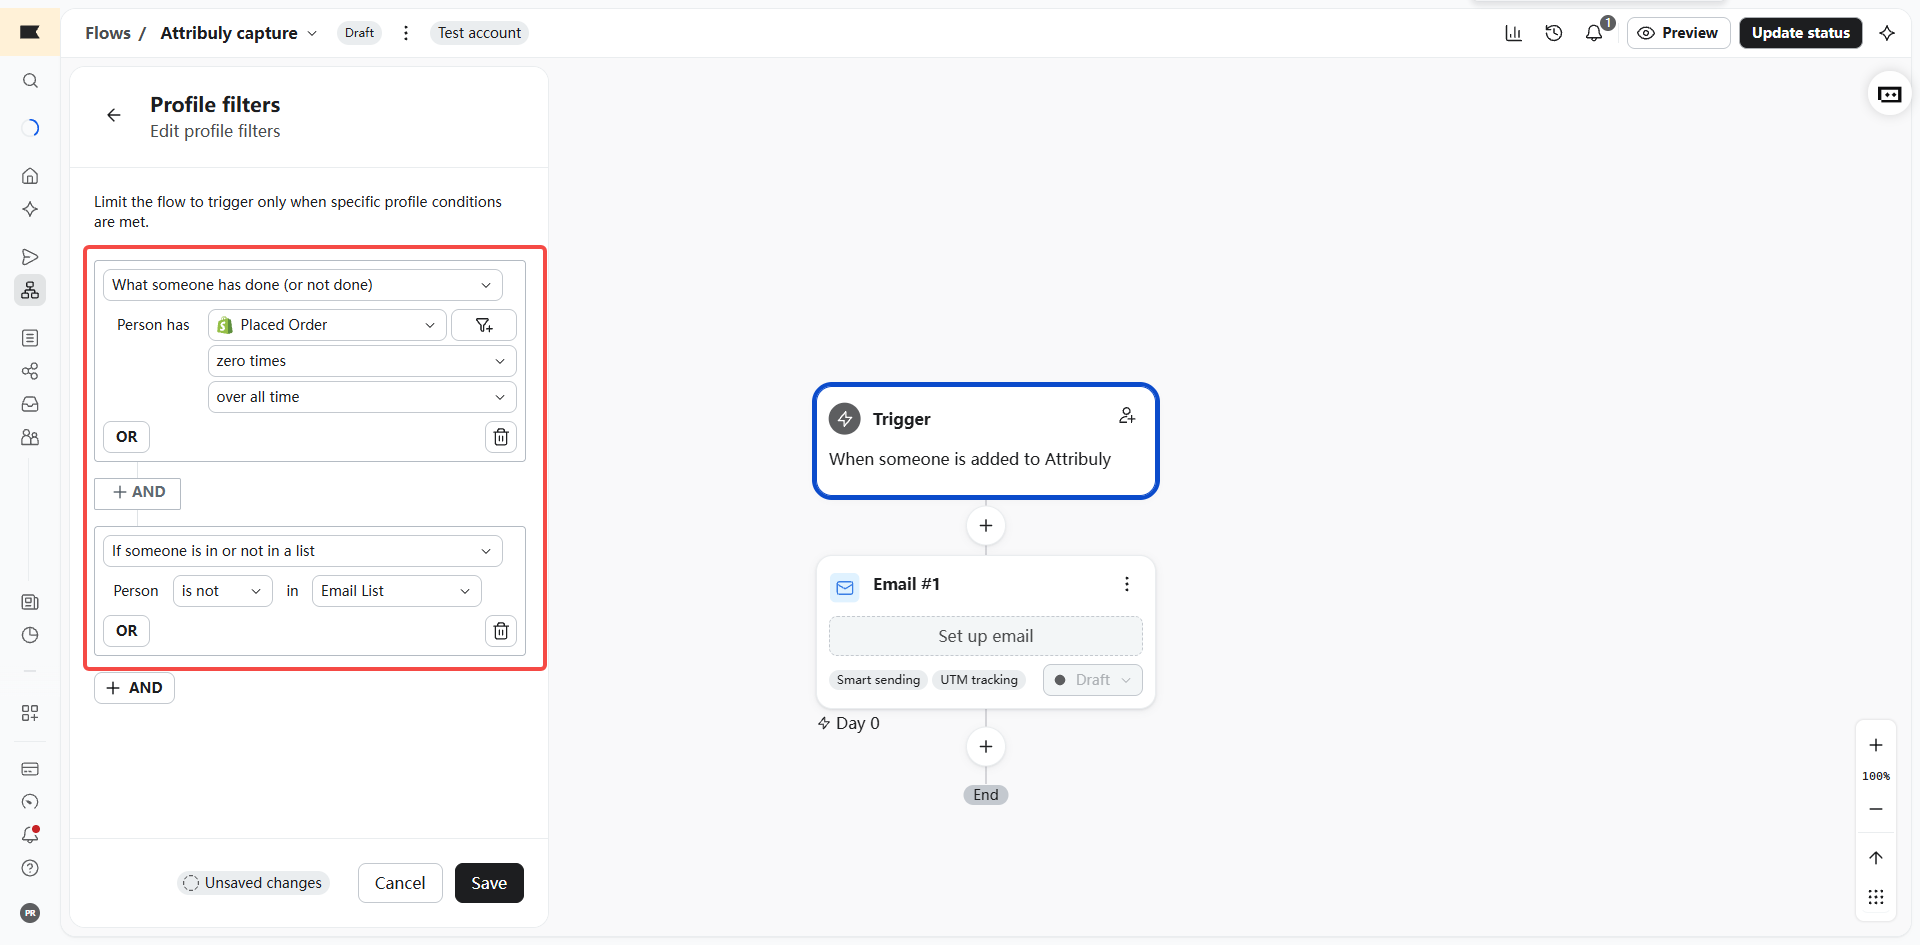
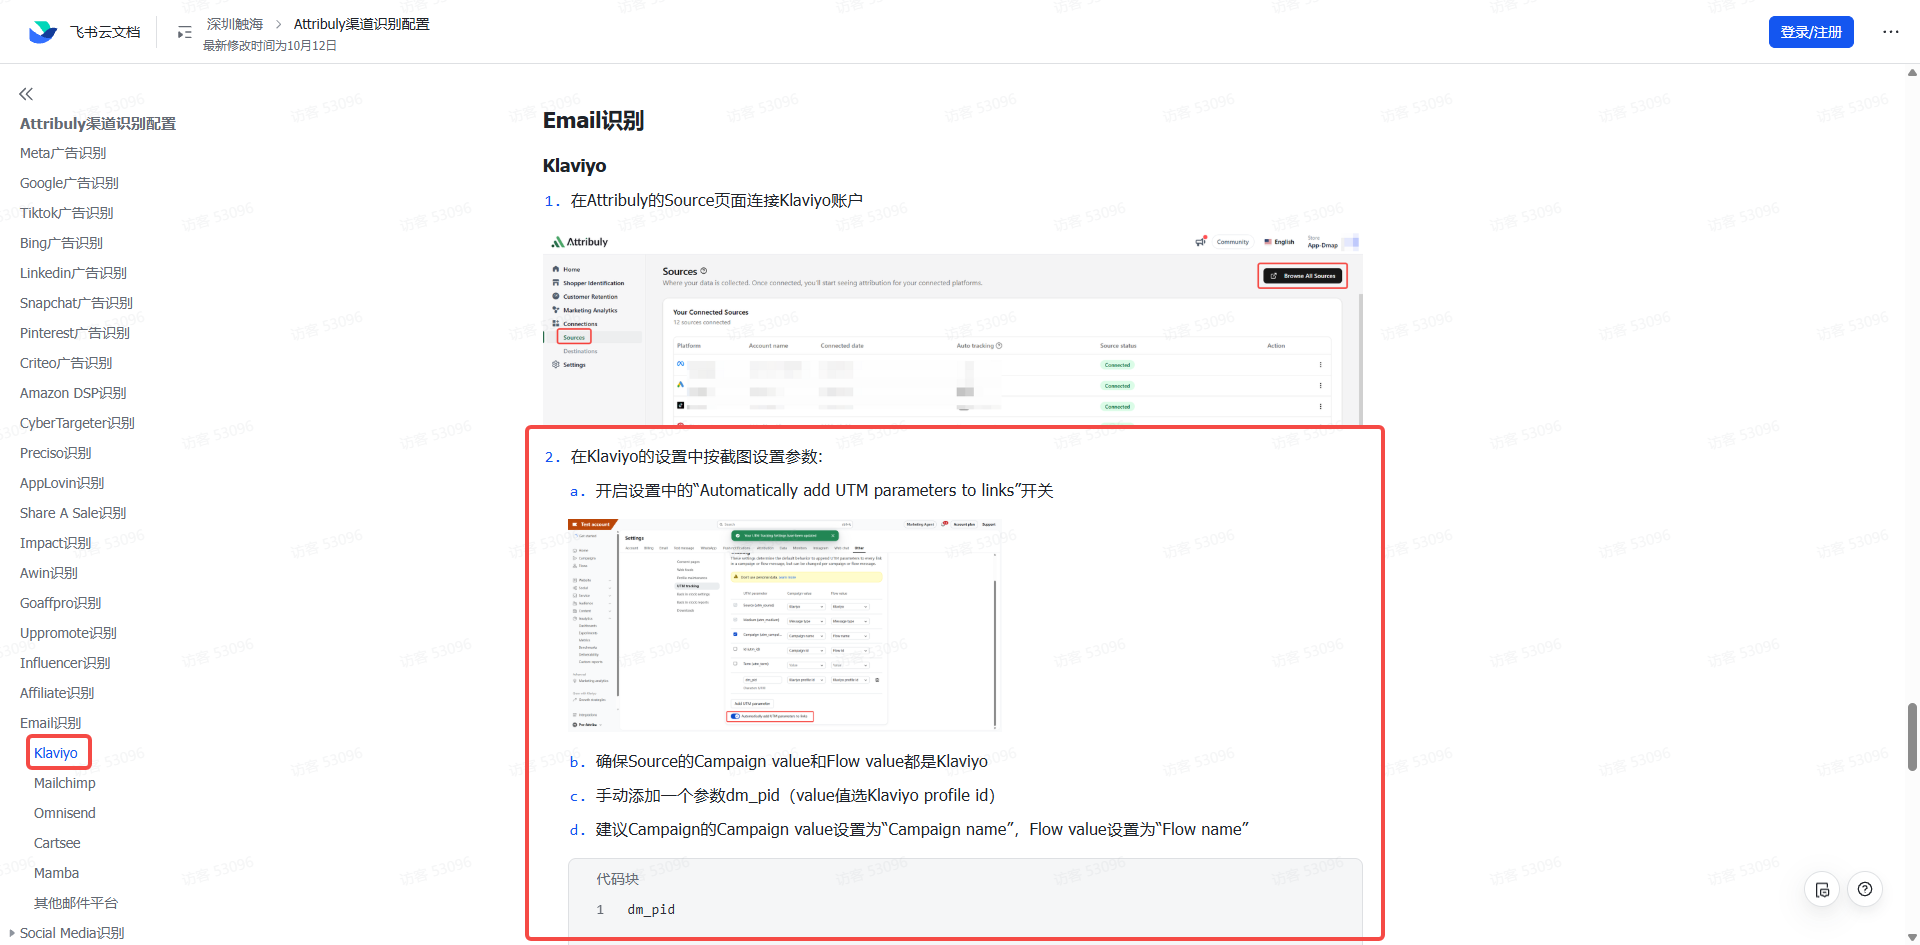
 4. Complete Klaviyo traffic identification using the channel identification guide.
Omnisend
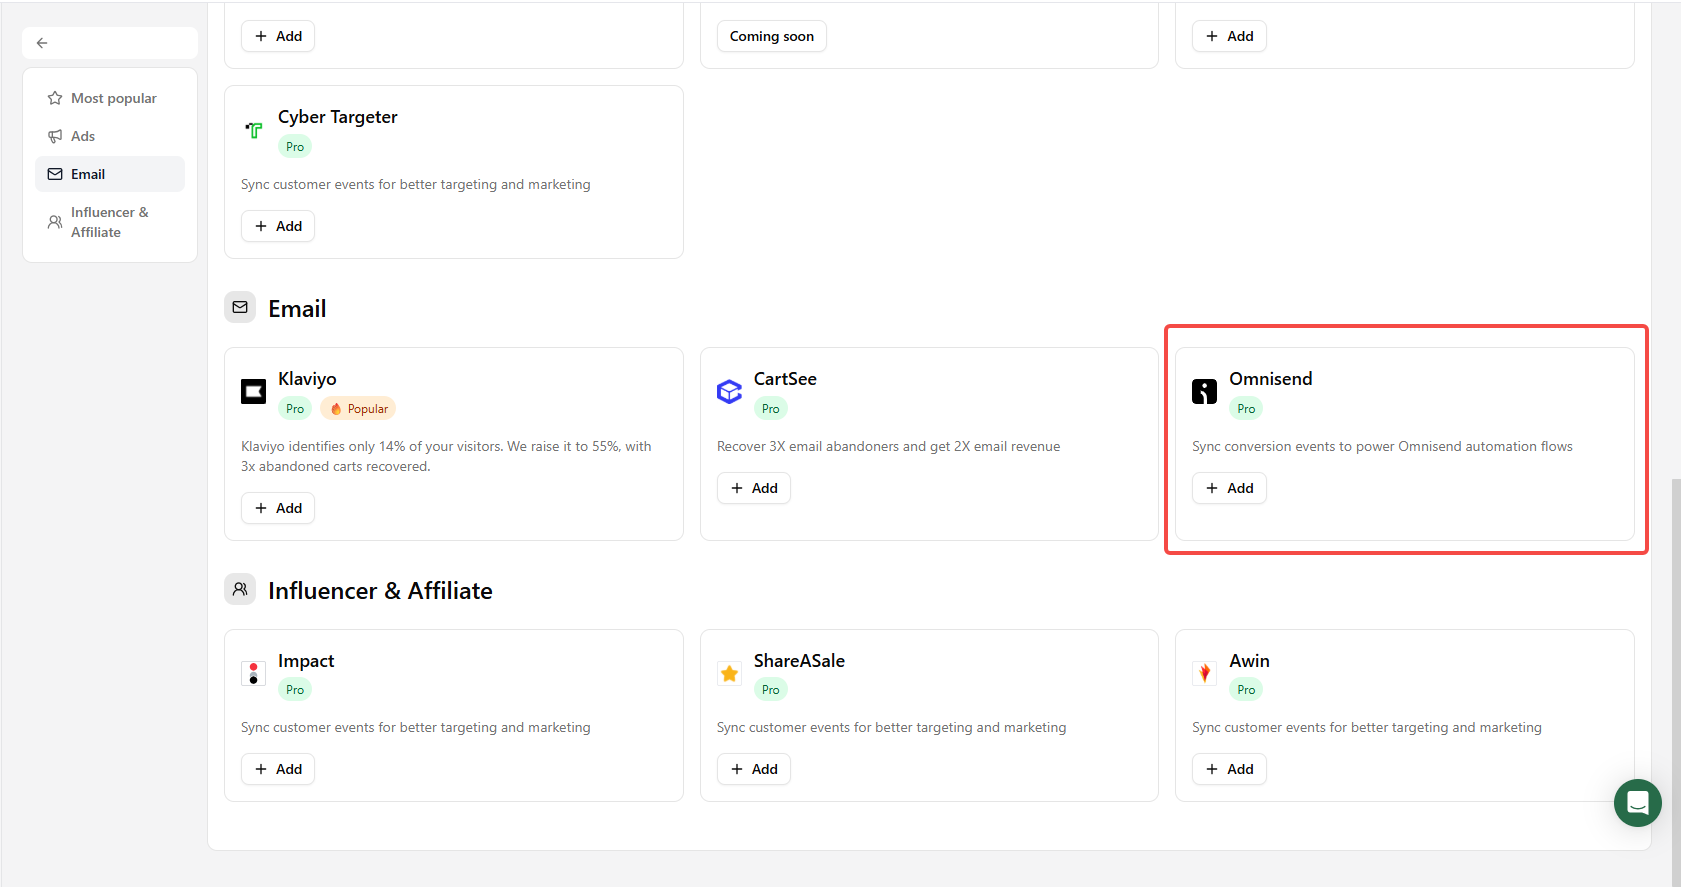
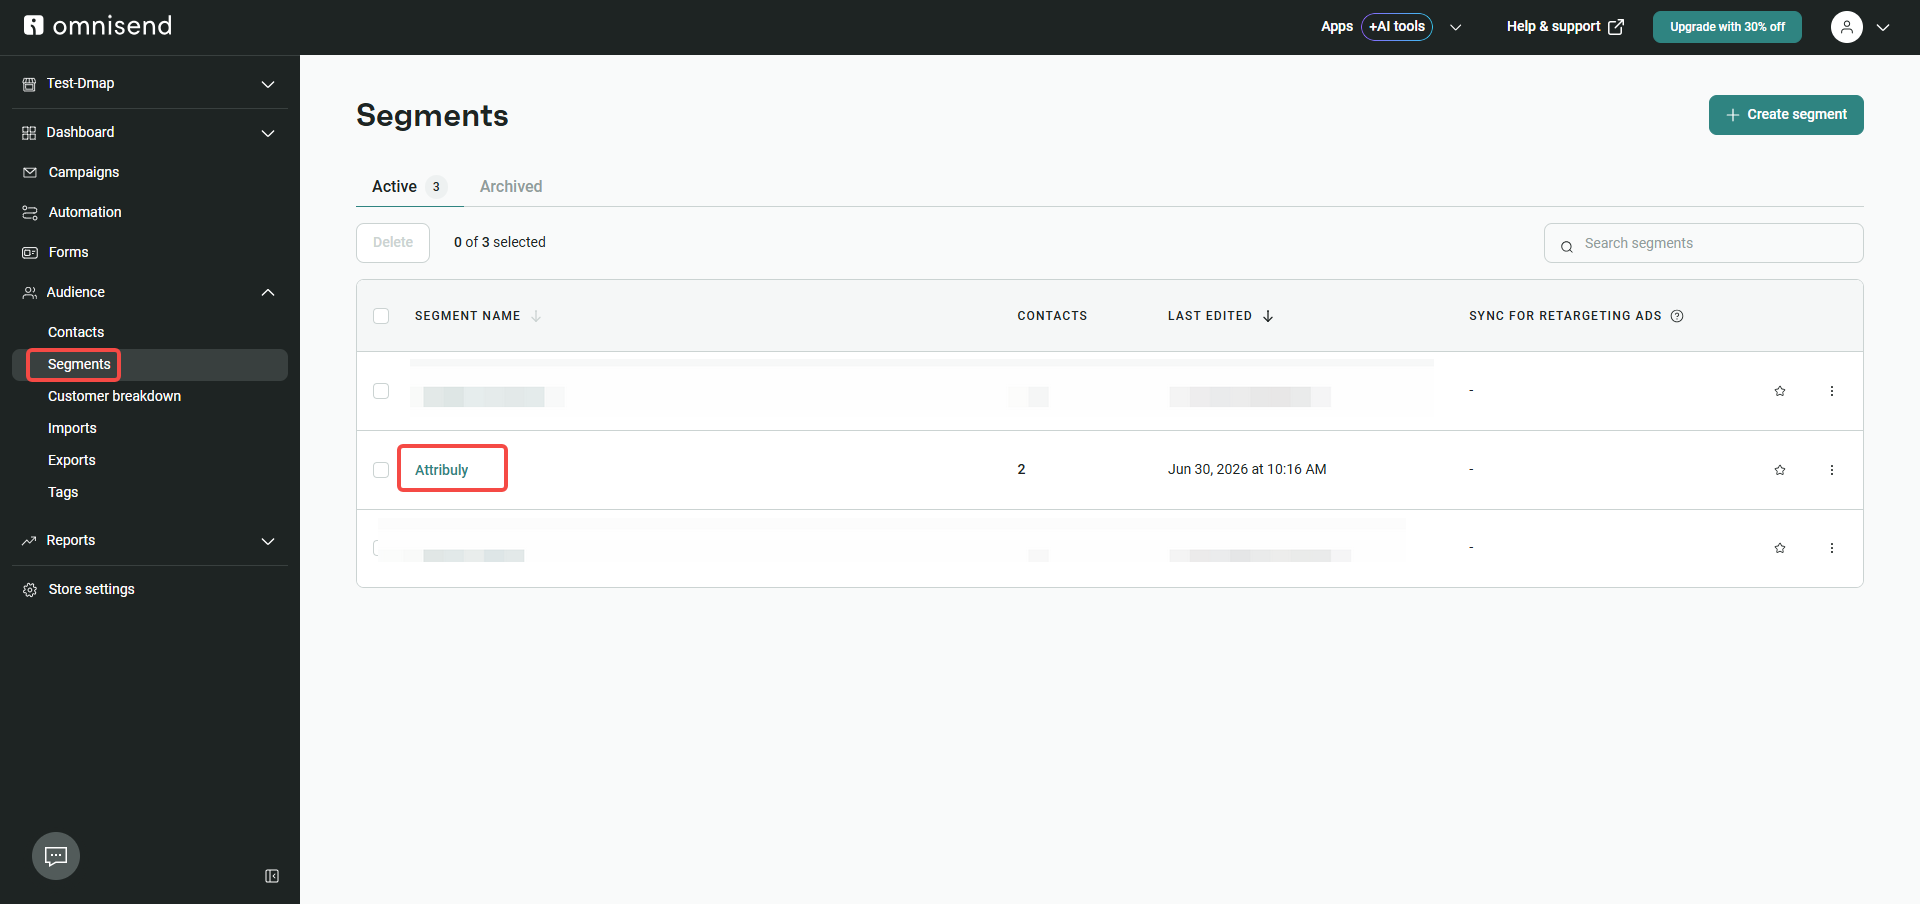
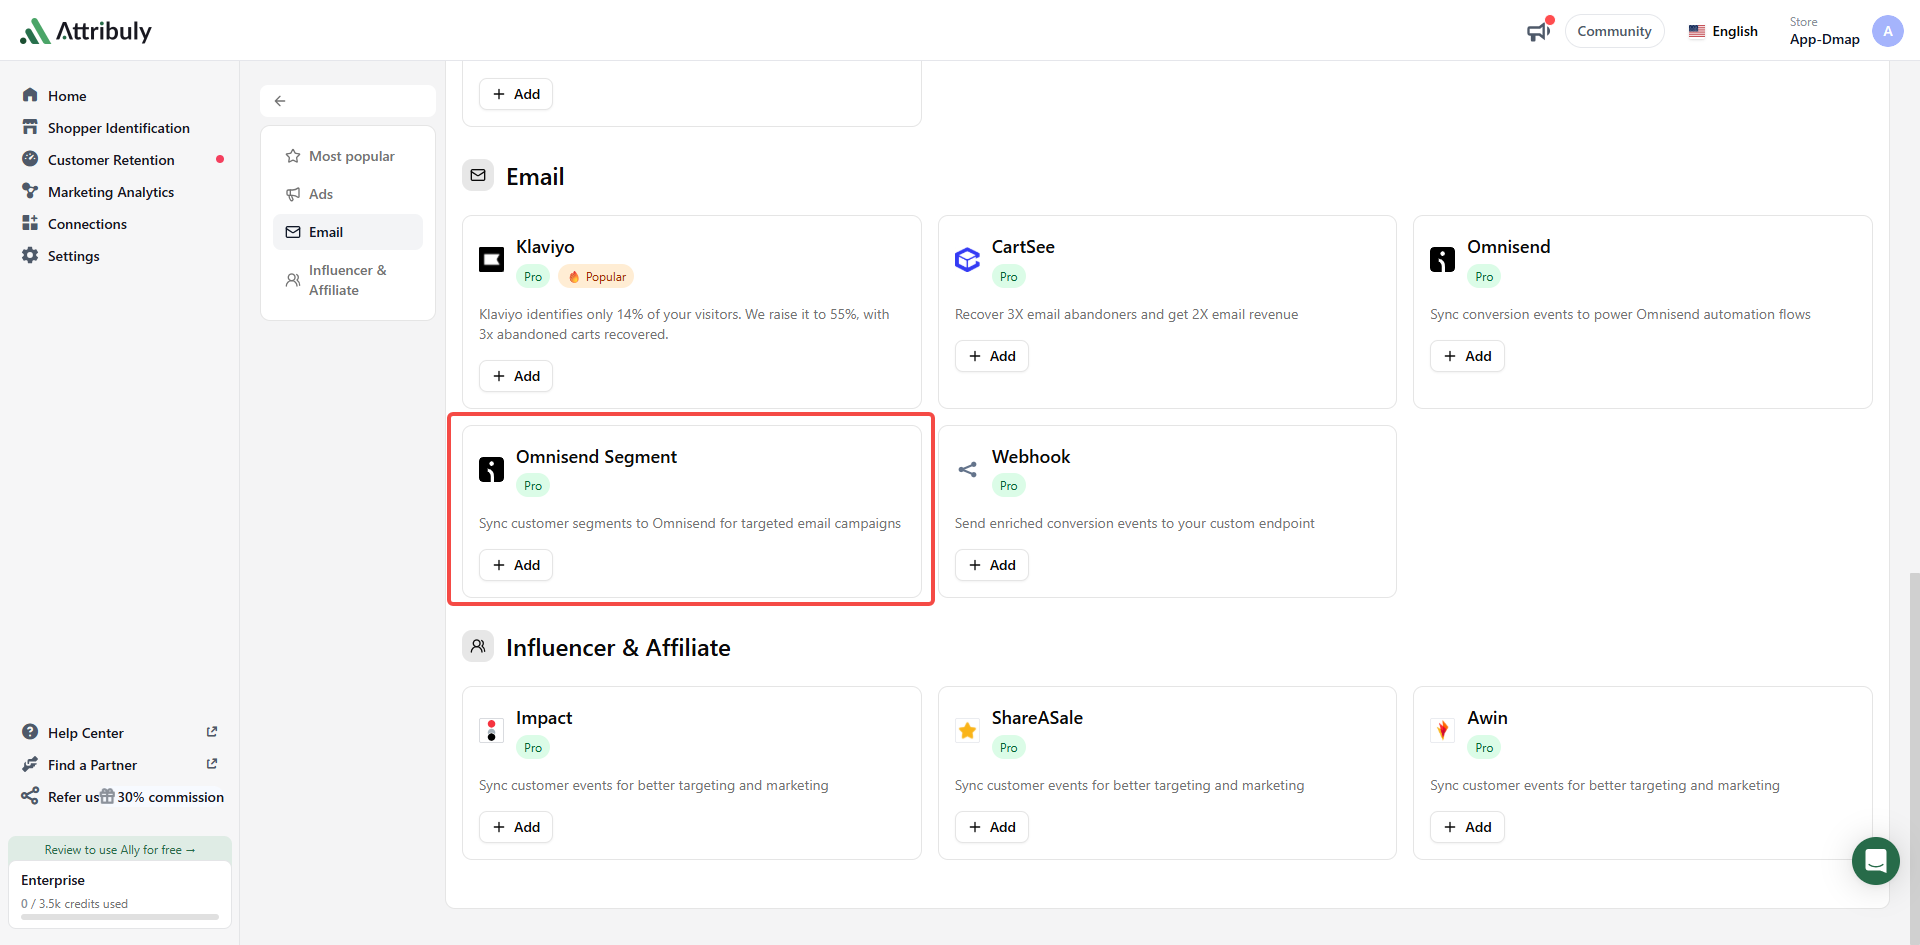
- Connect Omnisend under Sources and create an Omnisend event destination. Create an Omnisend Segment destination with Capture selected to sync identified emails to that segment.
 2. Clone the abandoned-cart workflow, change the trigger to Added to Cart, Attribuly SS, enable the skip condition for contacts in or recently completing the original automation, and add 20 minutes to the trigger wait.
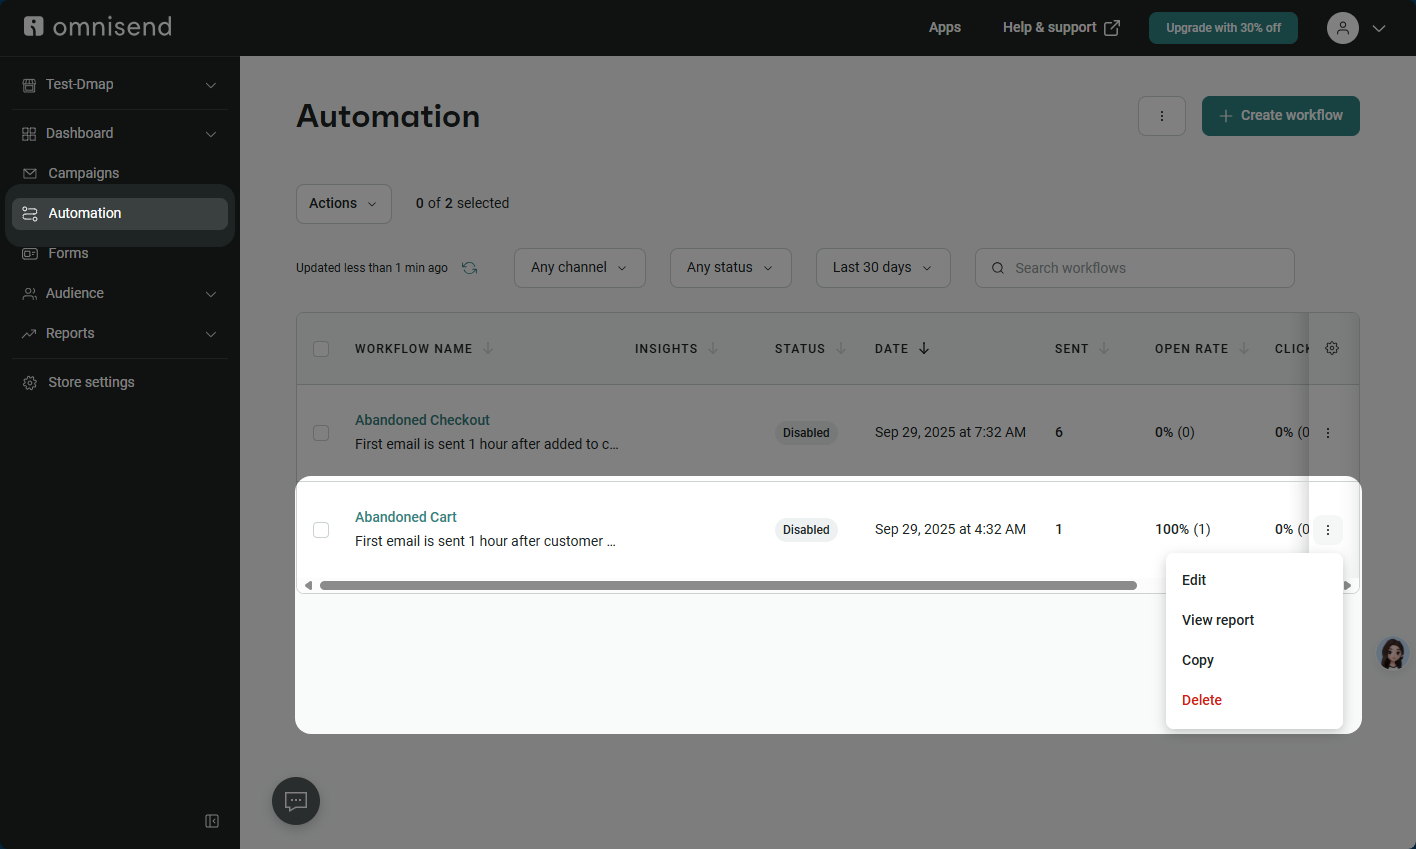
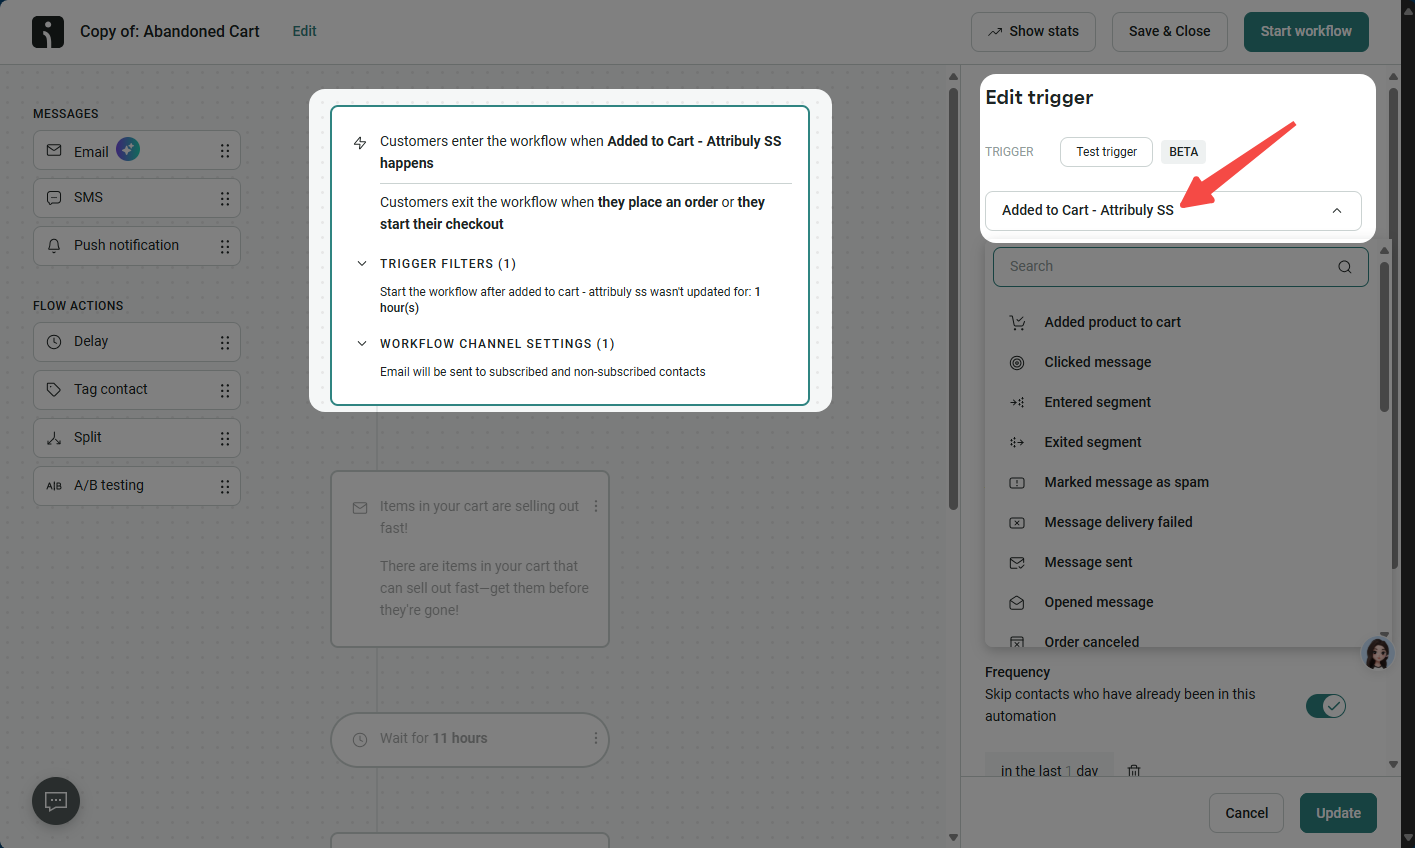
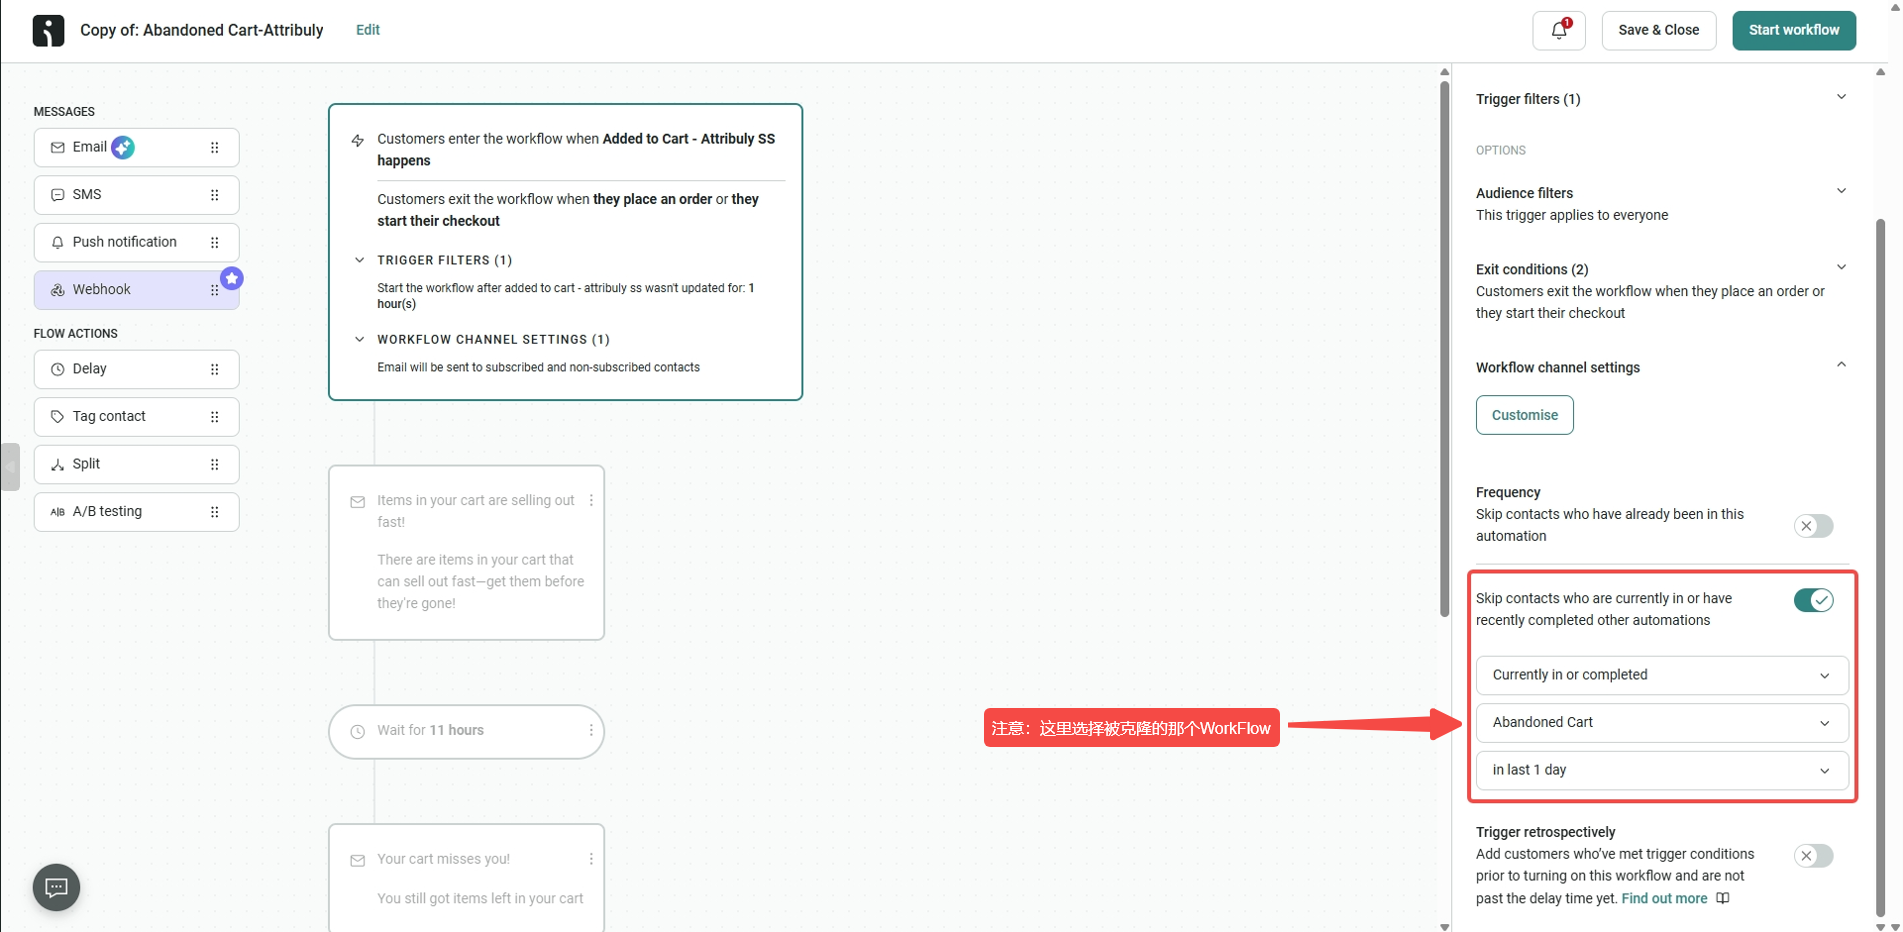 Select the original workflow here
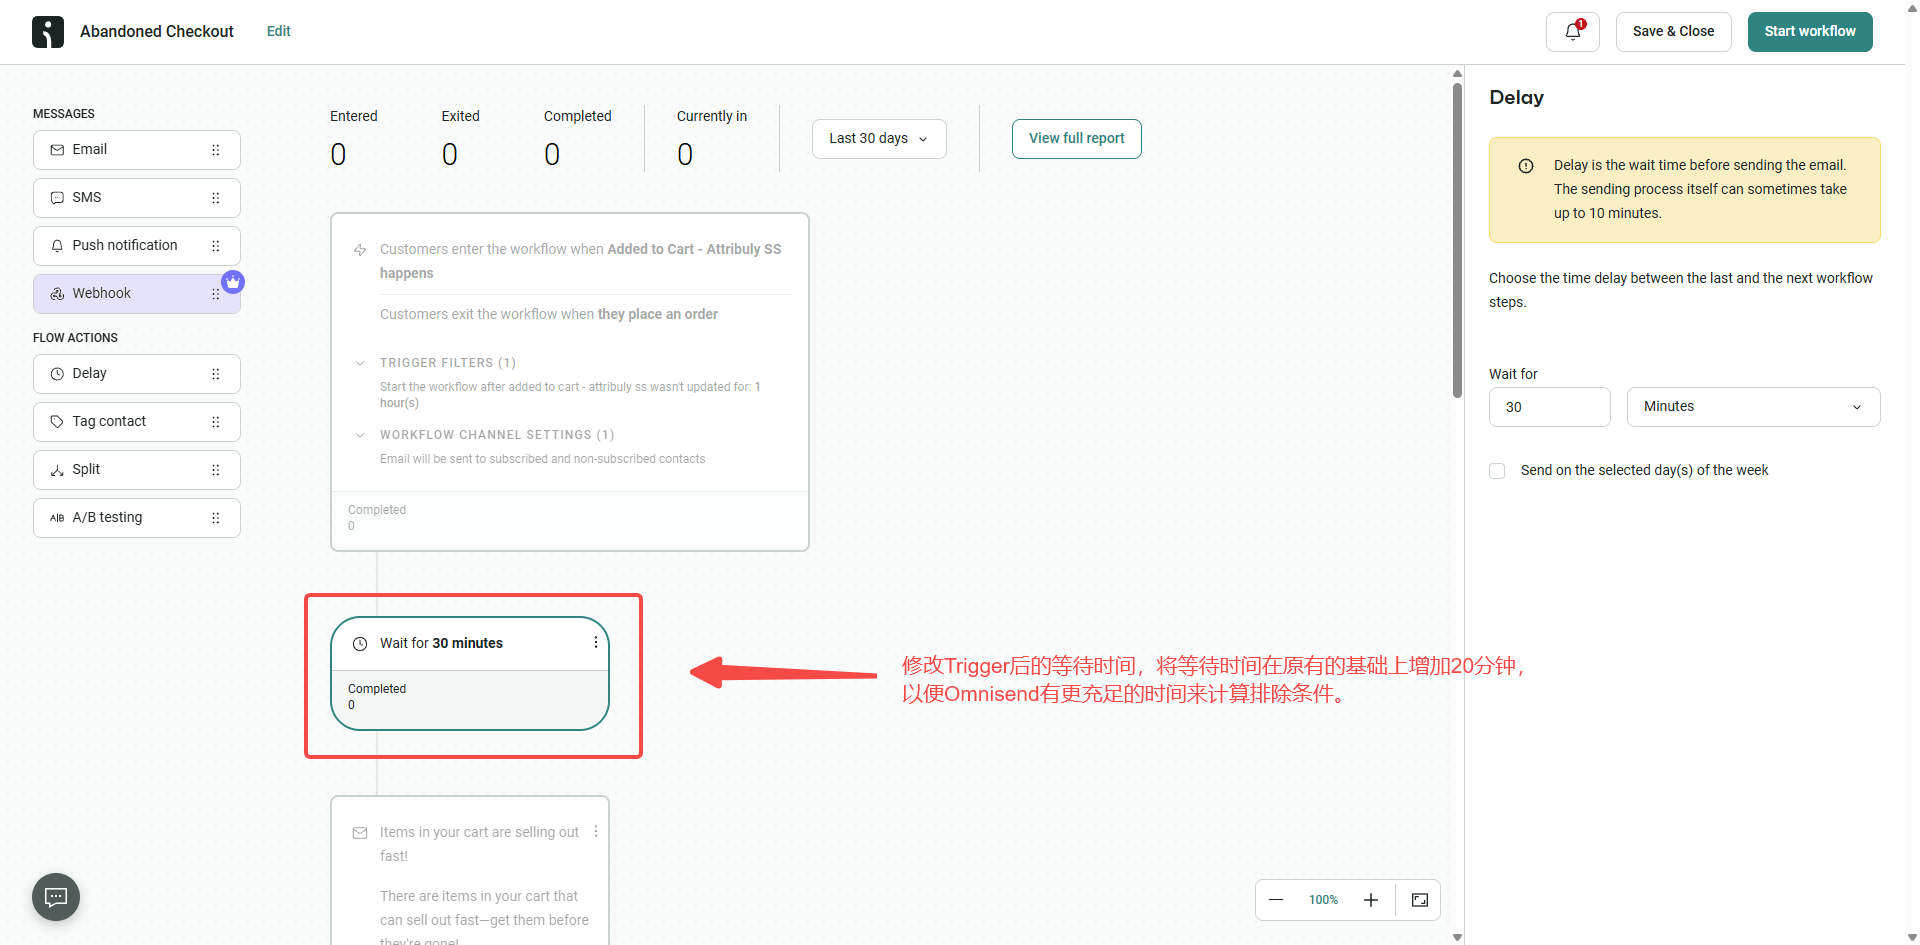 Add 20 minutes to the delay to allow time for exclusion checks.
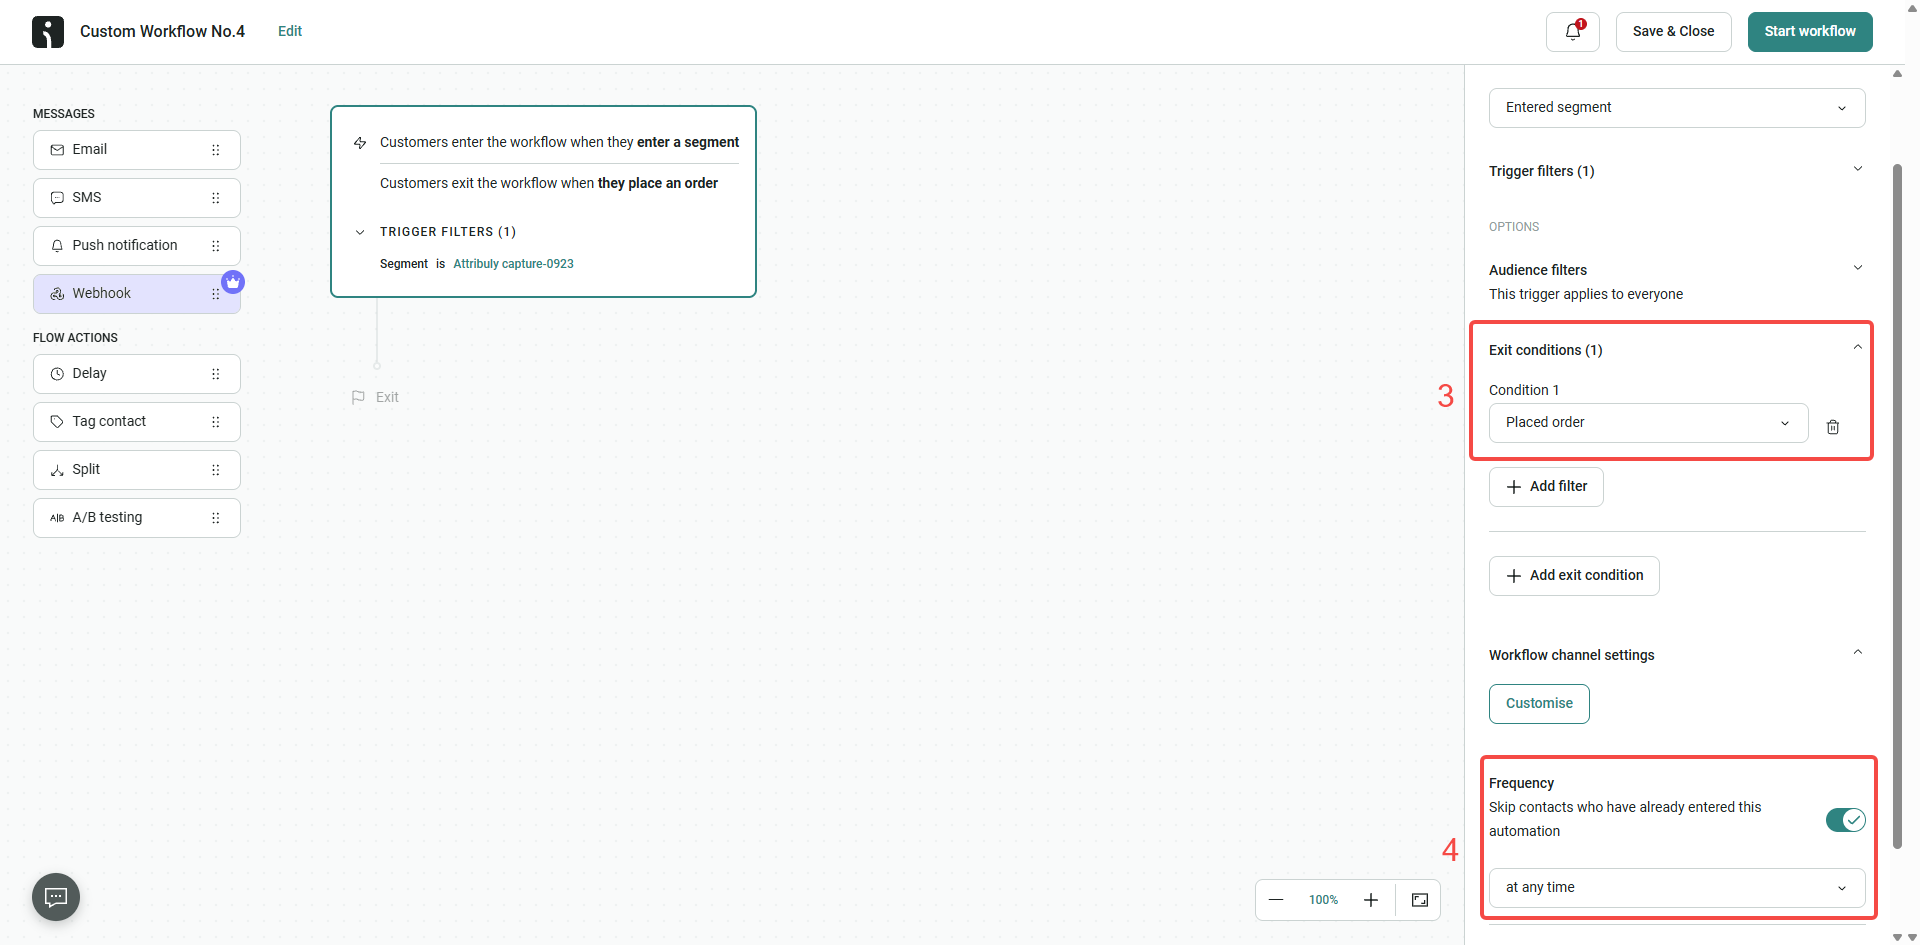
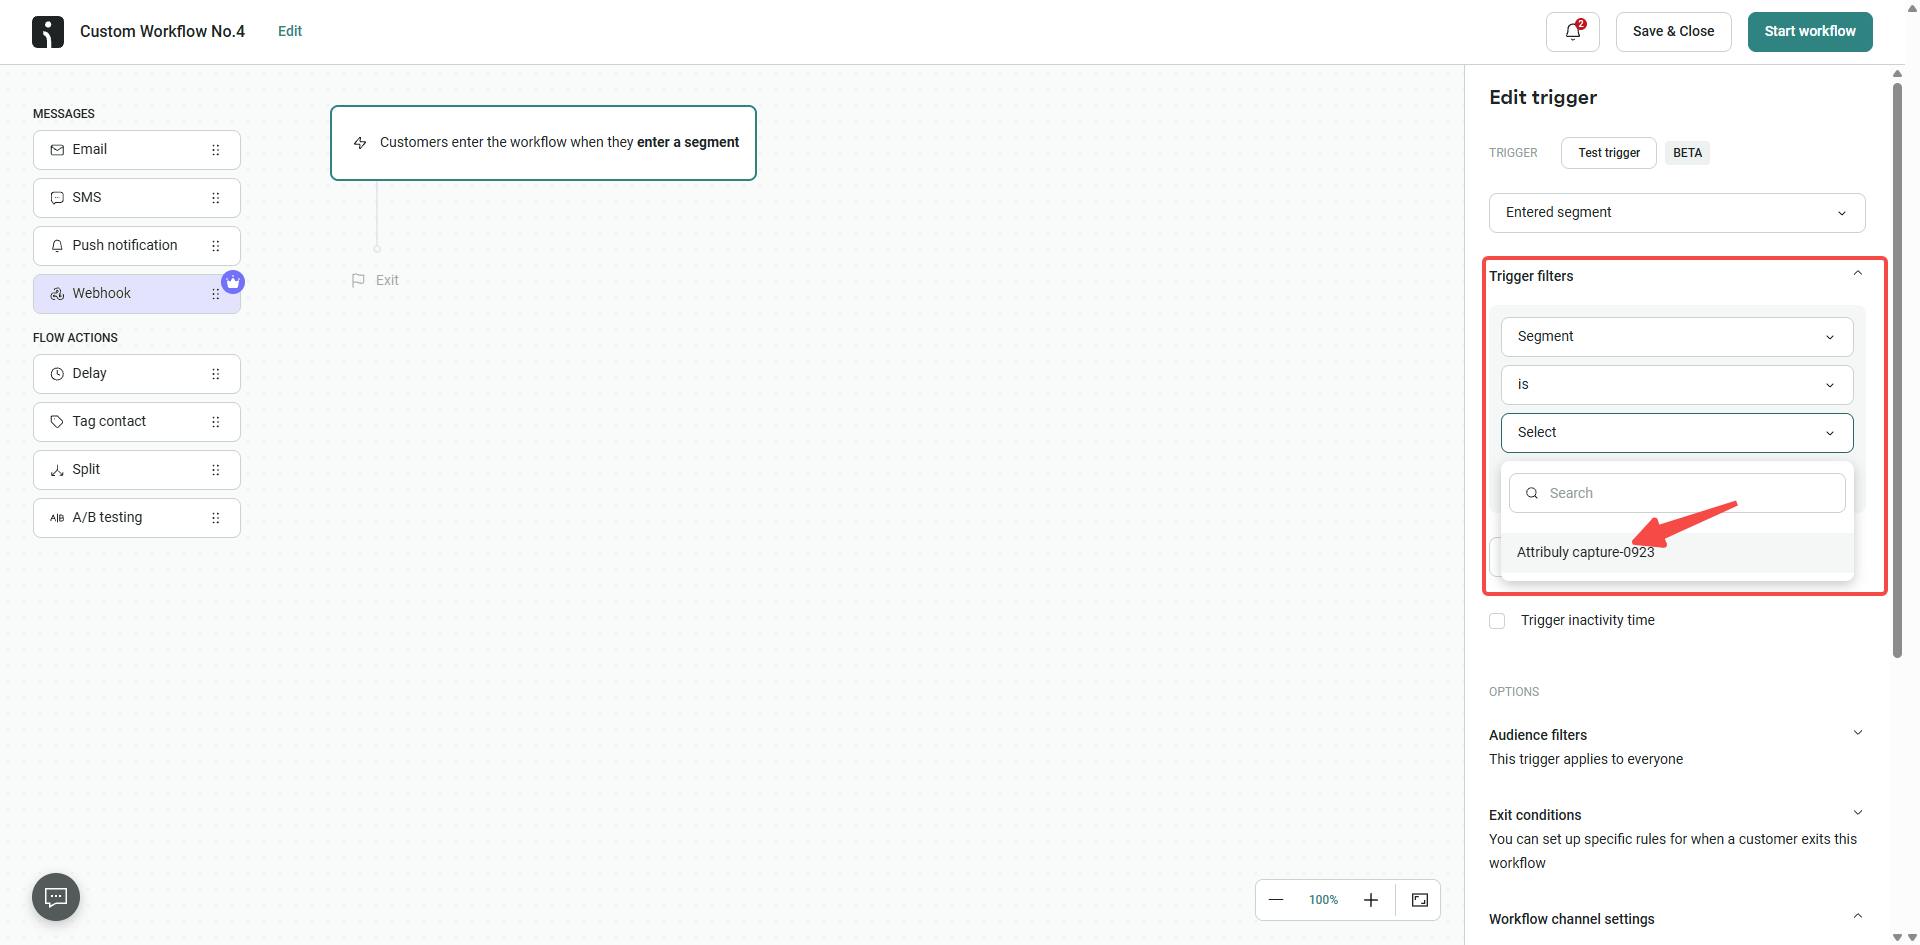
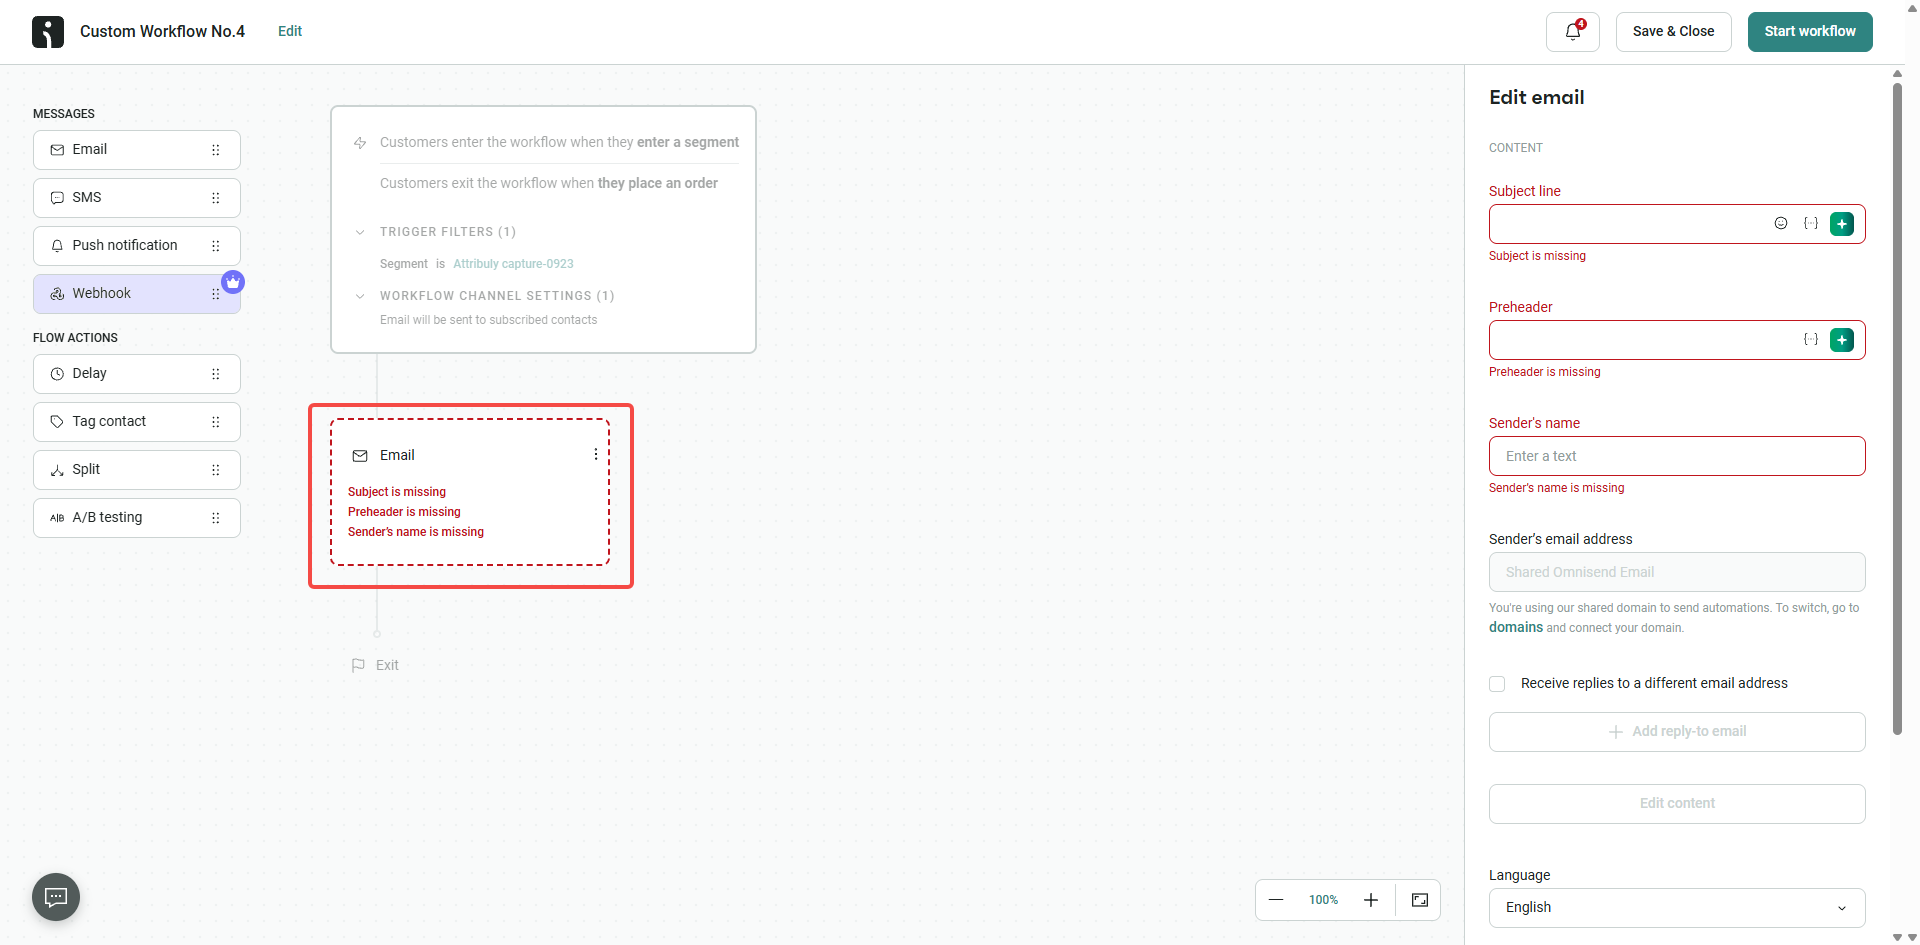
3. Create a welcome workflow. Configure the trigger, recommended conditions and repeat frequency, and edit an invitation email that allows subscription.
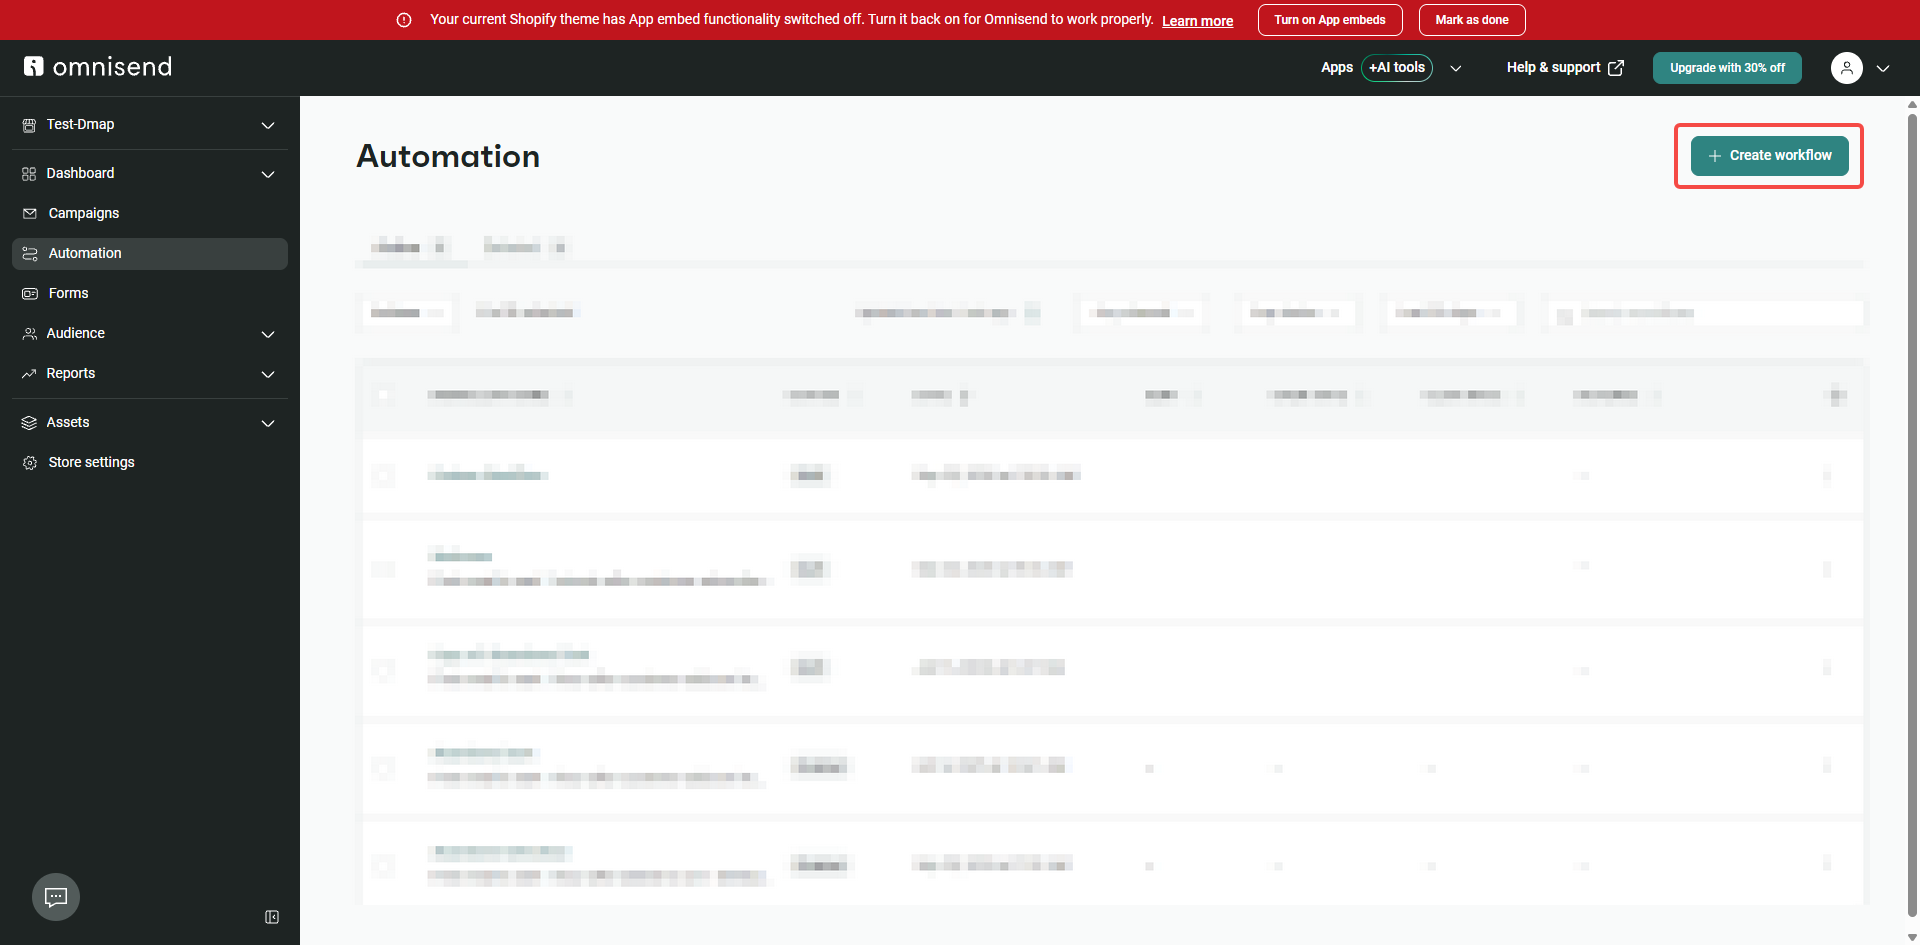
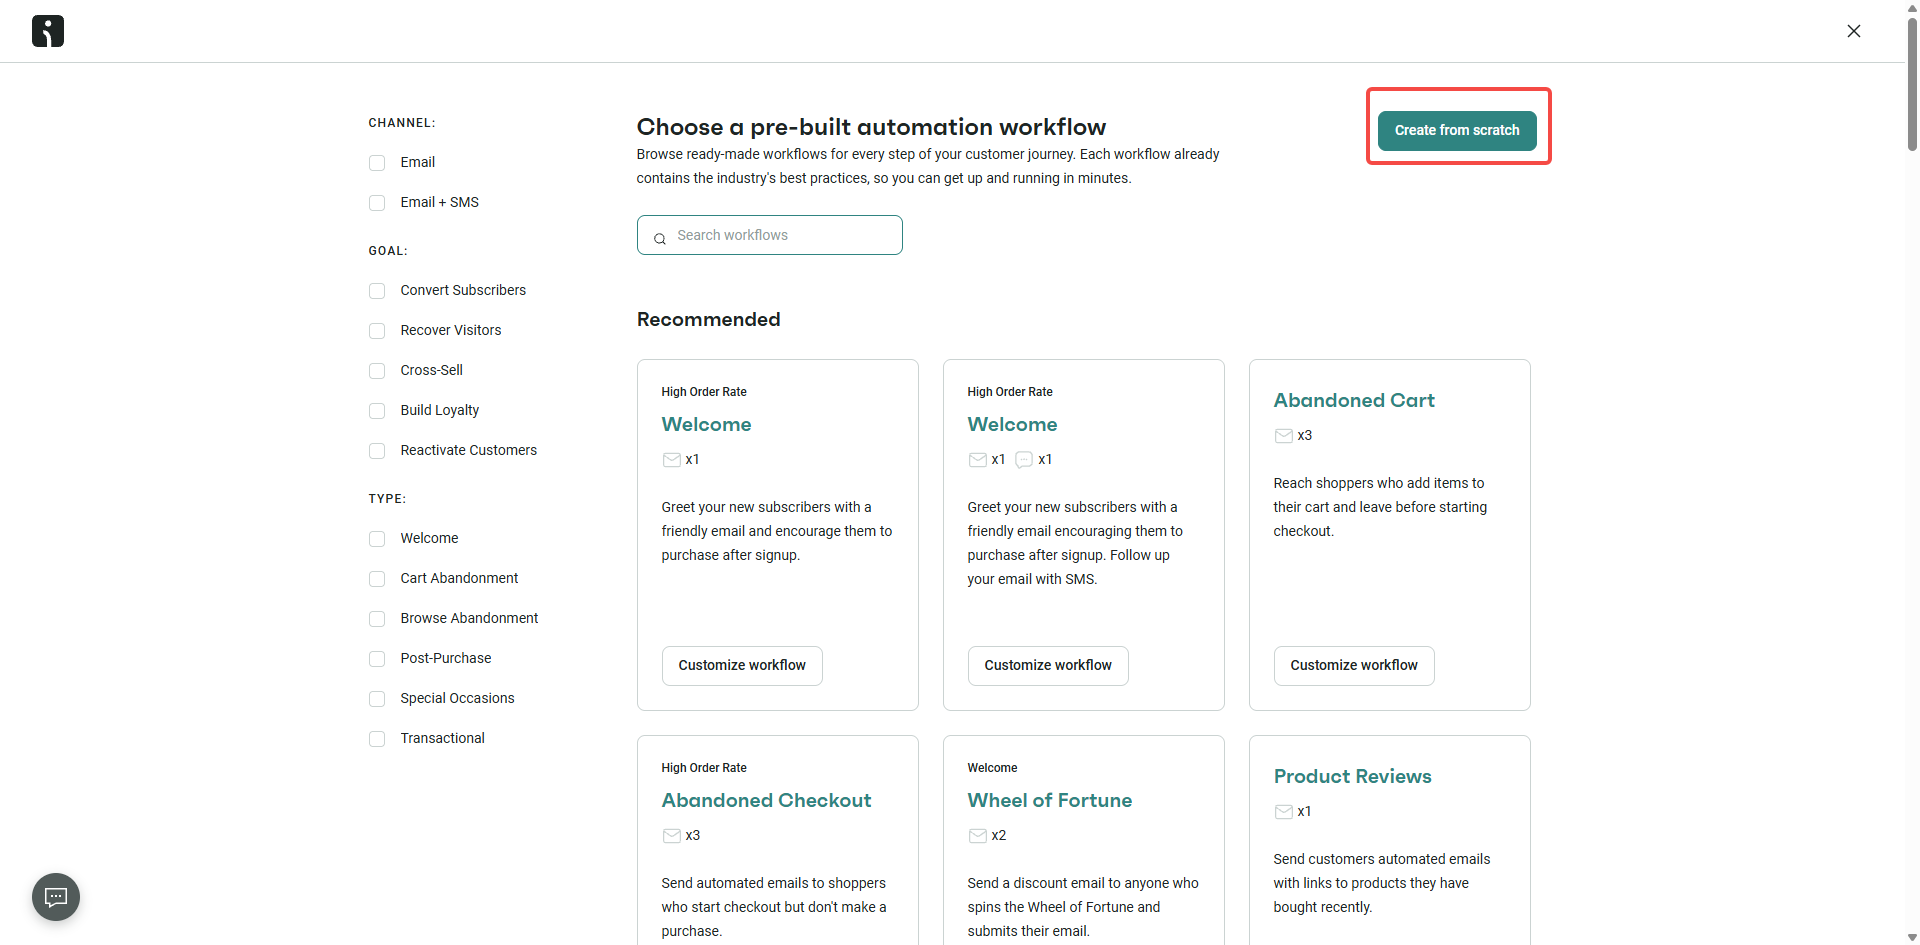
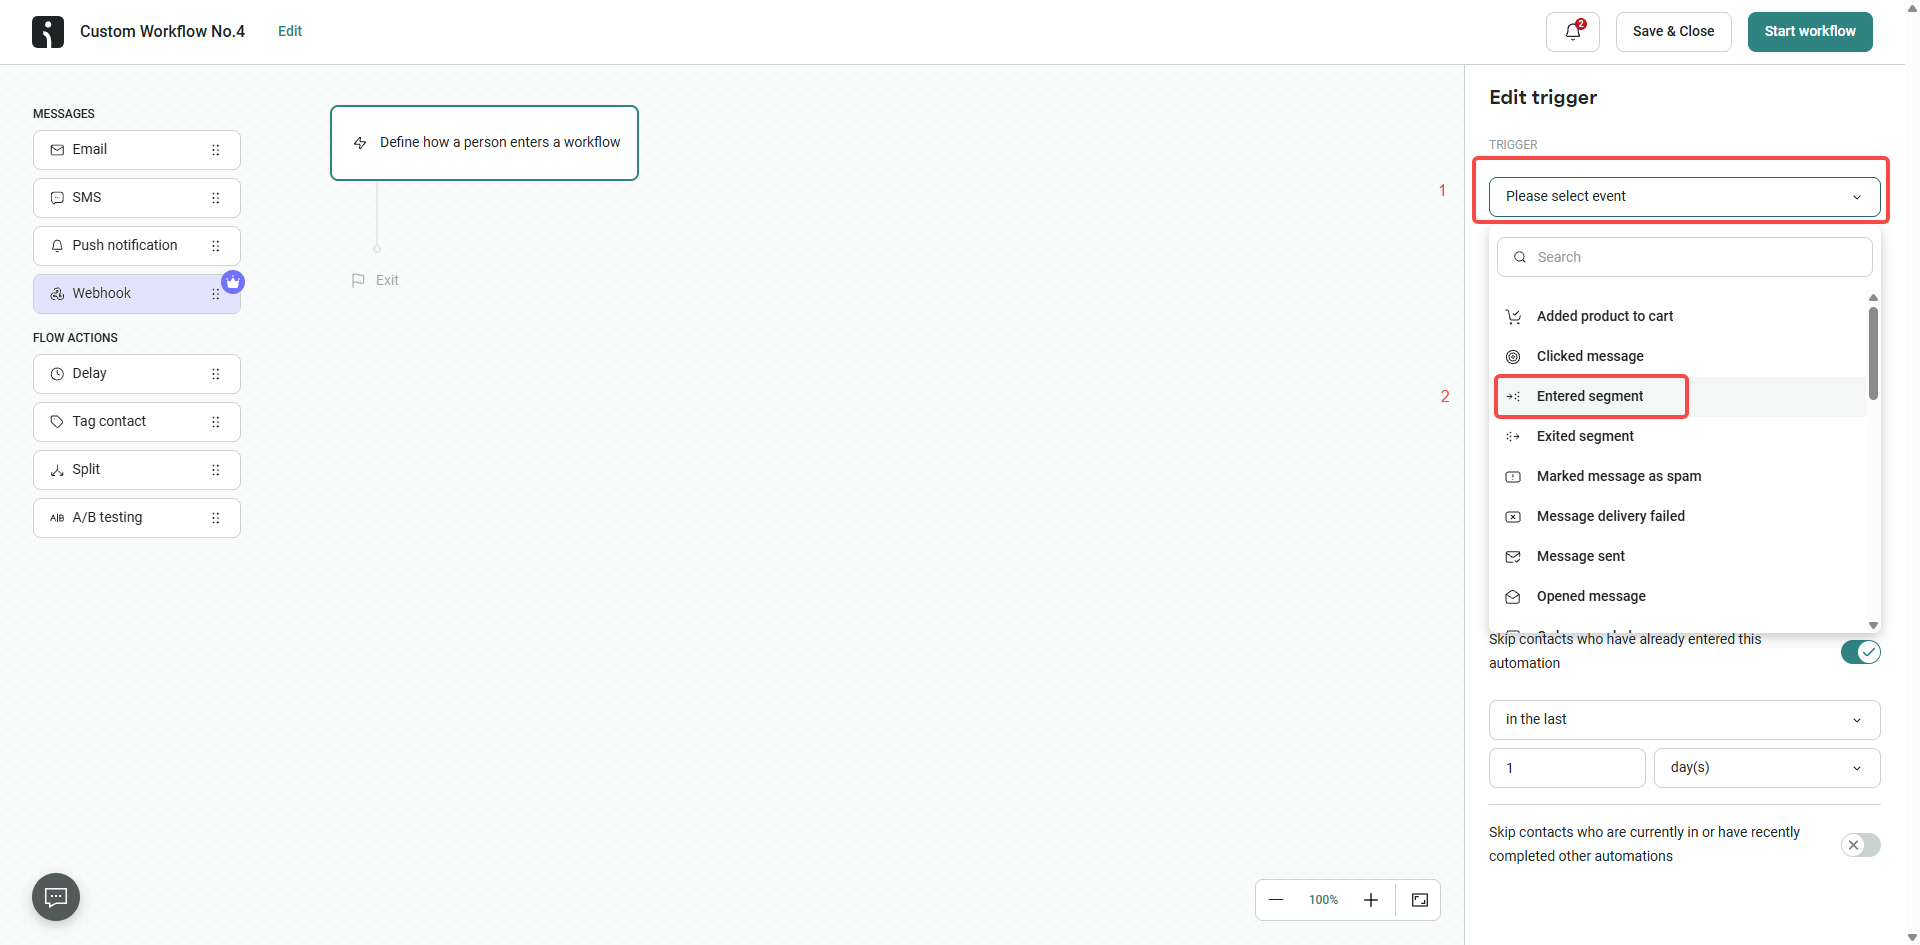
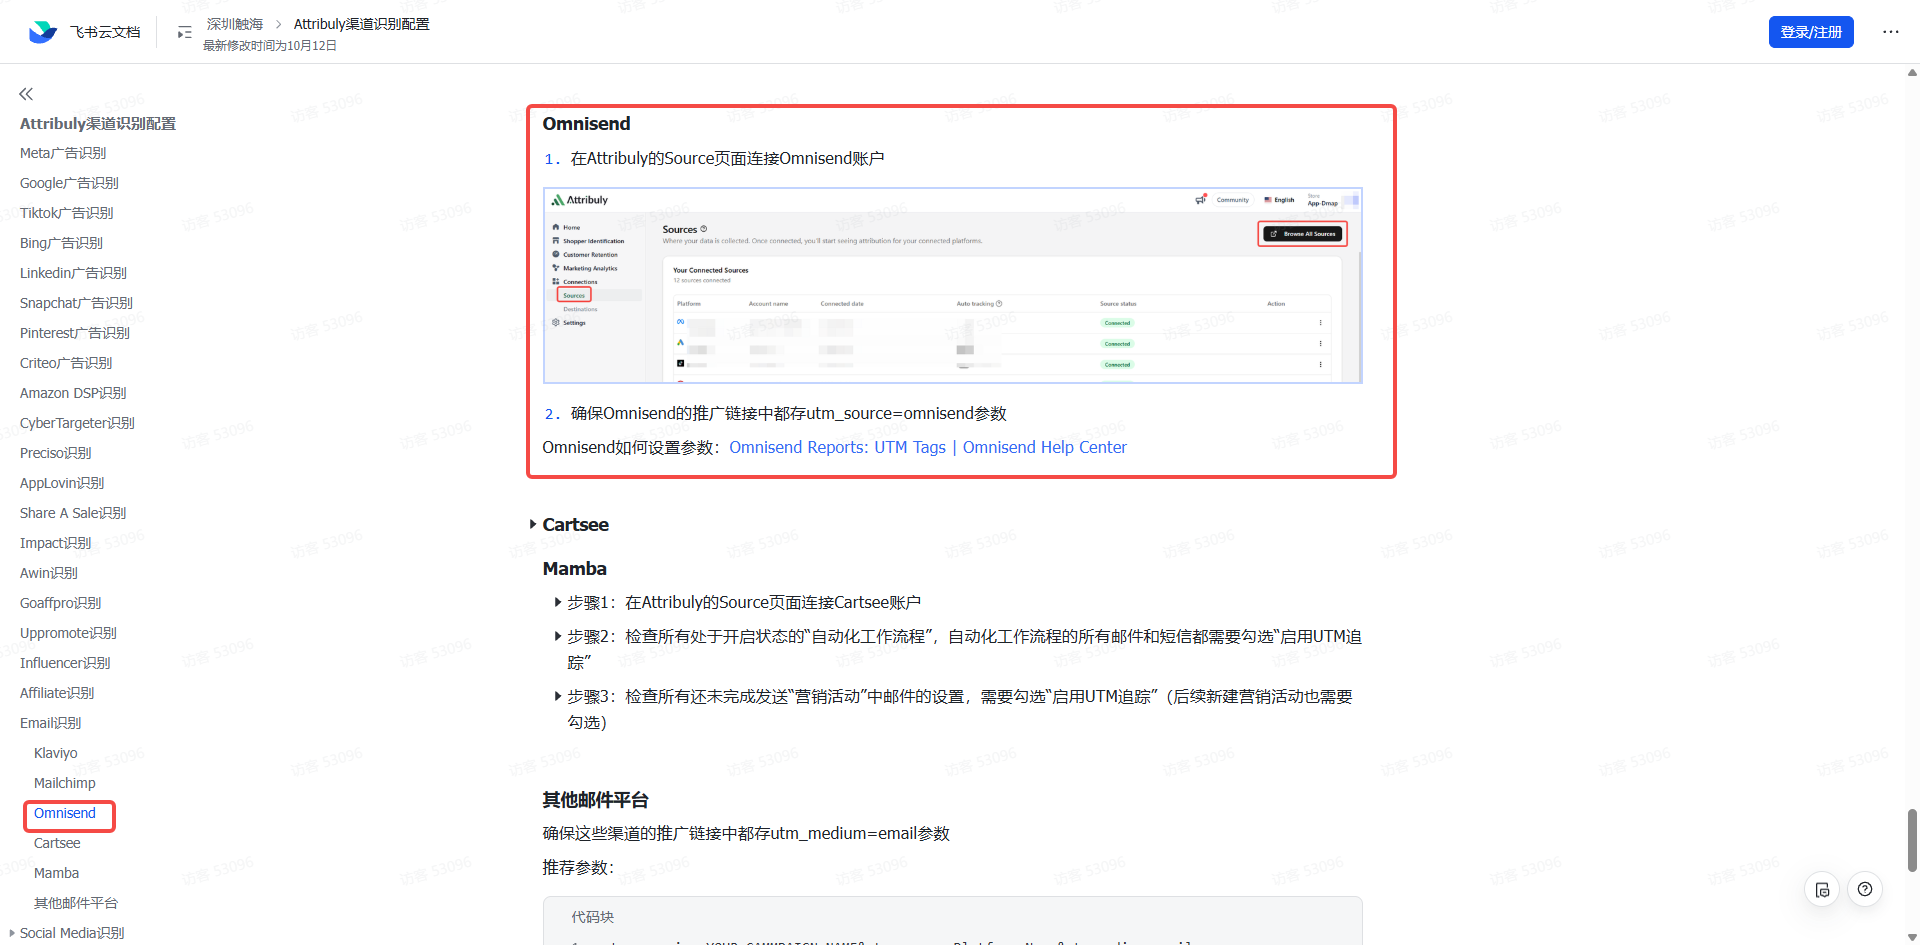
 4. Complete Omnisend traffic identification using the channel identification guide.
Cartsee
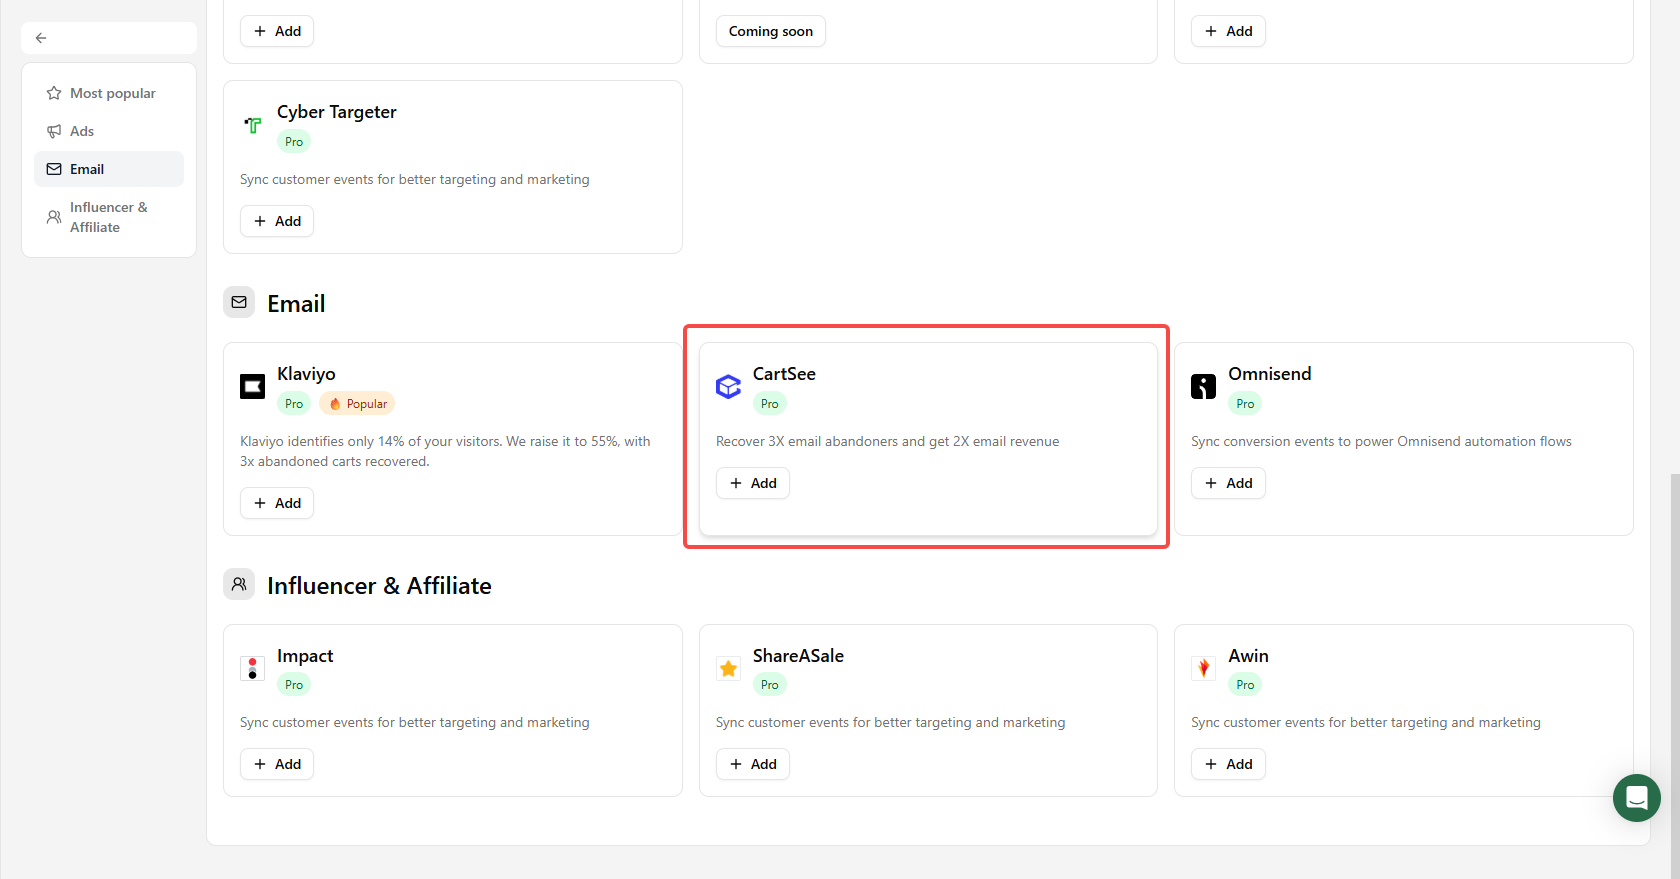
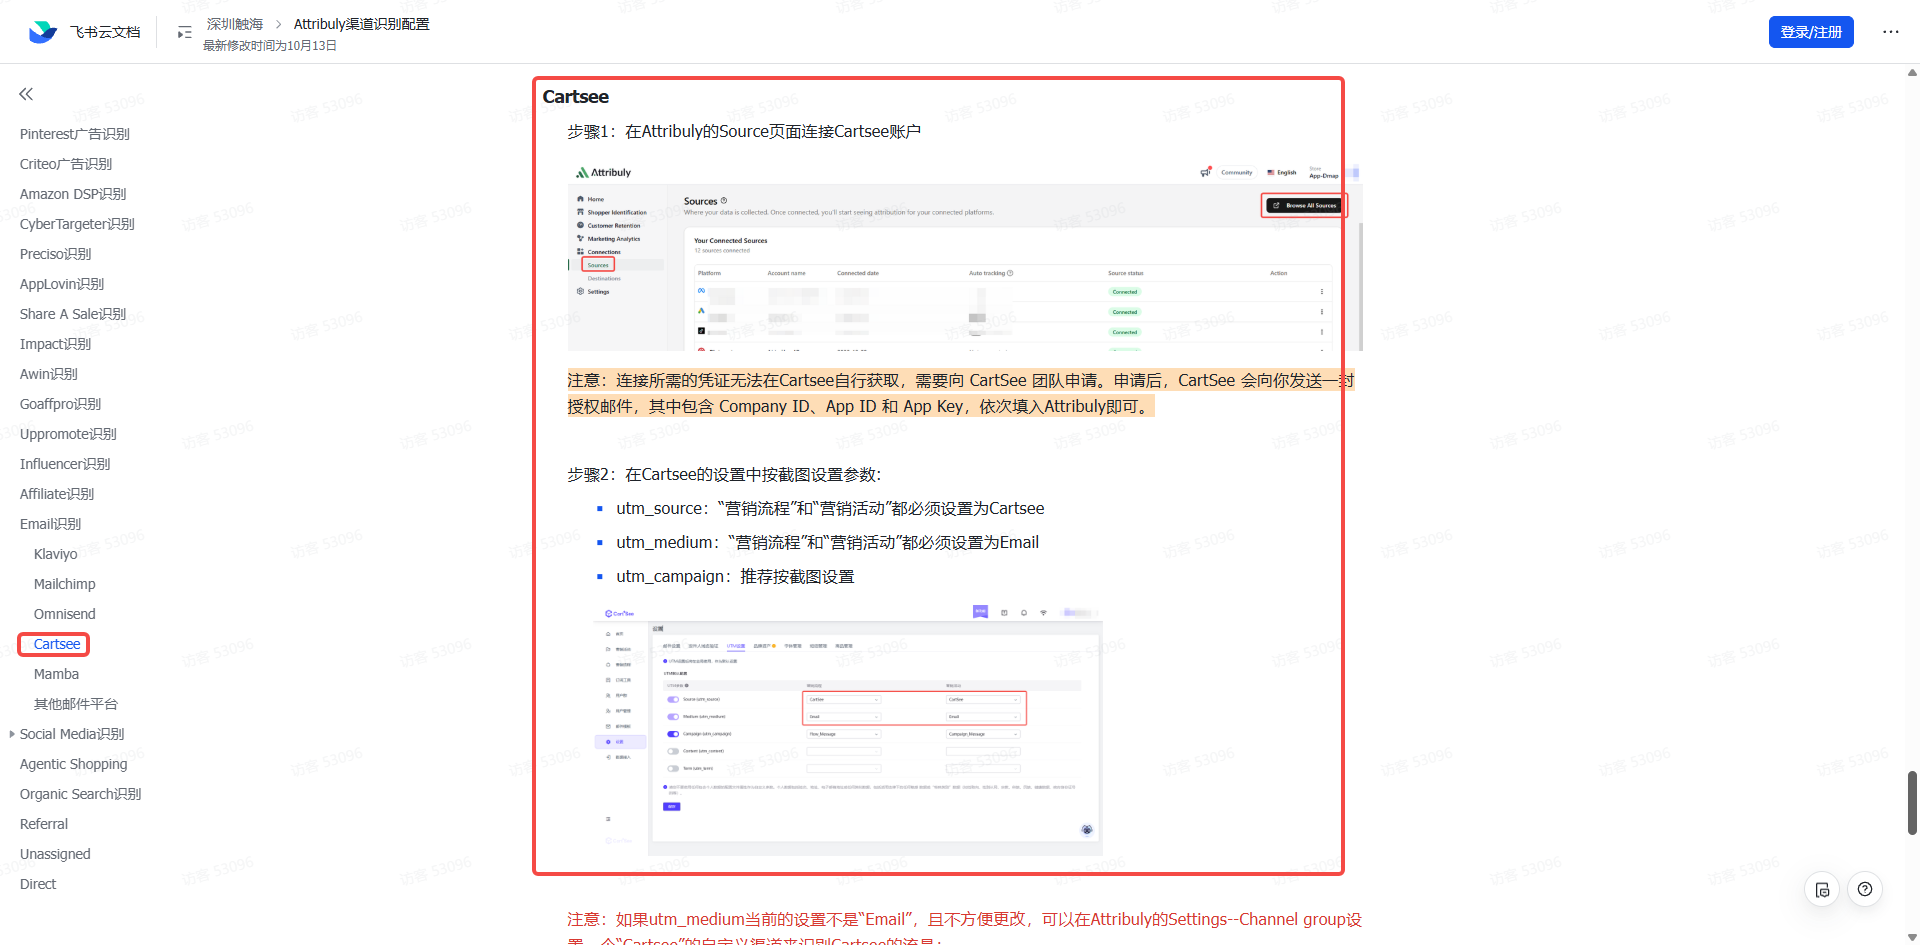
- Connect Cartsee under Sources. Request the Company ID, App ID and App Key from CartSee. Create a Cartsee event destination and sync Capture emails to the email platform, then create a dynamic segment. See SHOPLINE sync or the Shopify source guide.
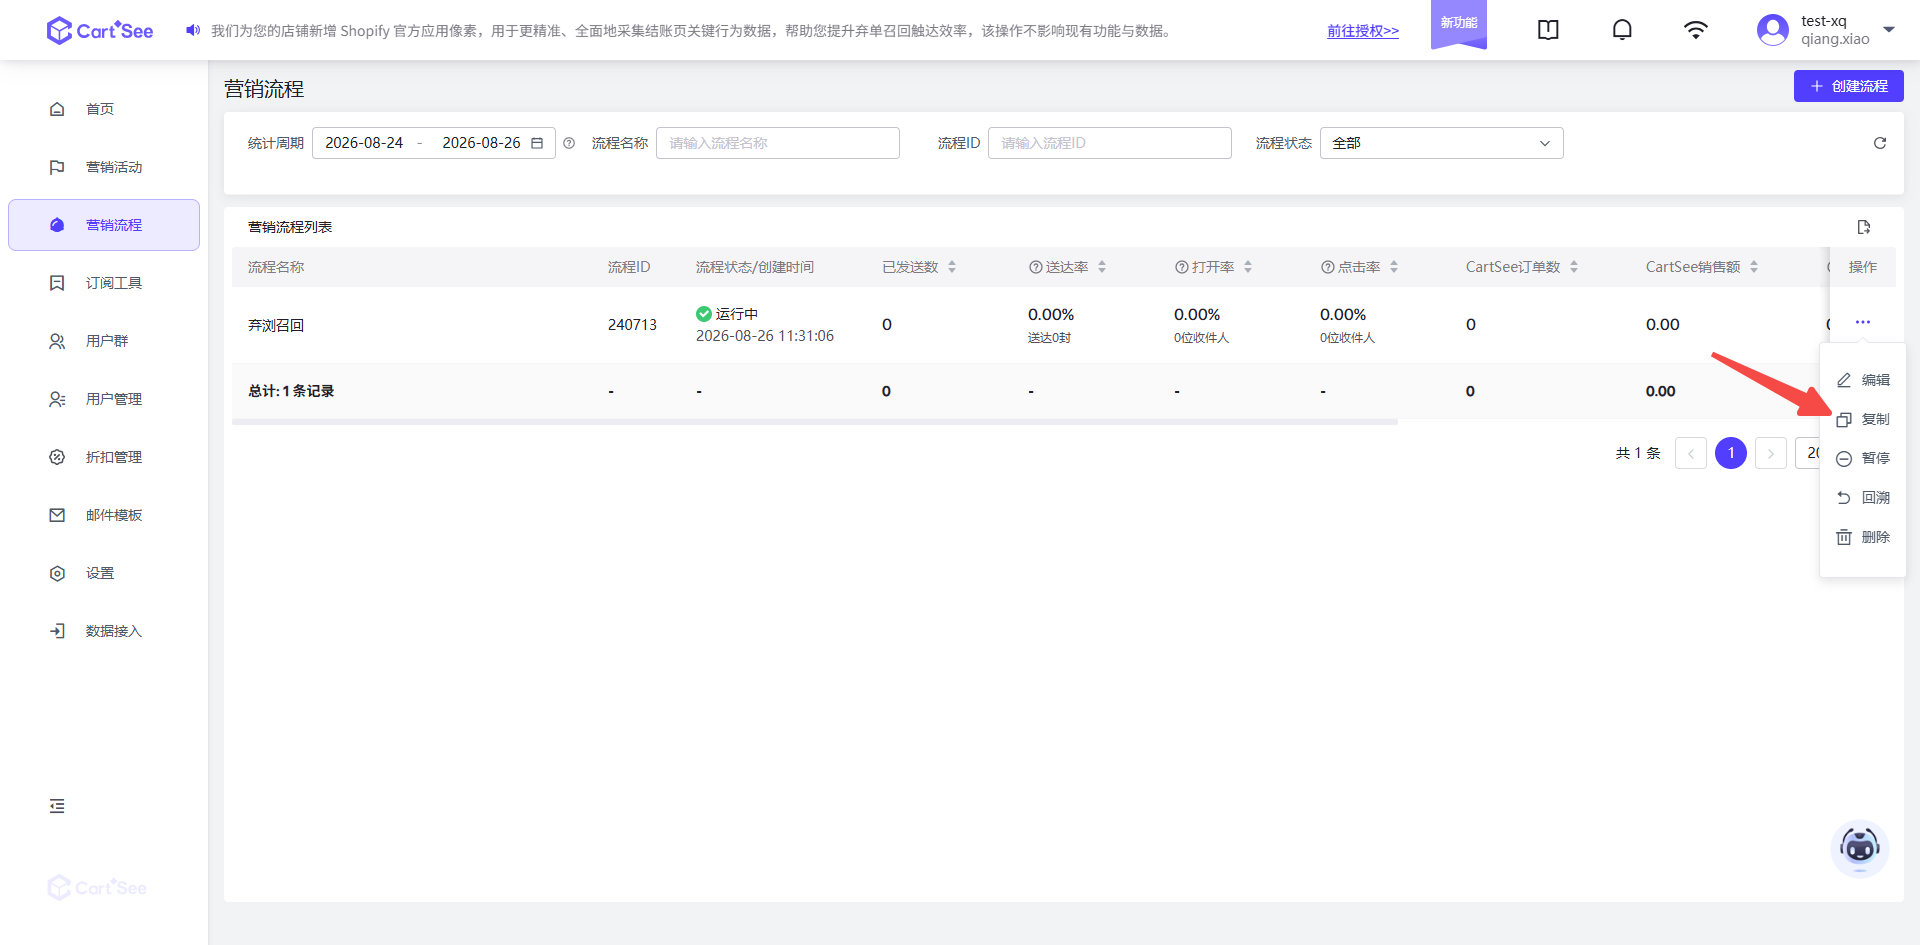
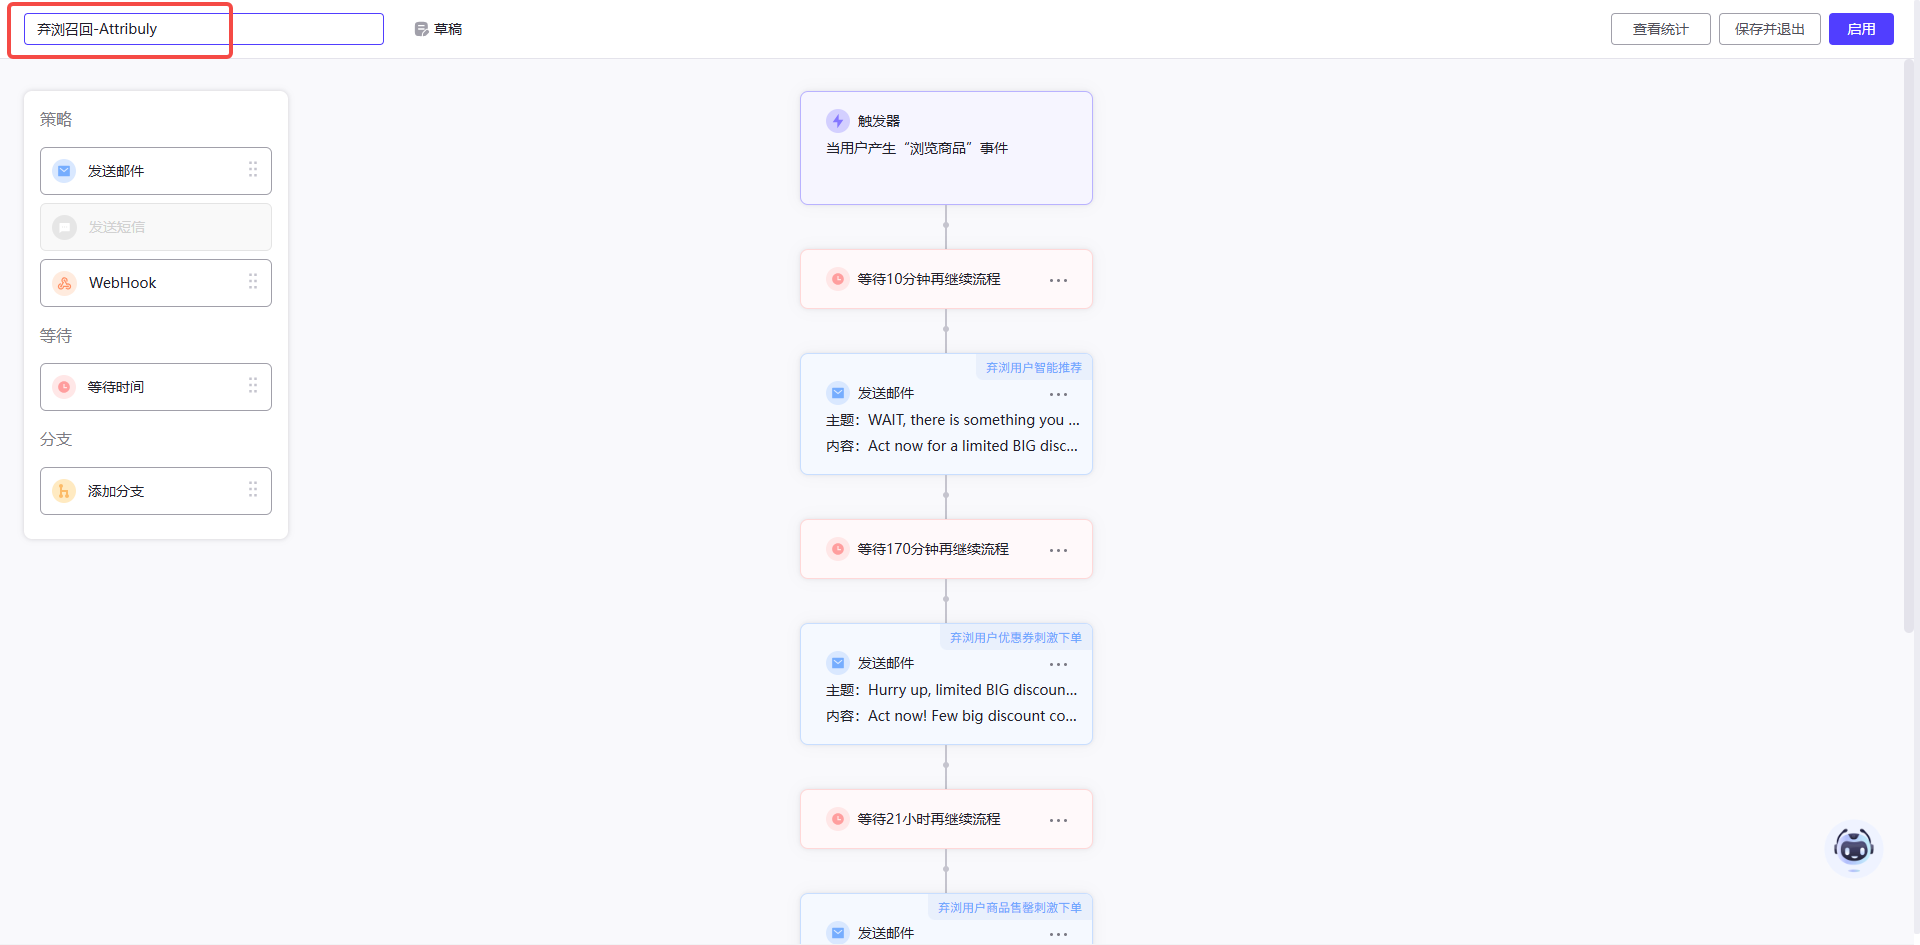
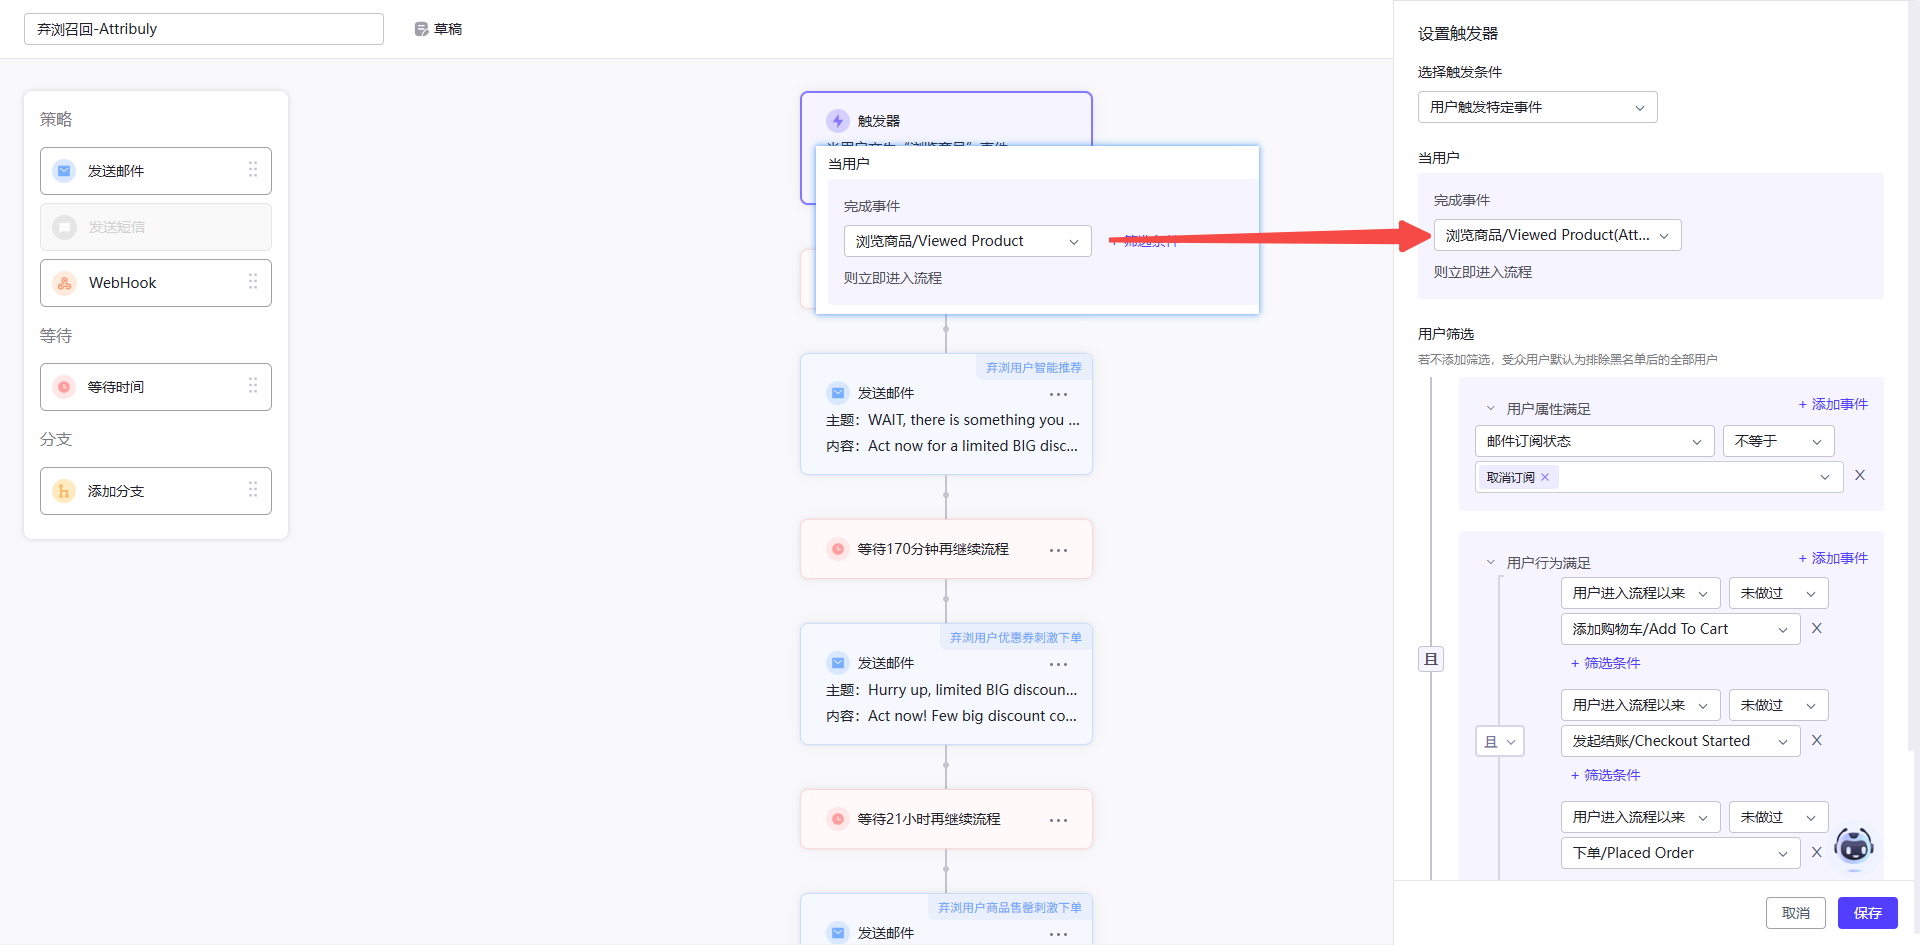
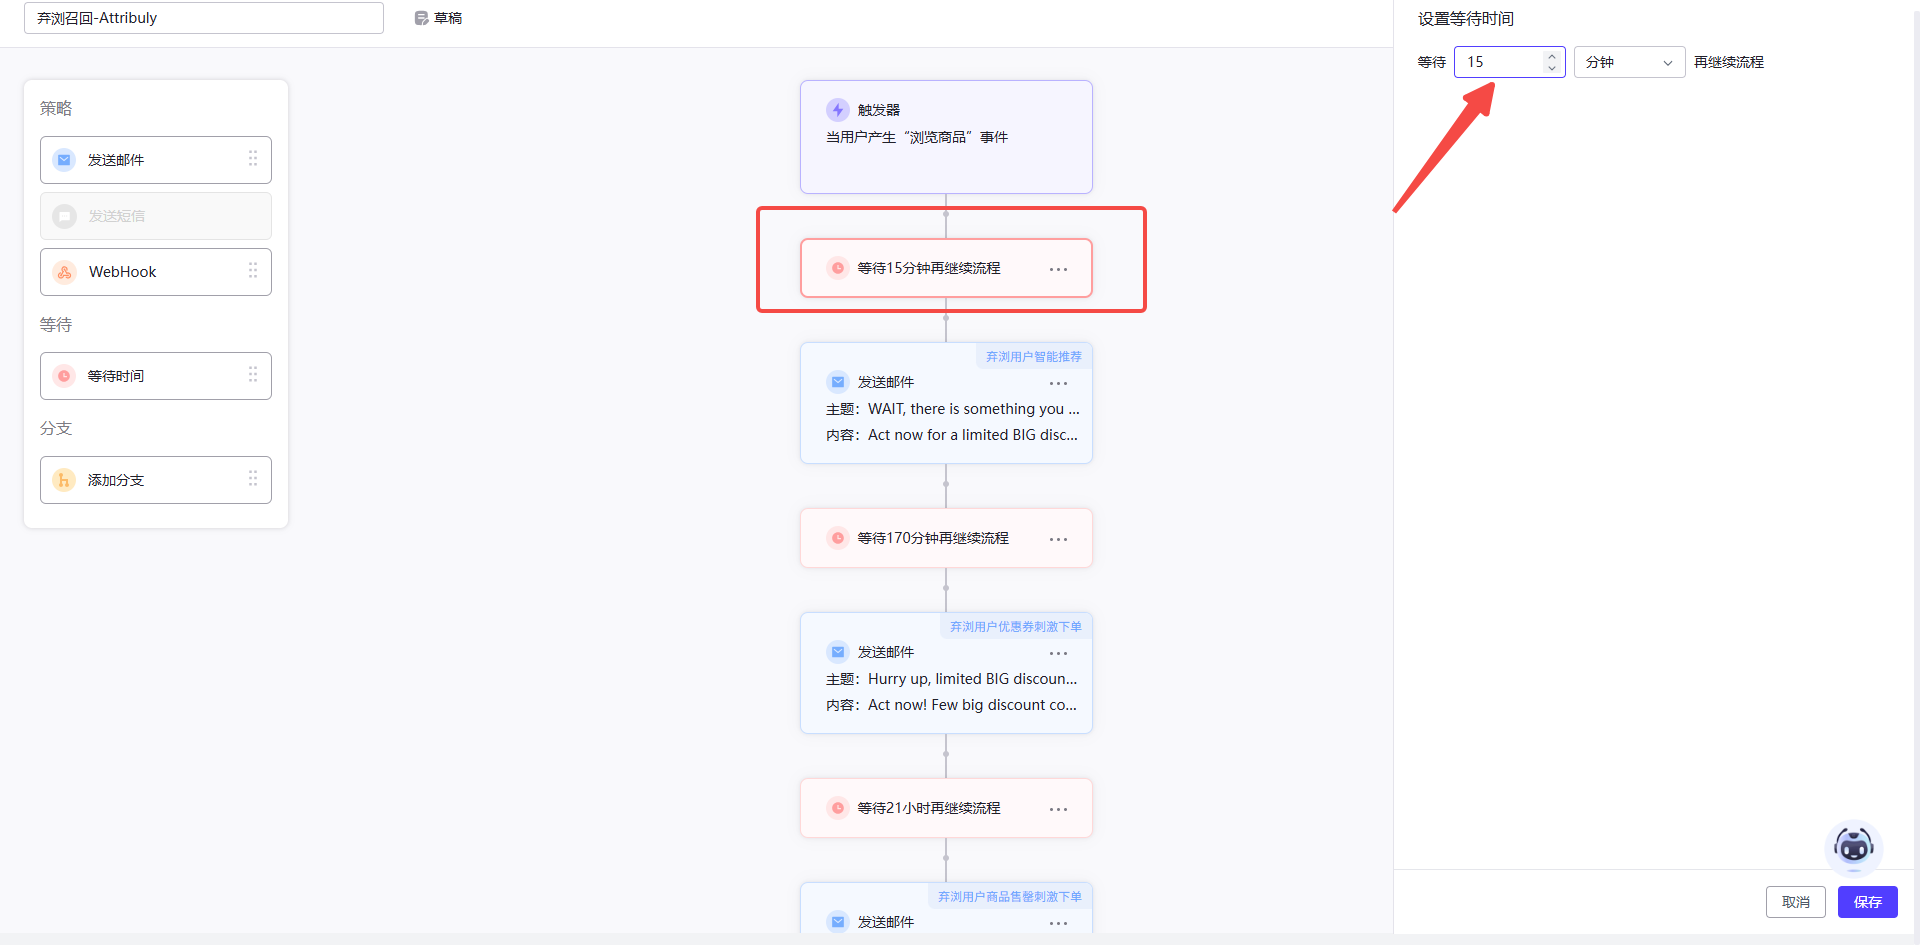
 2. Clone the existing workflow with an -Attribuly suffix. Change its trigger to the corresponding Attribuly event, add a filter excluding the corresponding native event since entering the flow, and increase the first wait by 20 minutes.
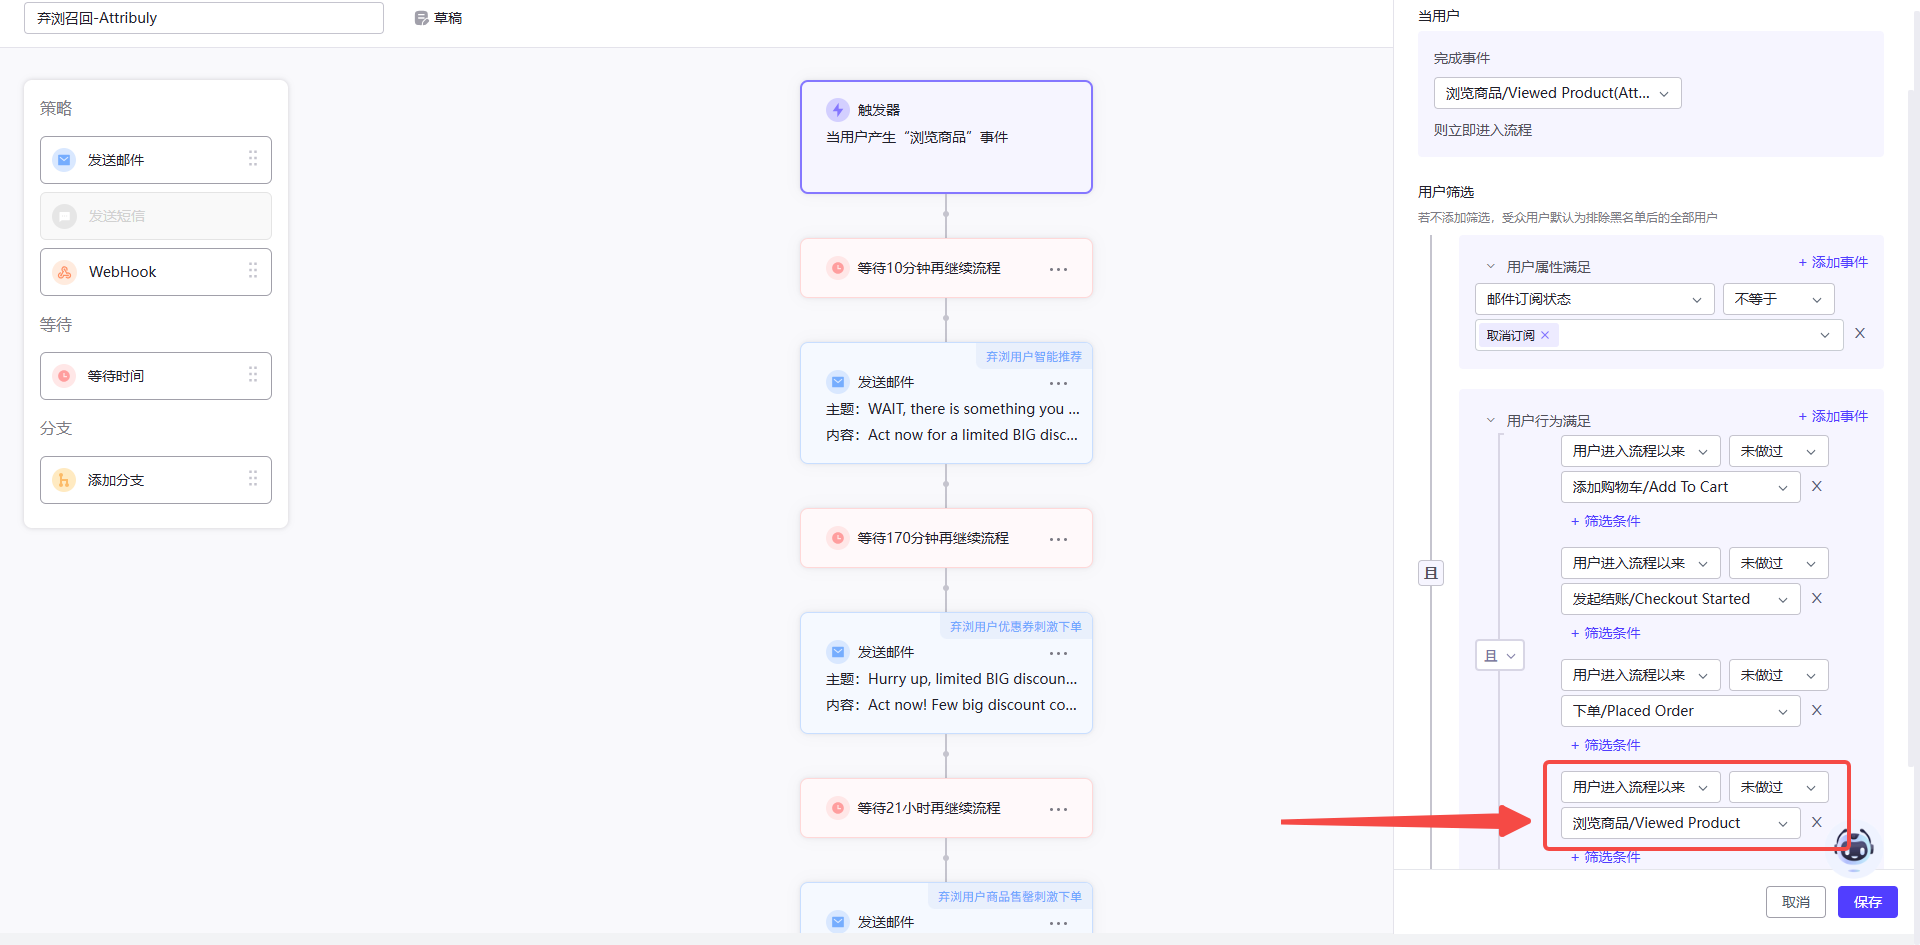
 3. Create a welcome workflow. Exclude customers who have ever ordered and people whose subscription status is already subscribed; edit the invitation email to allow subscription.
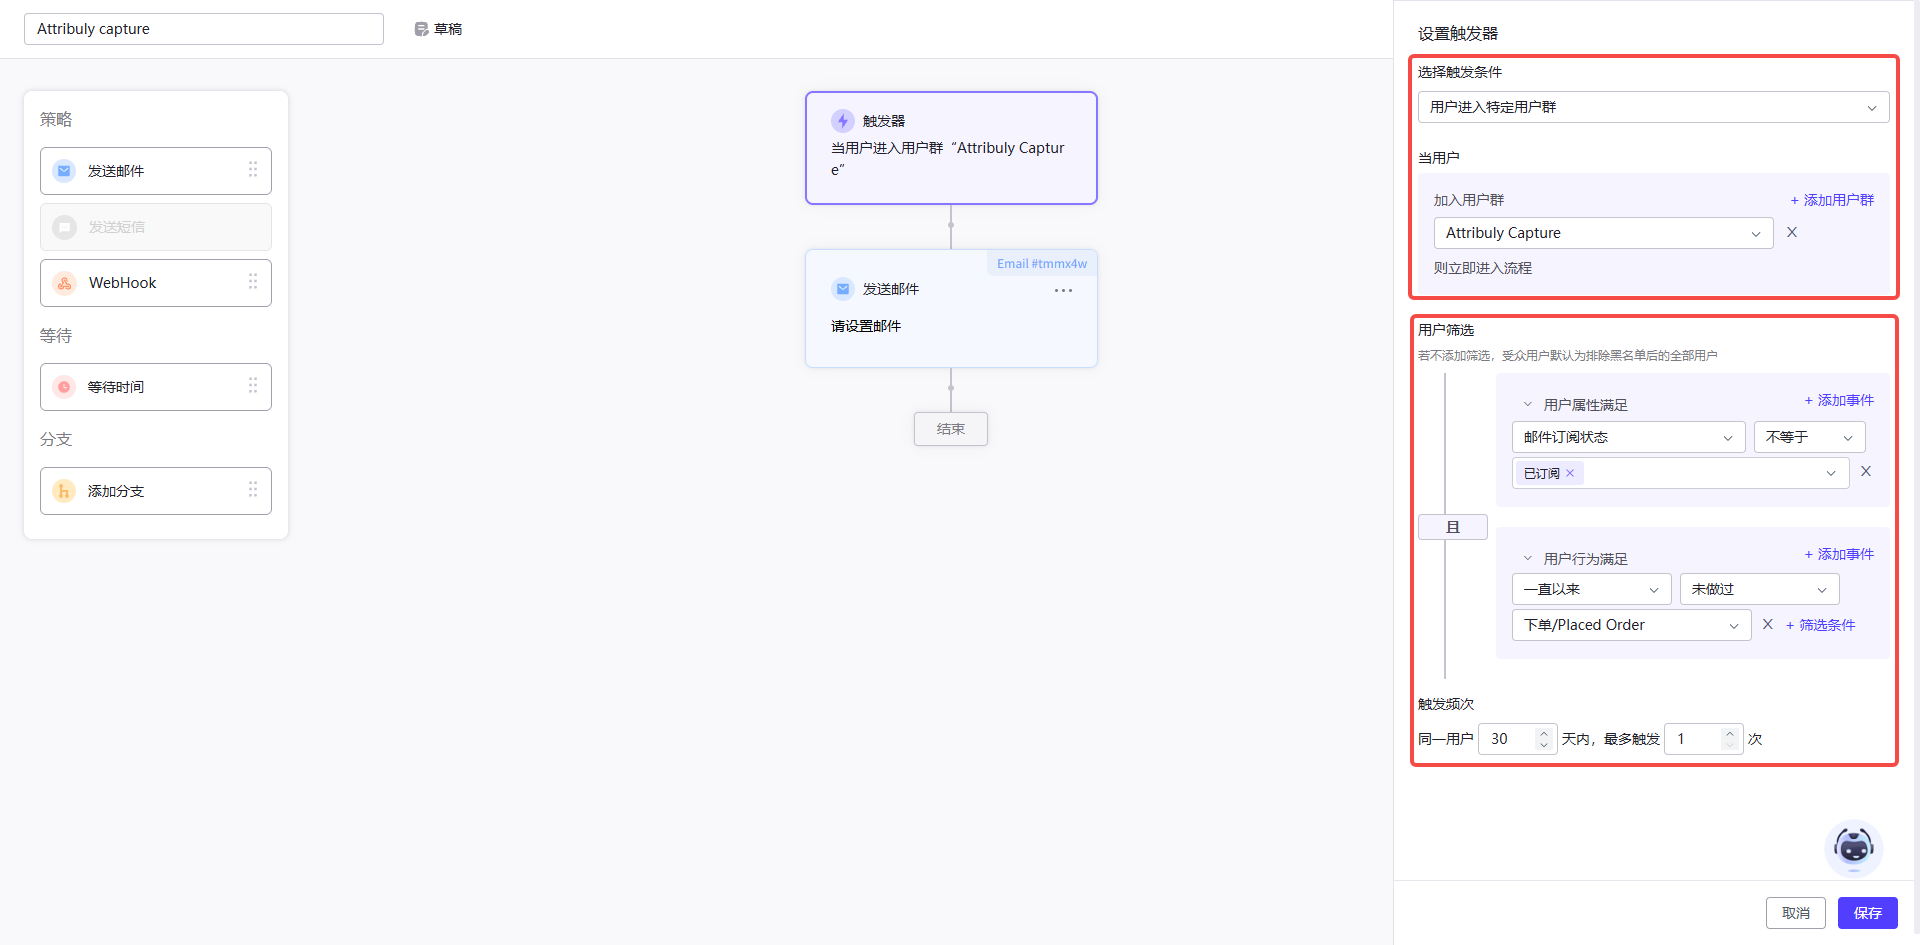
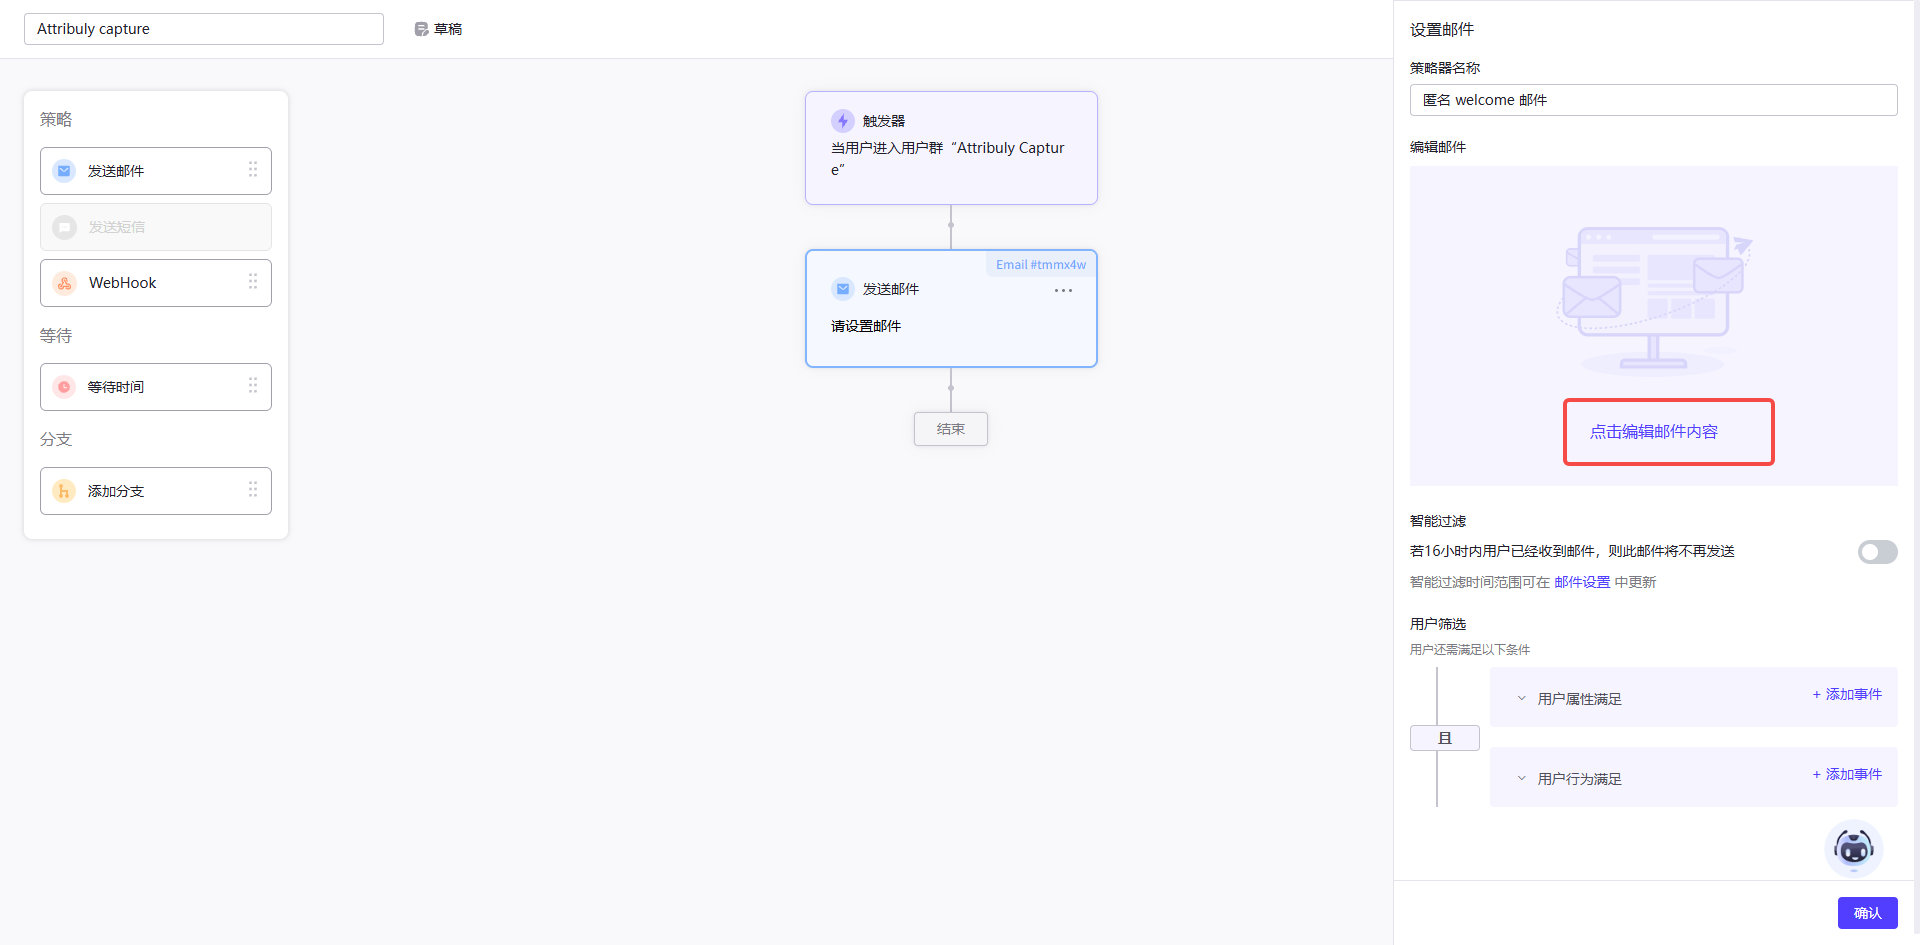 4. Complete Cartsee traffic identification.
MambaSMS
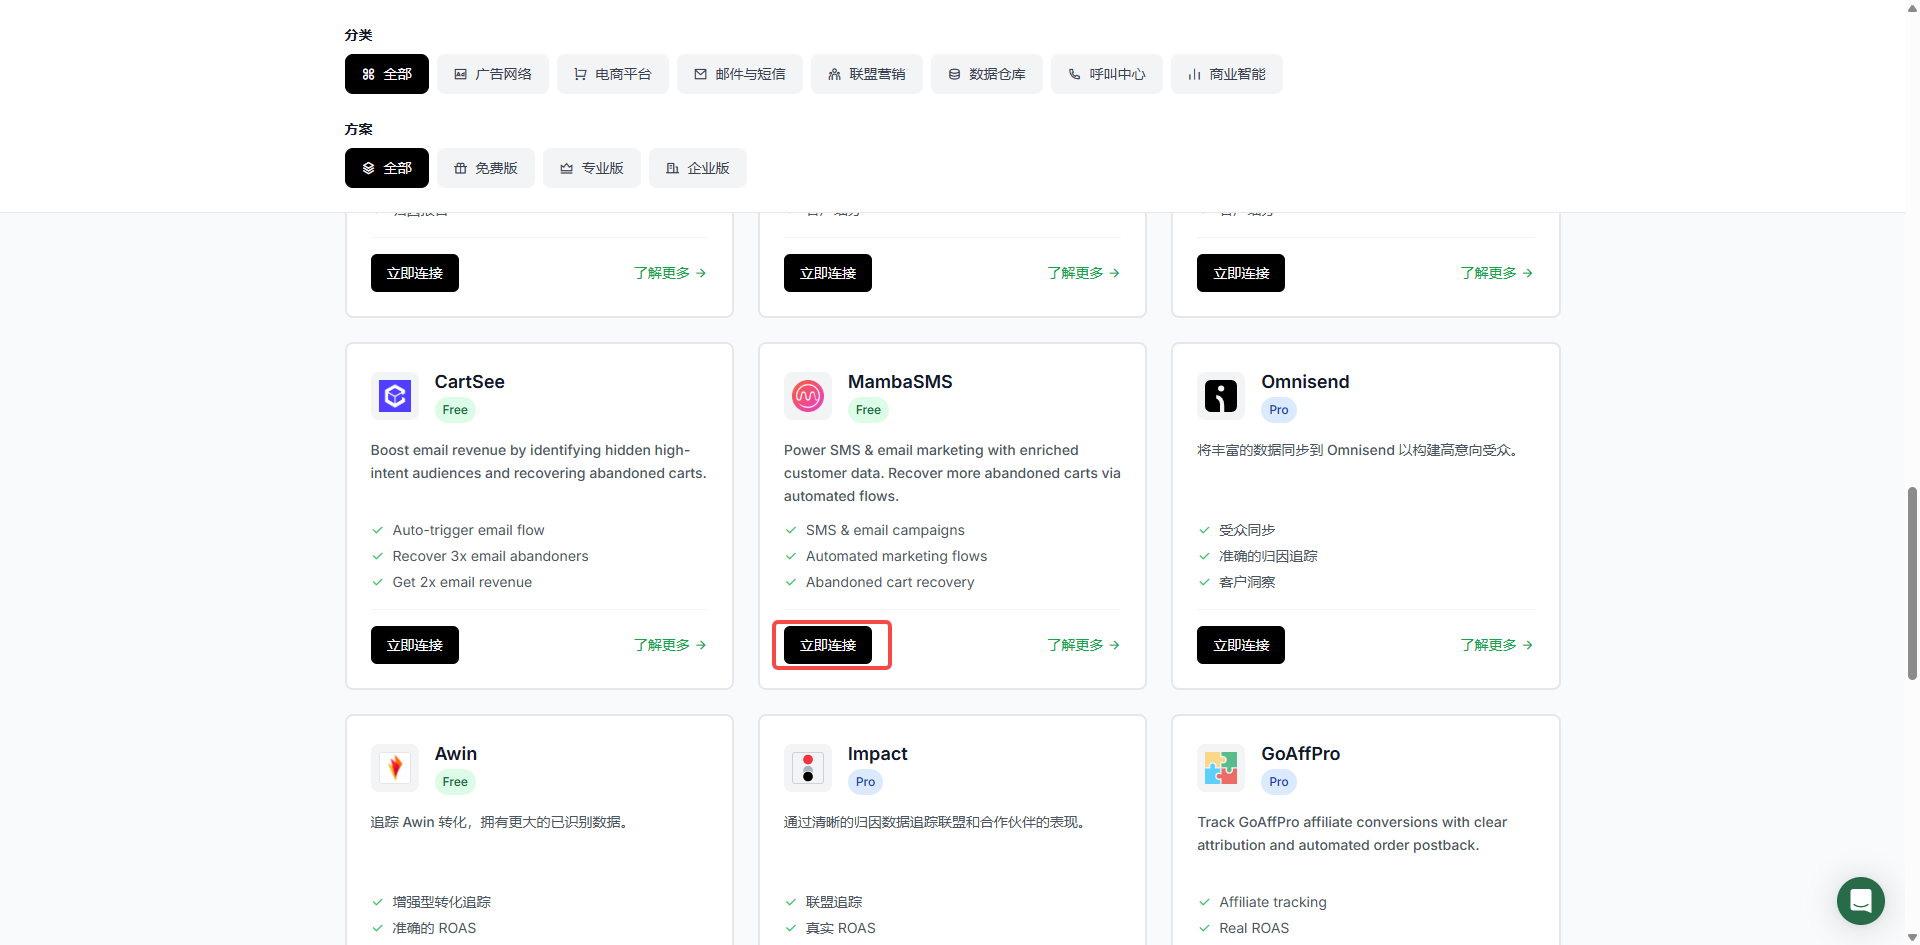
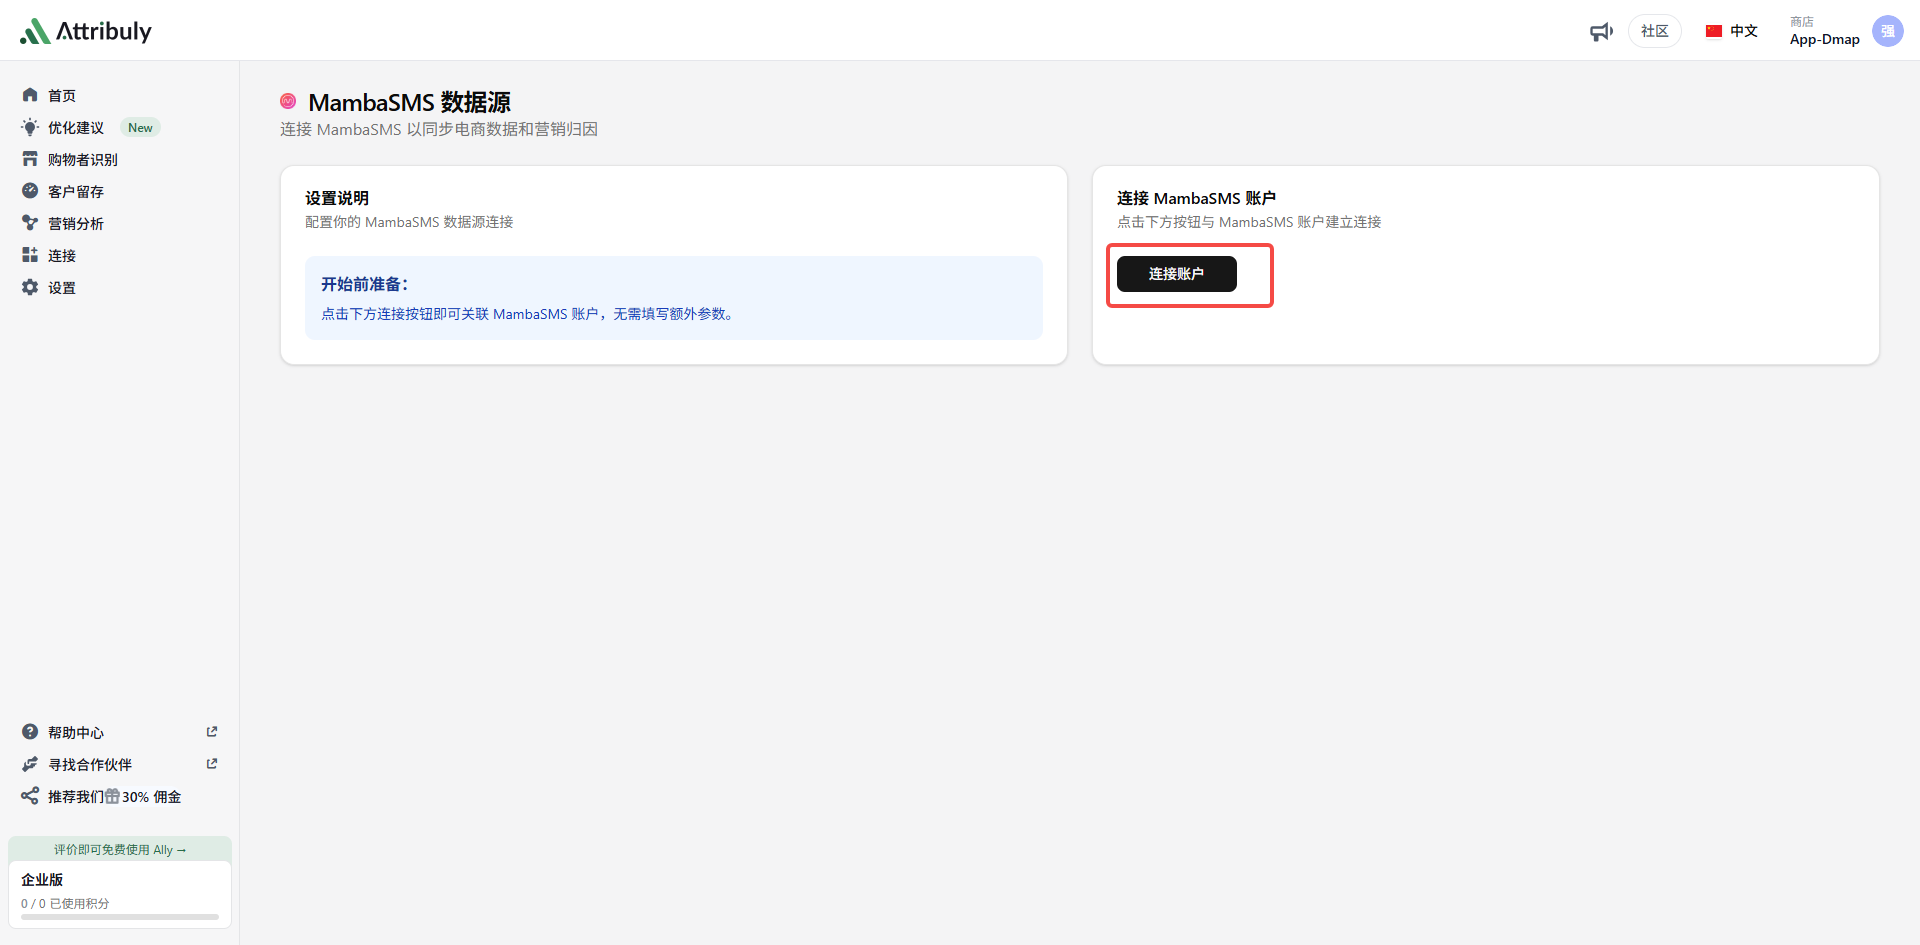
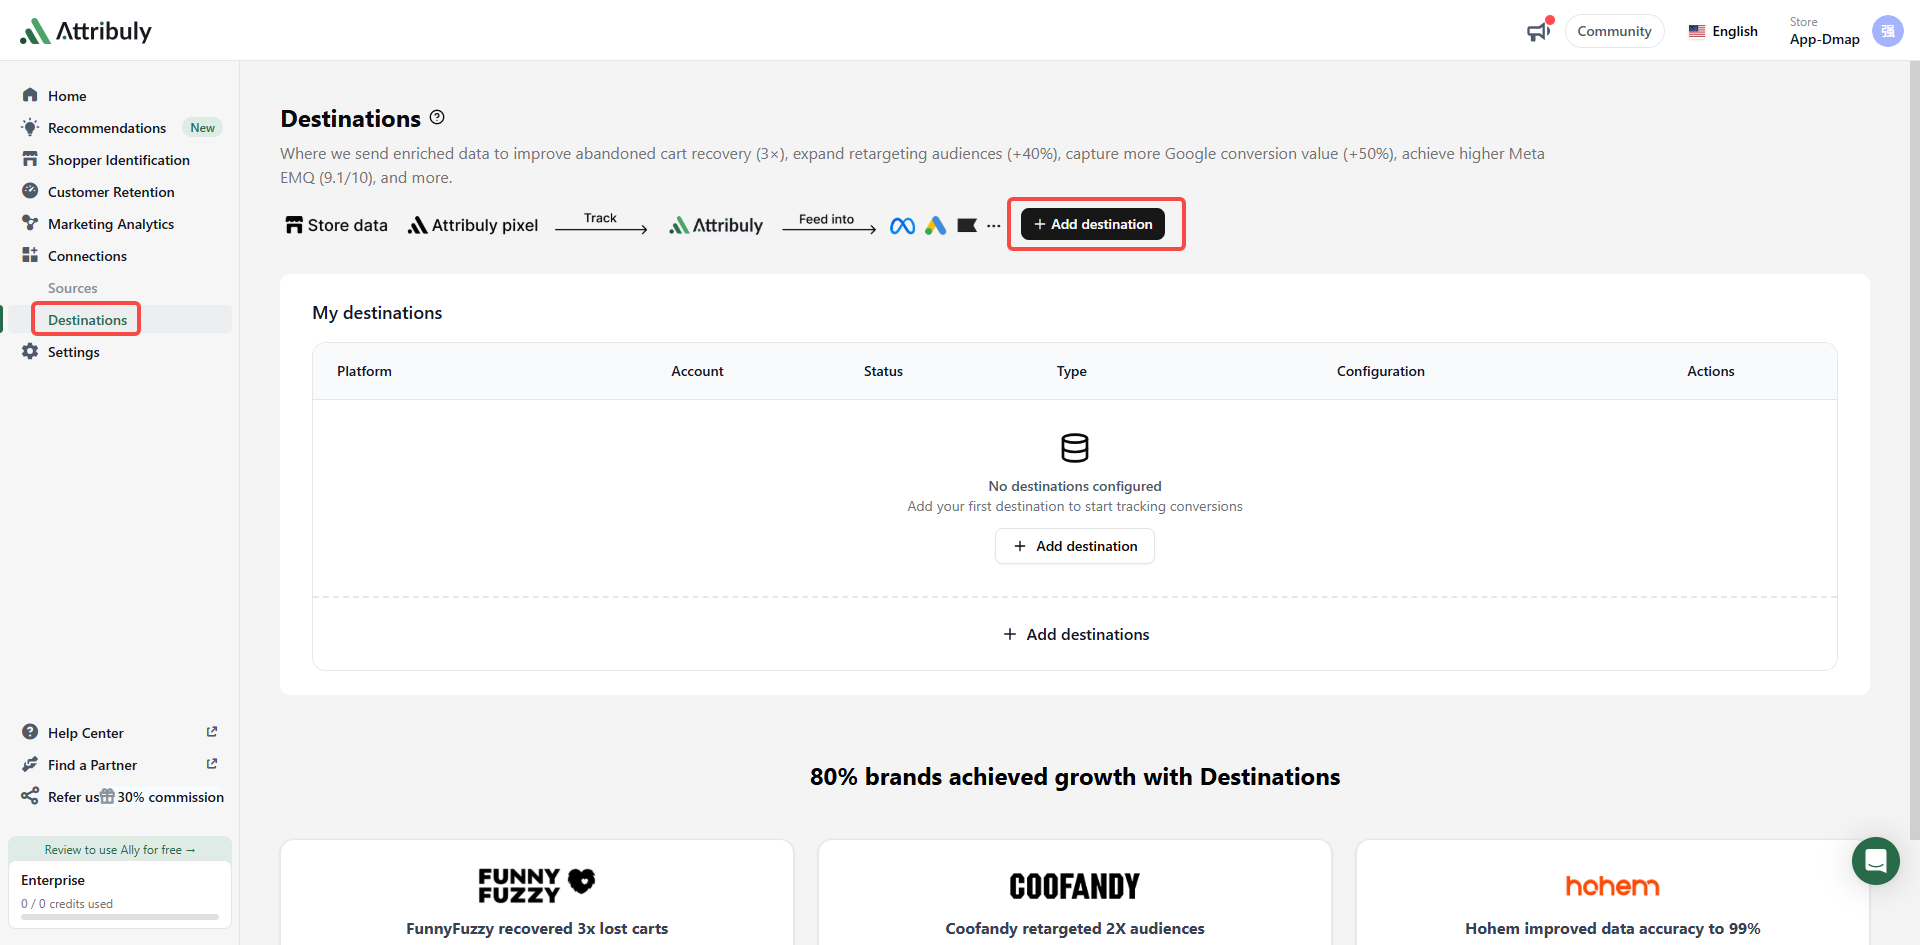
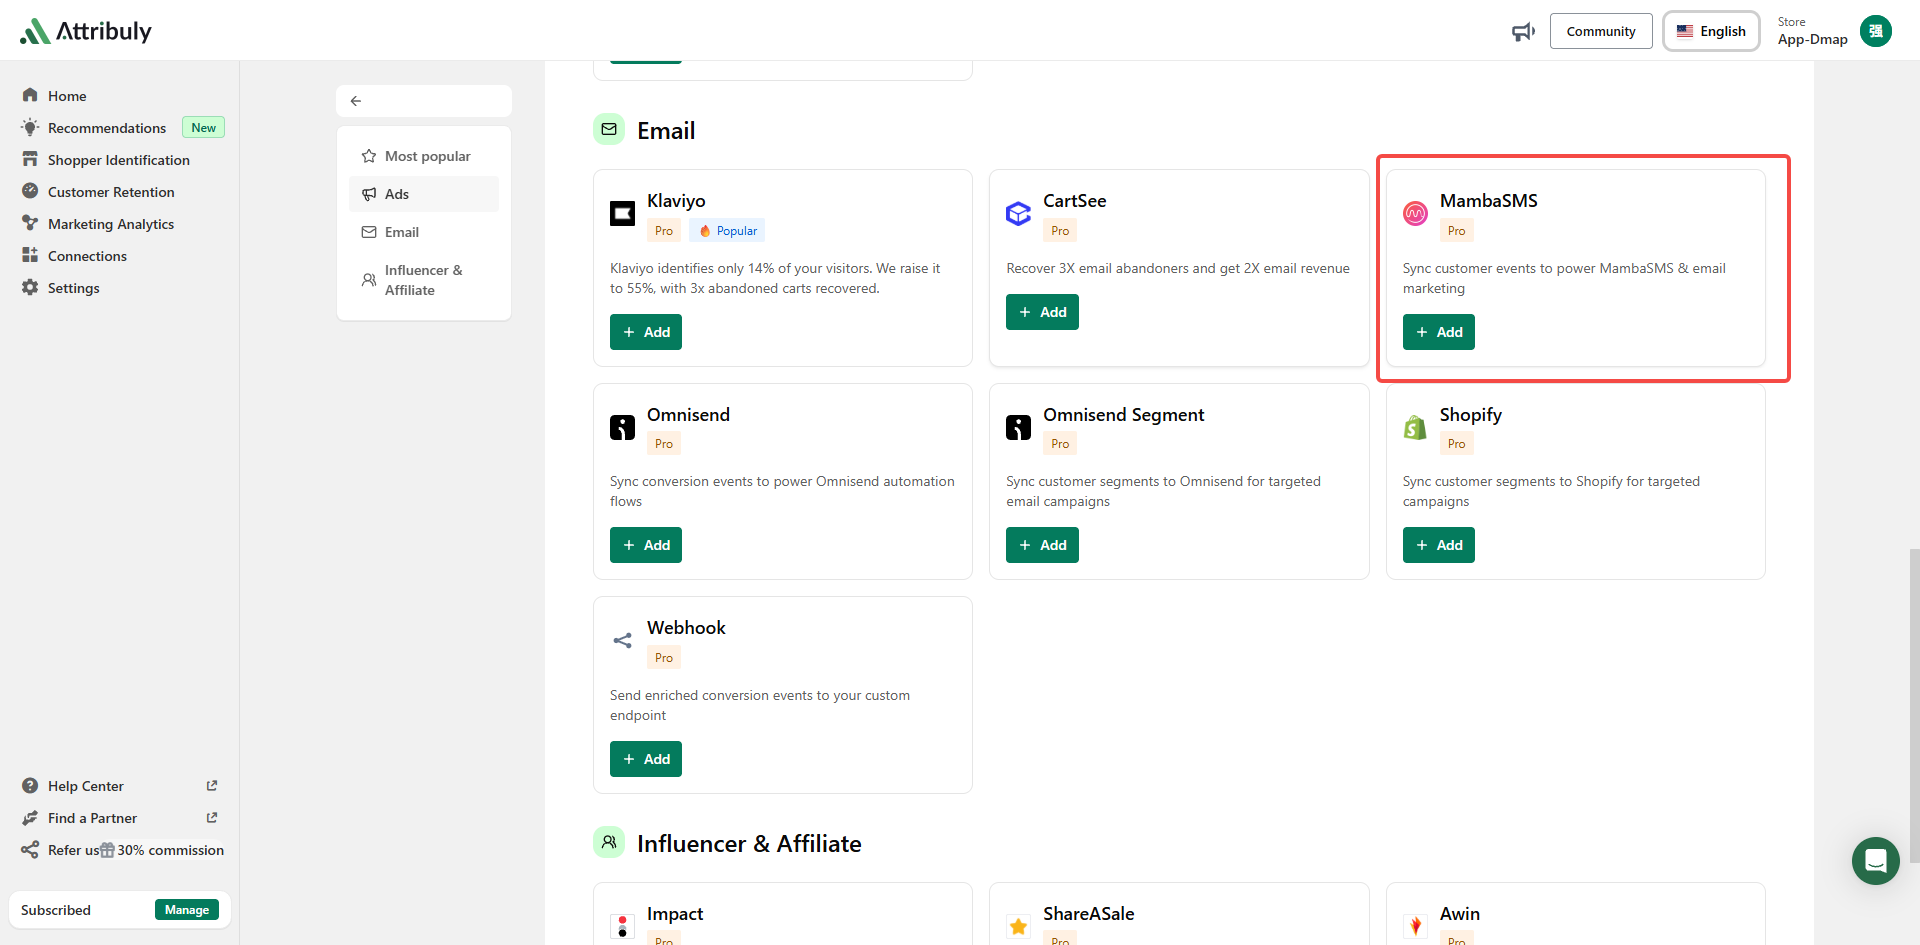
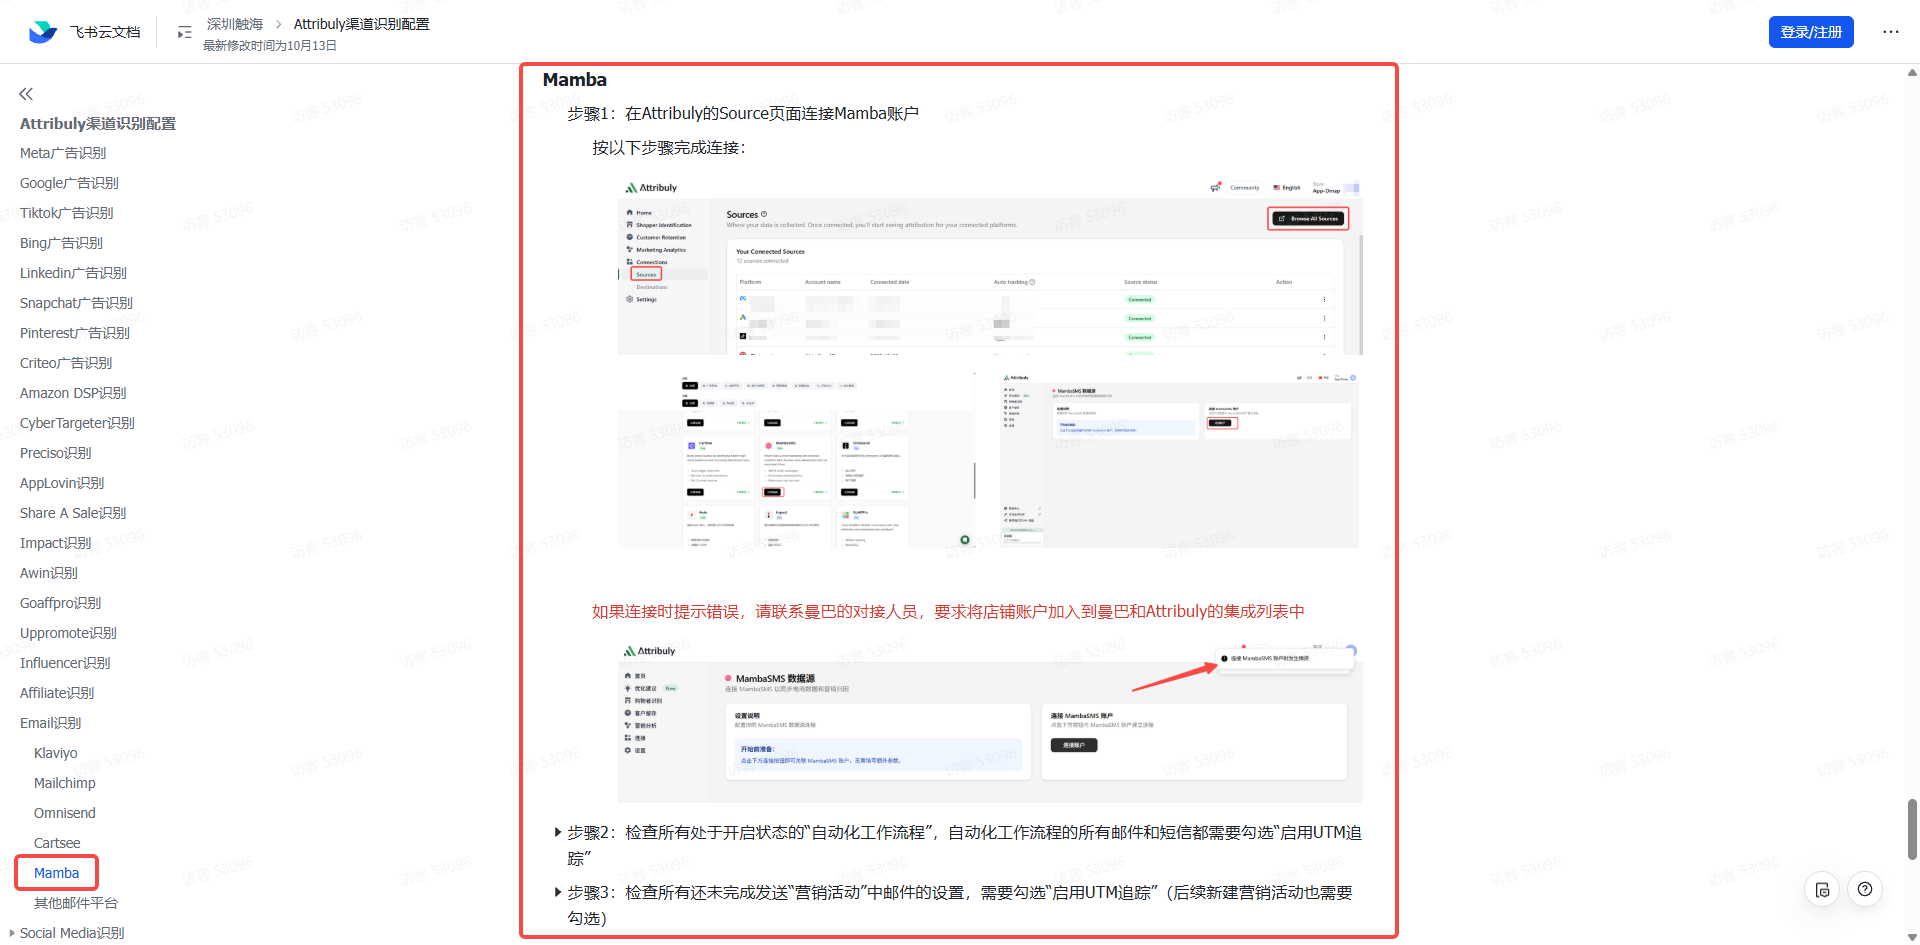
- Connect Mamba under Sources. If connection fails, ask Mamba to add your store to the integration list. Create a MambaSMS event destination and sync Capture emails to the platform.
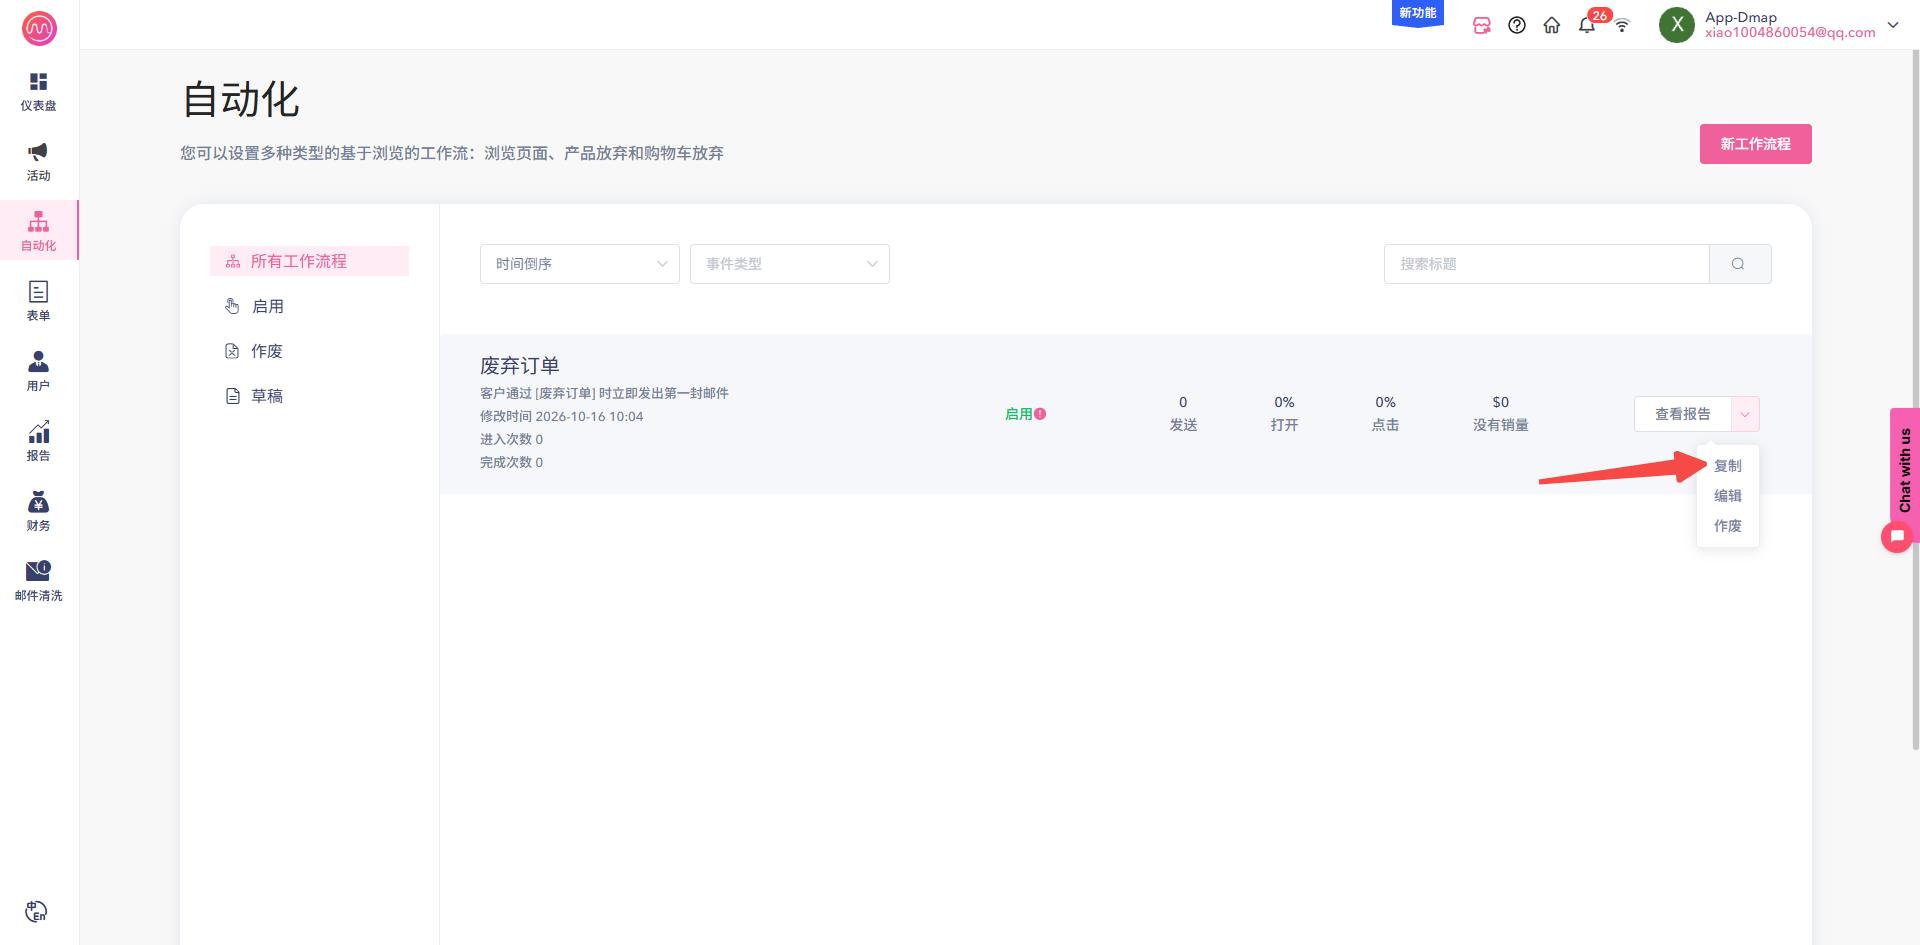
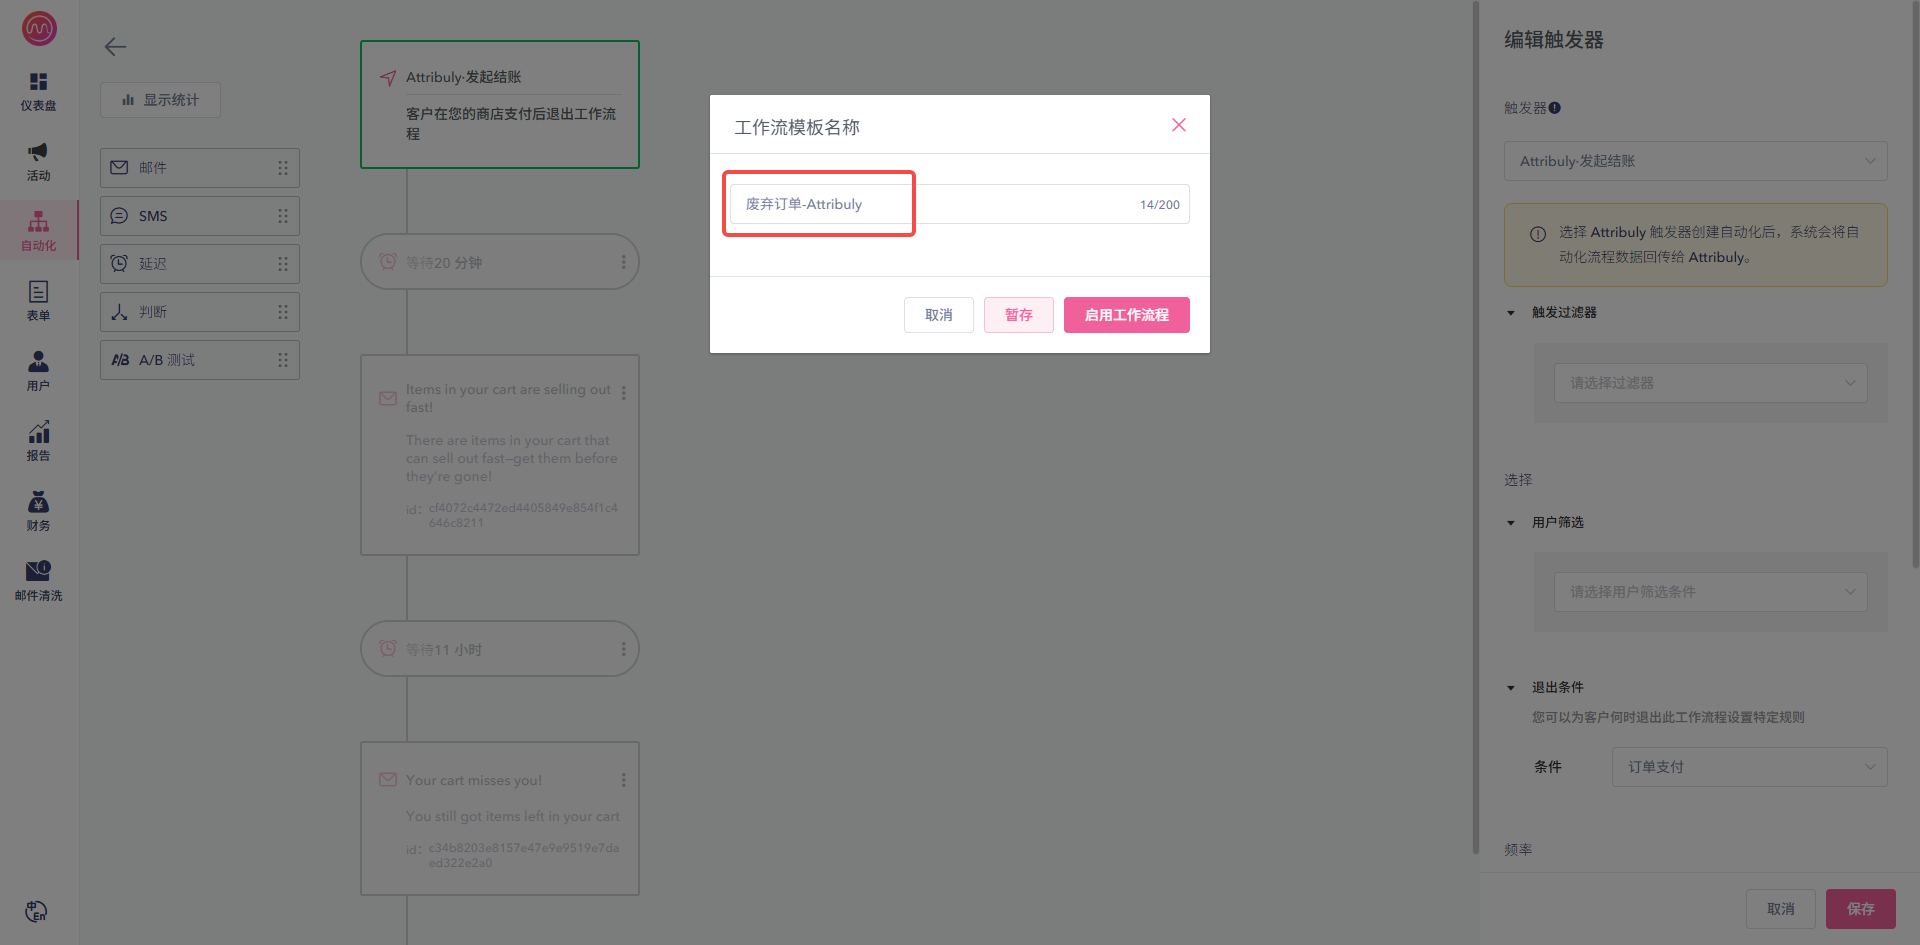
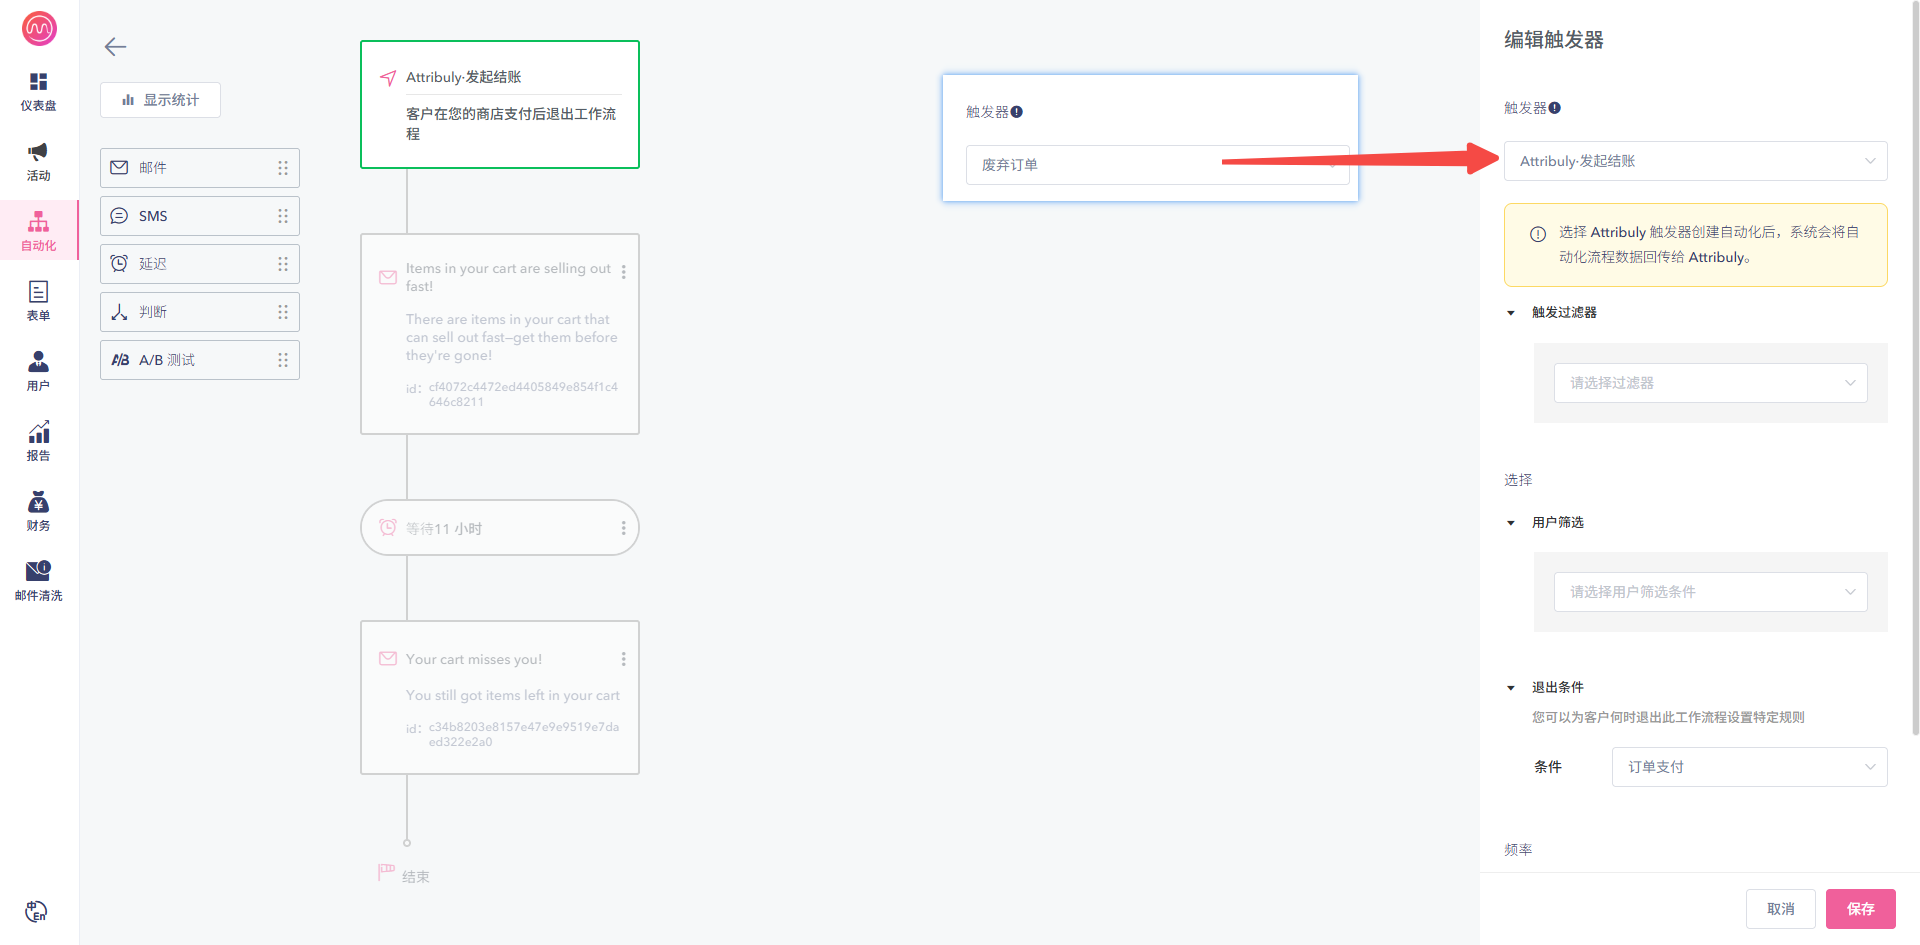
 2. Clone the existing workflow with an -Attribuly suffix, switch its trigger to the Attribuly event and enable the skip rule for the matching native workflow. Match site active to site visit, product view to product view, add to cart to abandoned cart, checkout started to abandoned order, and subscribe to subscription. Increase the first wait by 20 minutes.
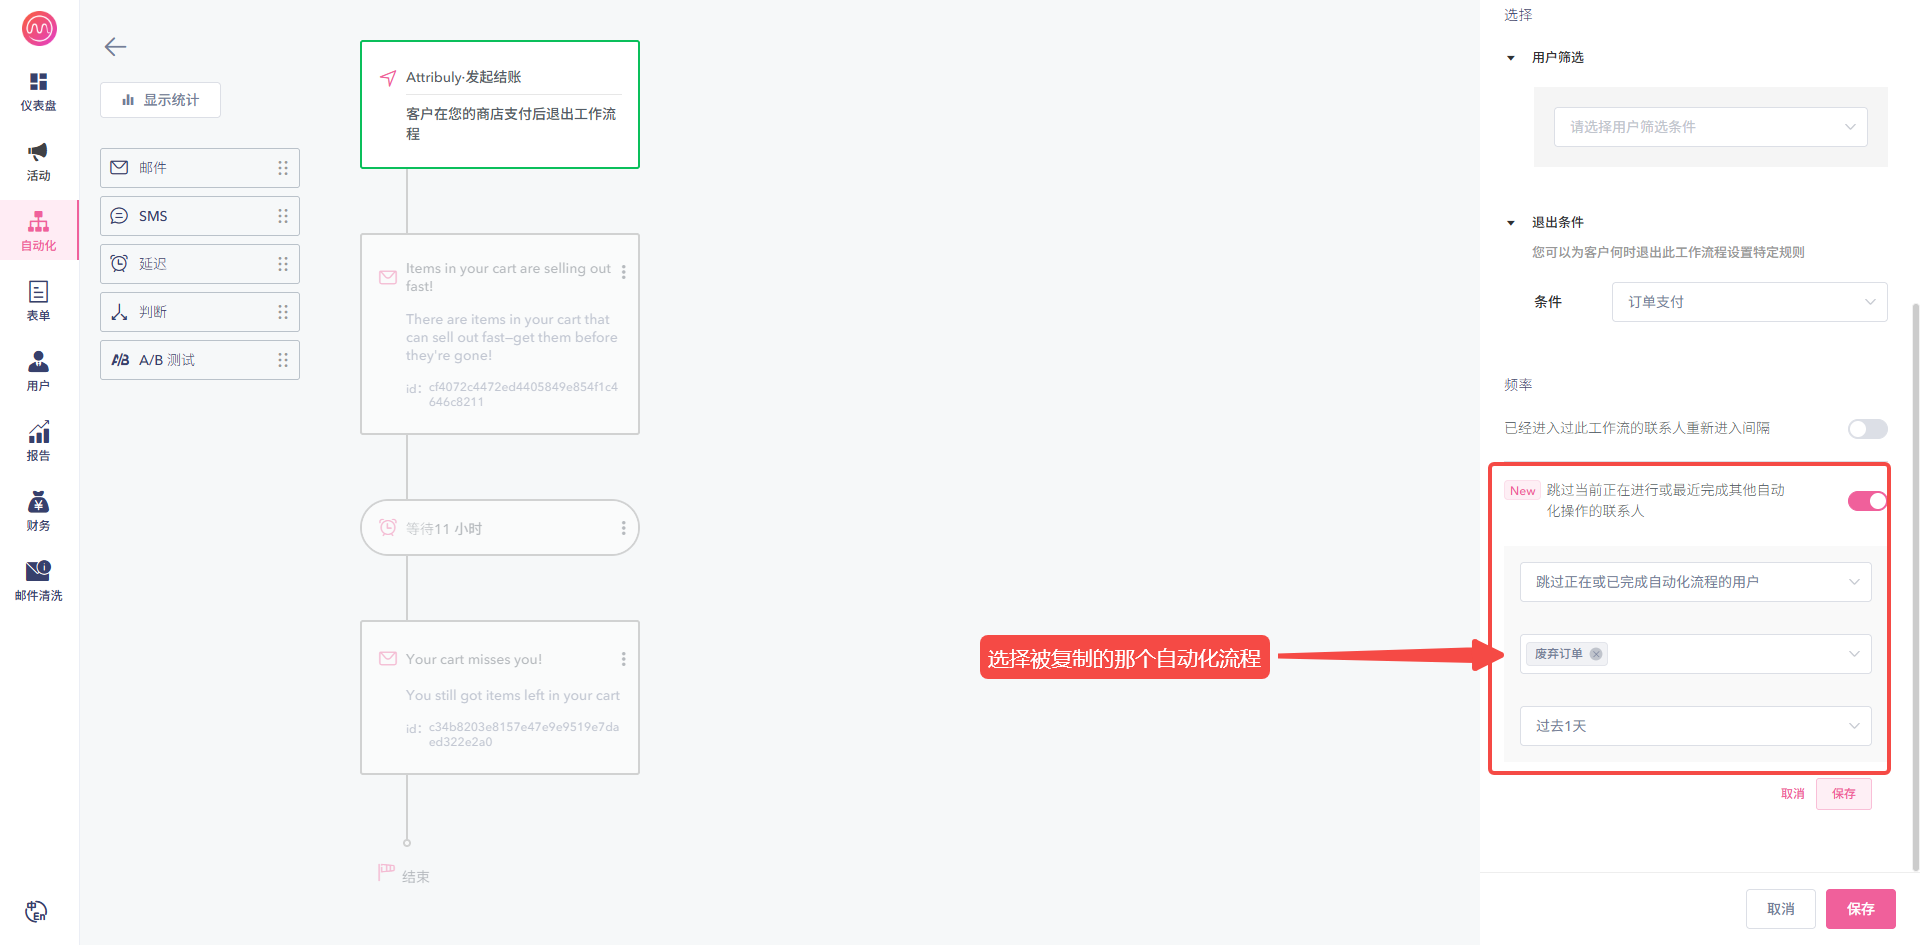
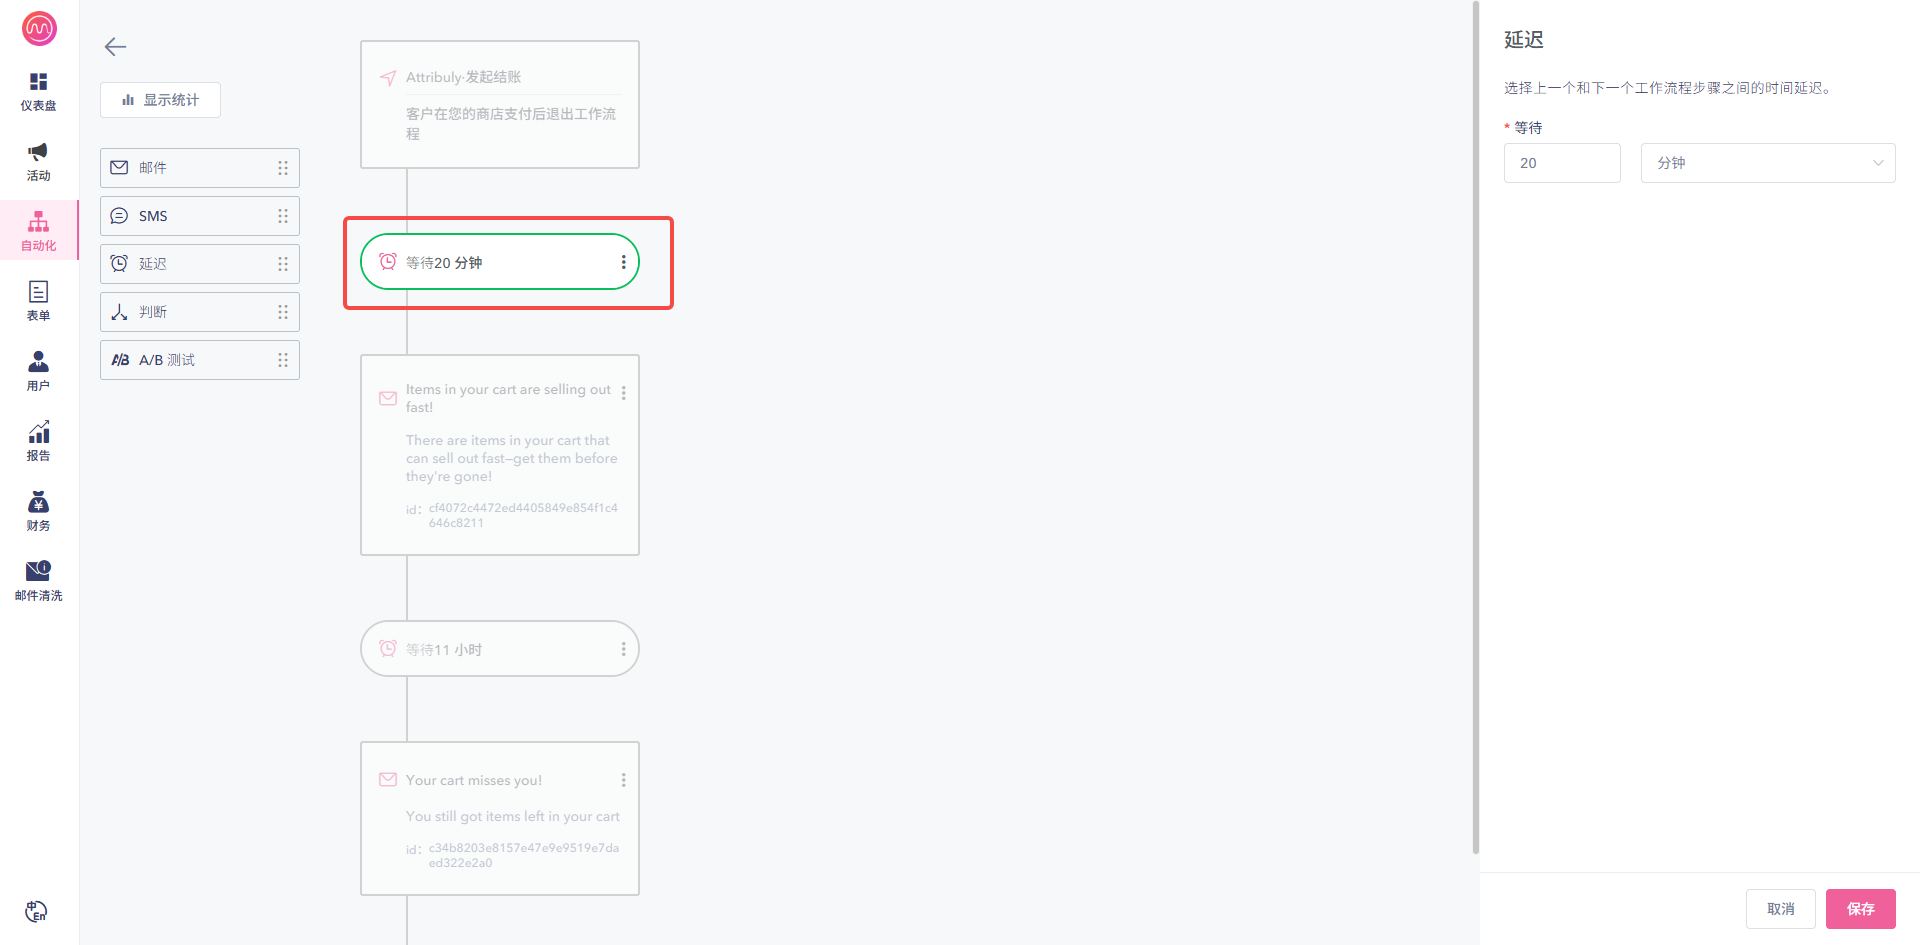 3. Create a welcome flow, configure its trigger, exclude members of your newsletter or master group, set the exit condition to order paid, and edit the invitation email so the recipient can subscribe.
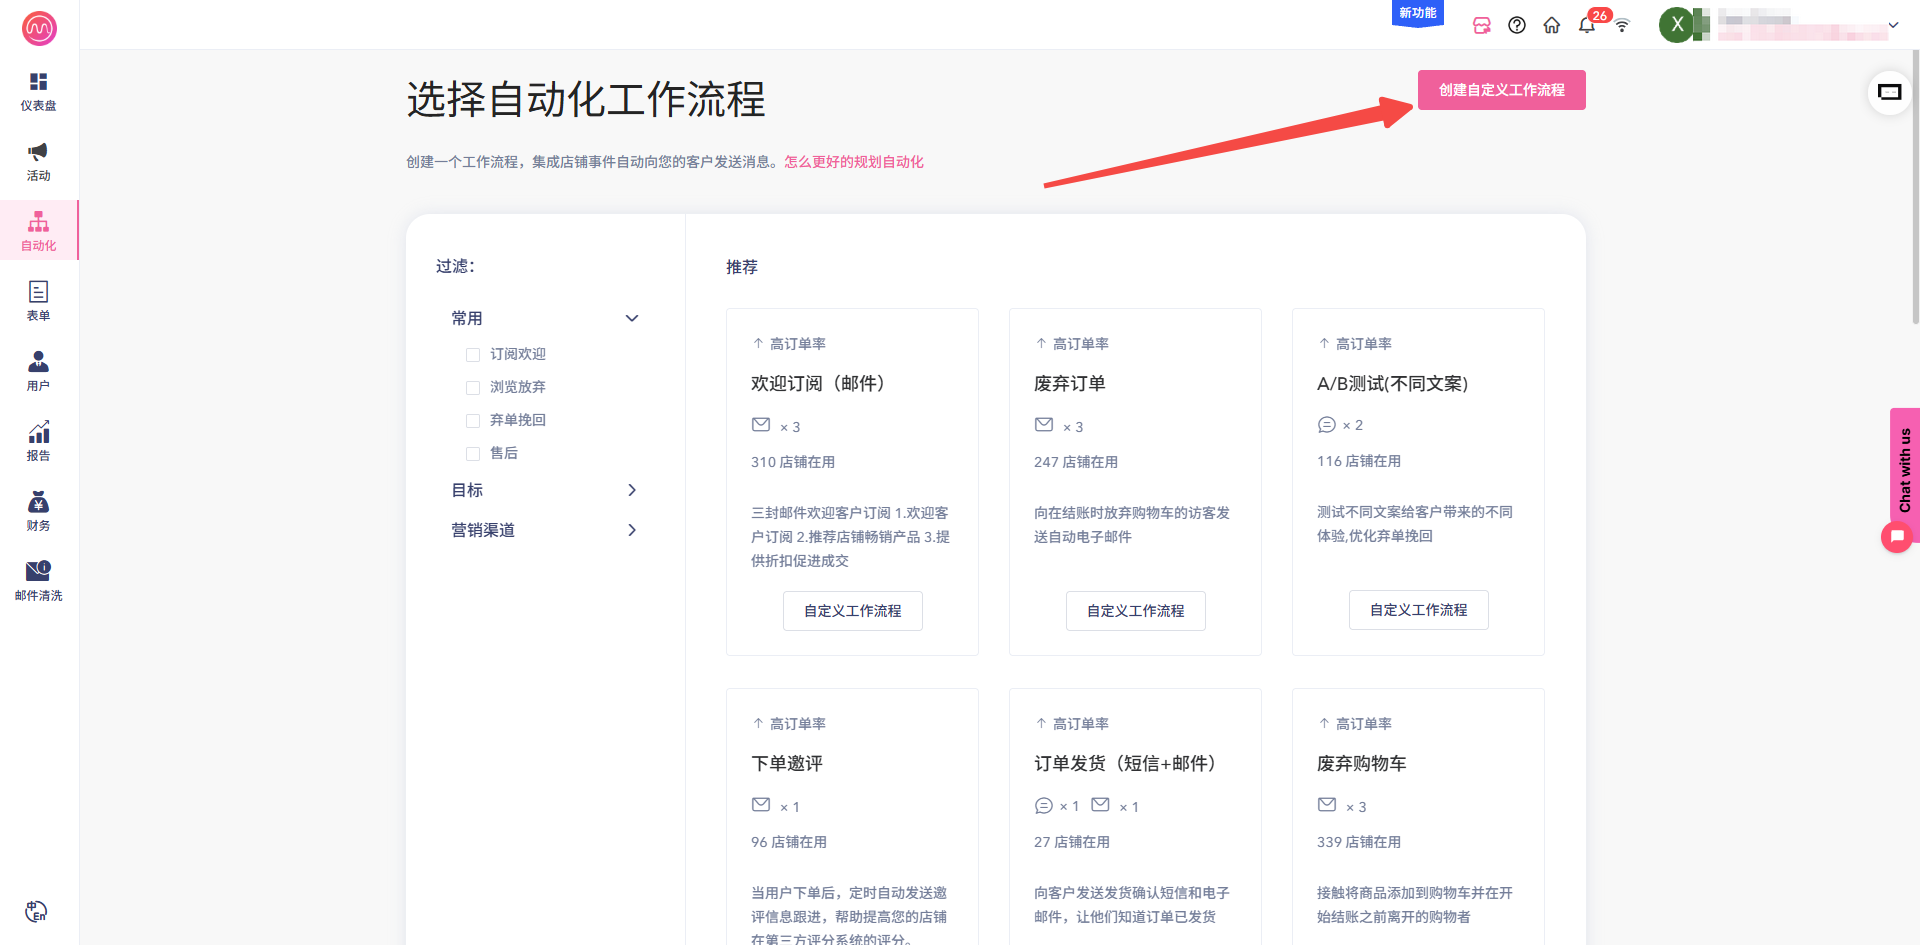
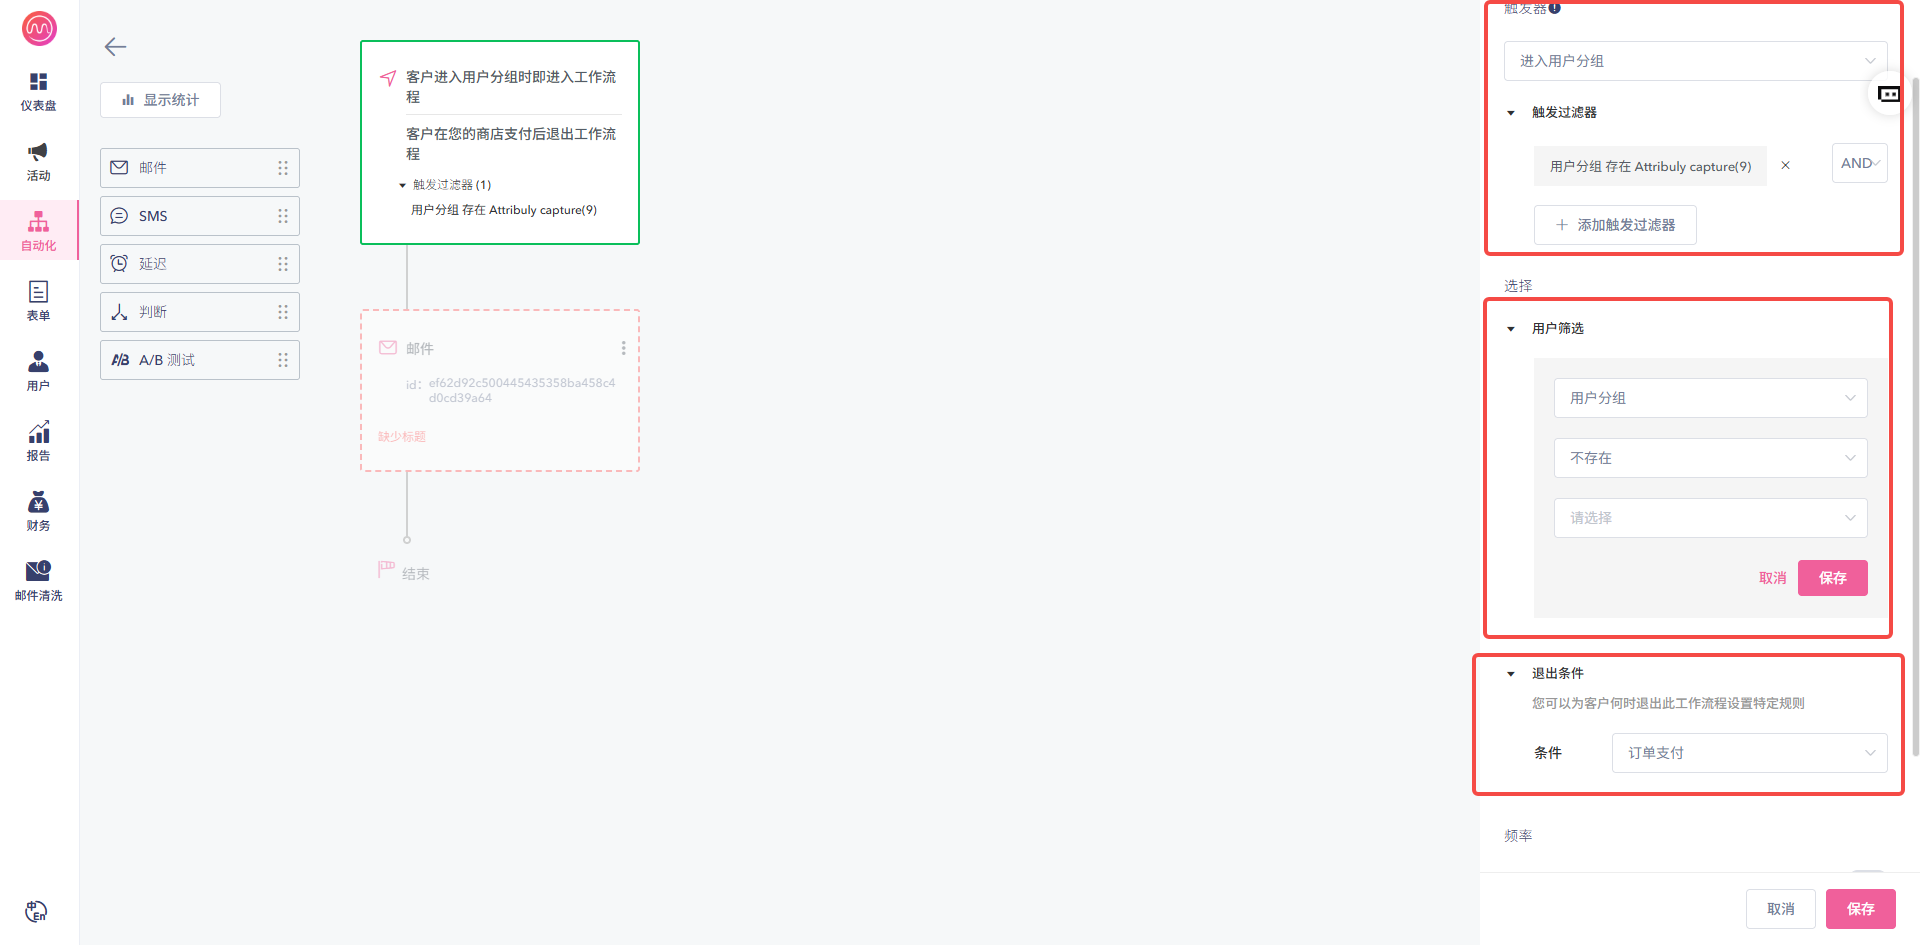
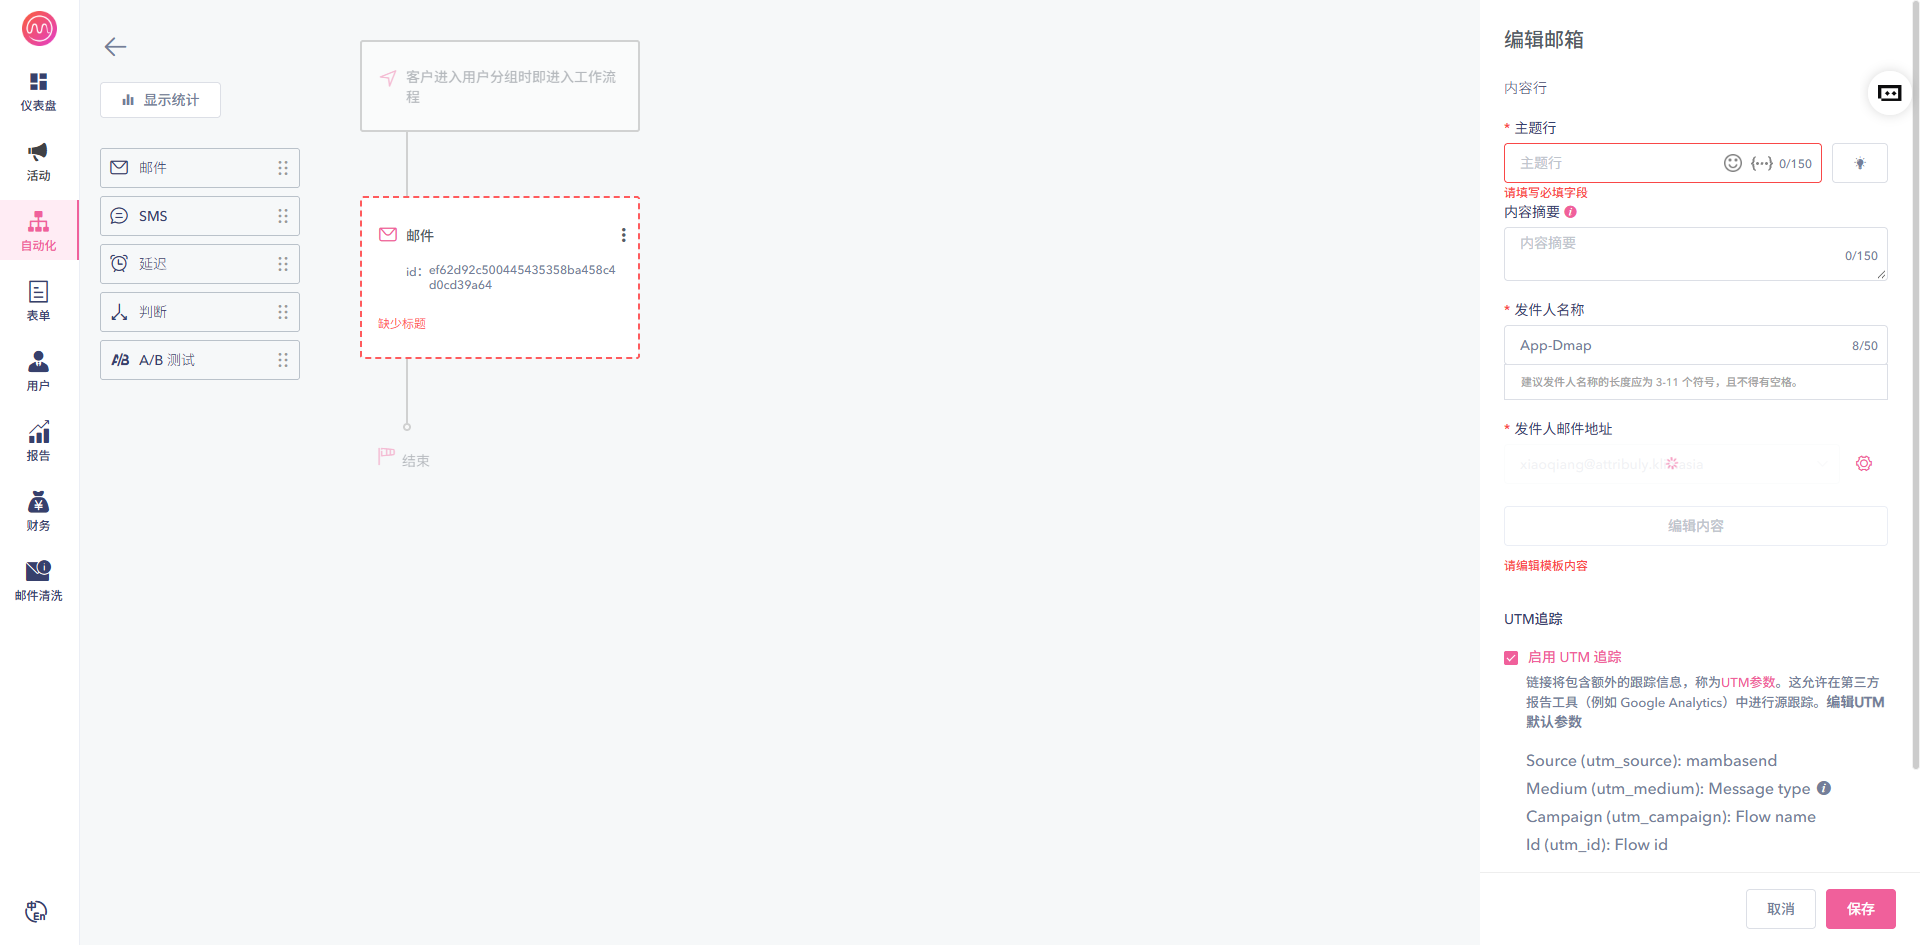 4. Complete Mamba traffic identification using the channel identification guide.
Troubleshooting
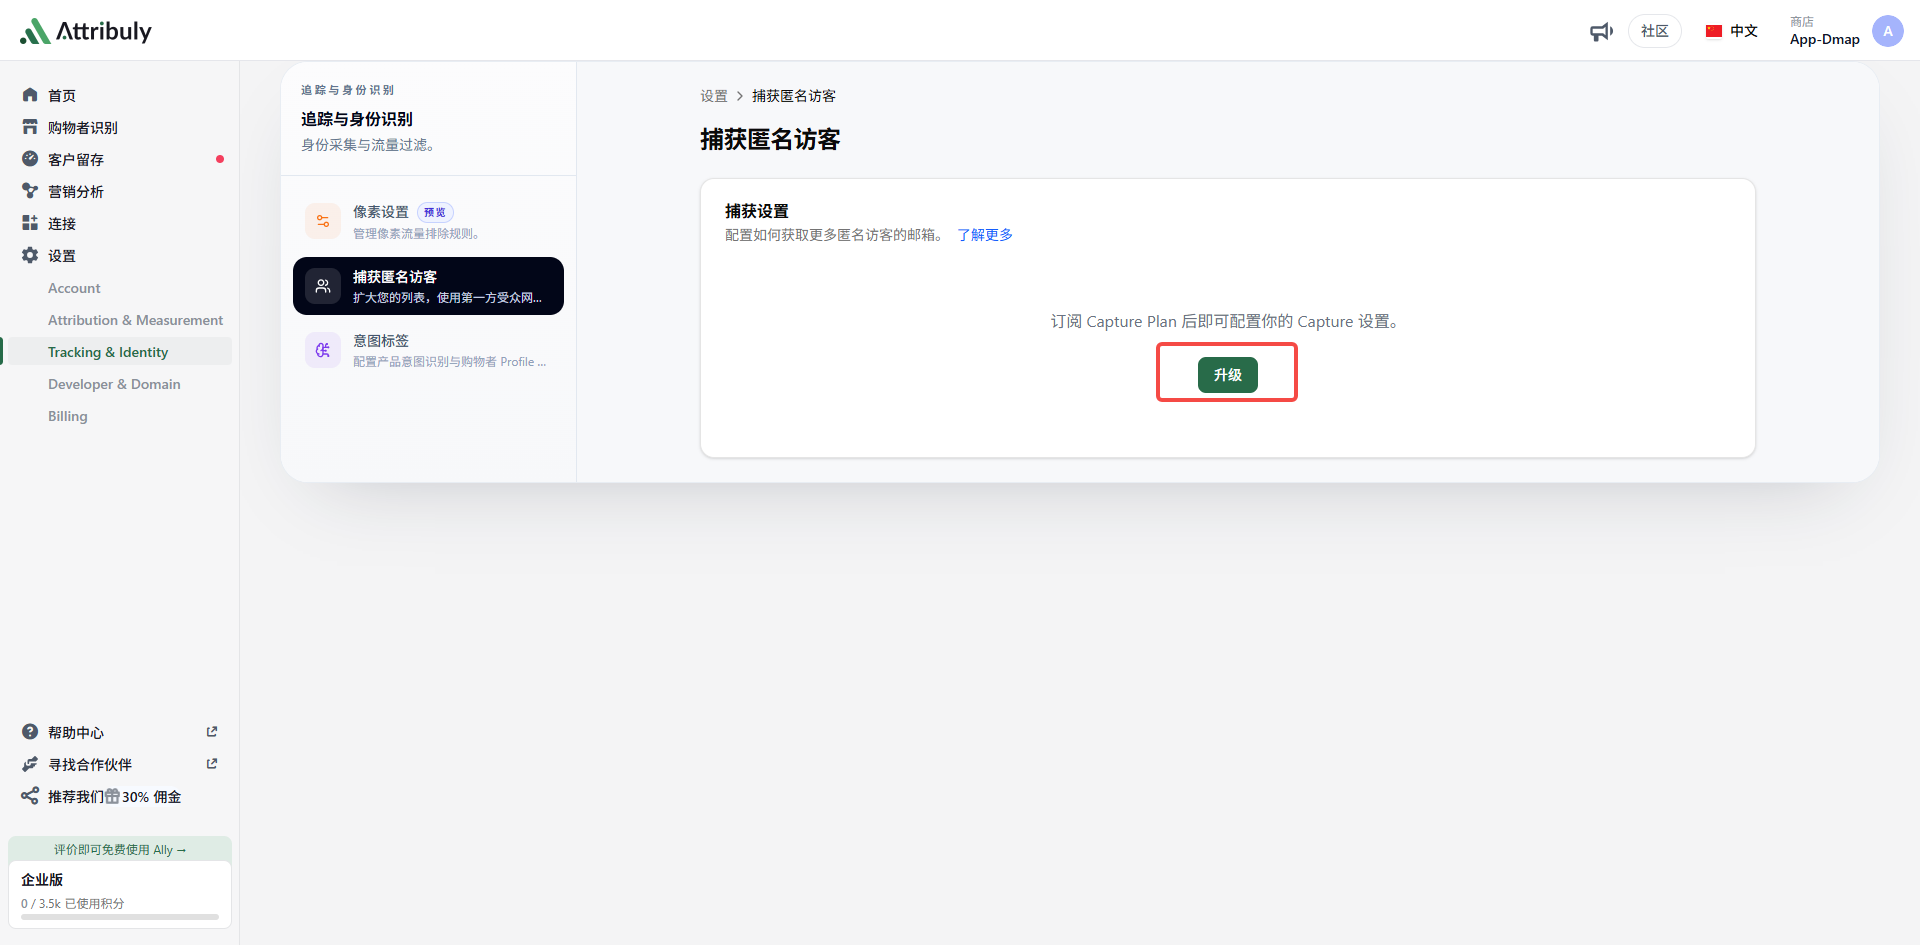
- Upgrade prompt when changing Capture rules: the source says trial users who have not subscribed to the feature cannot change rules on the settings page.
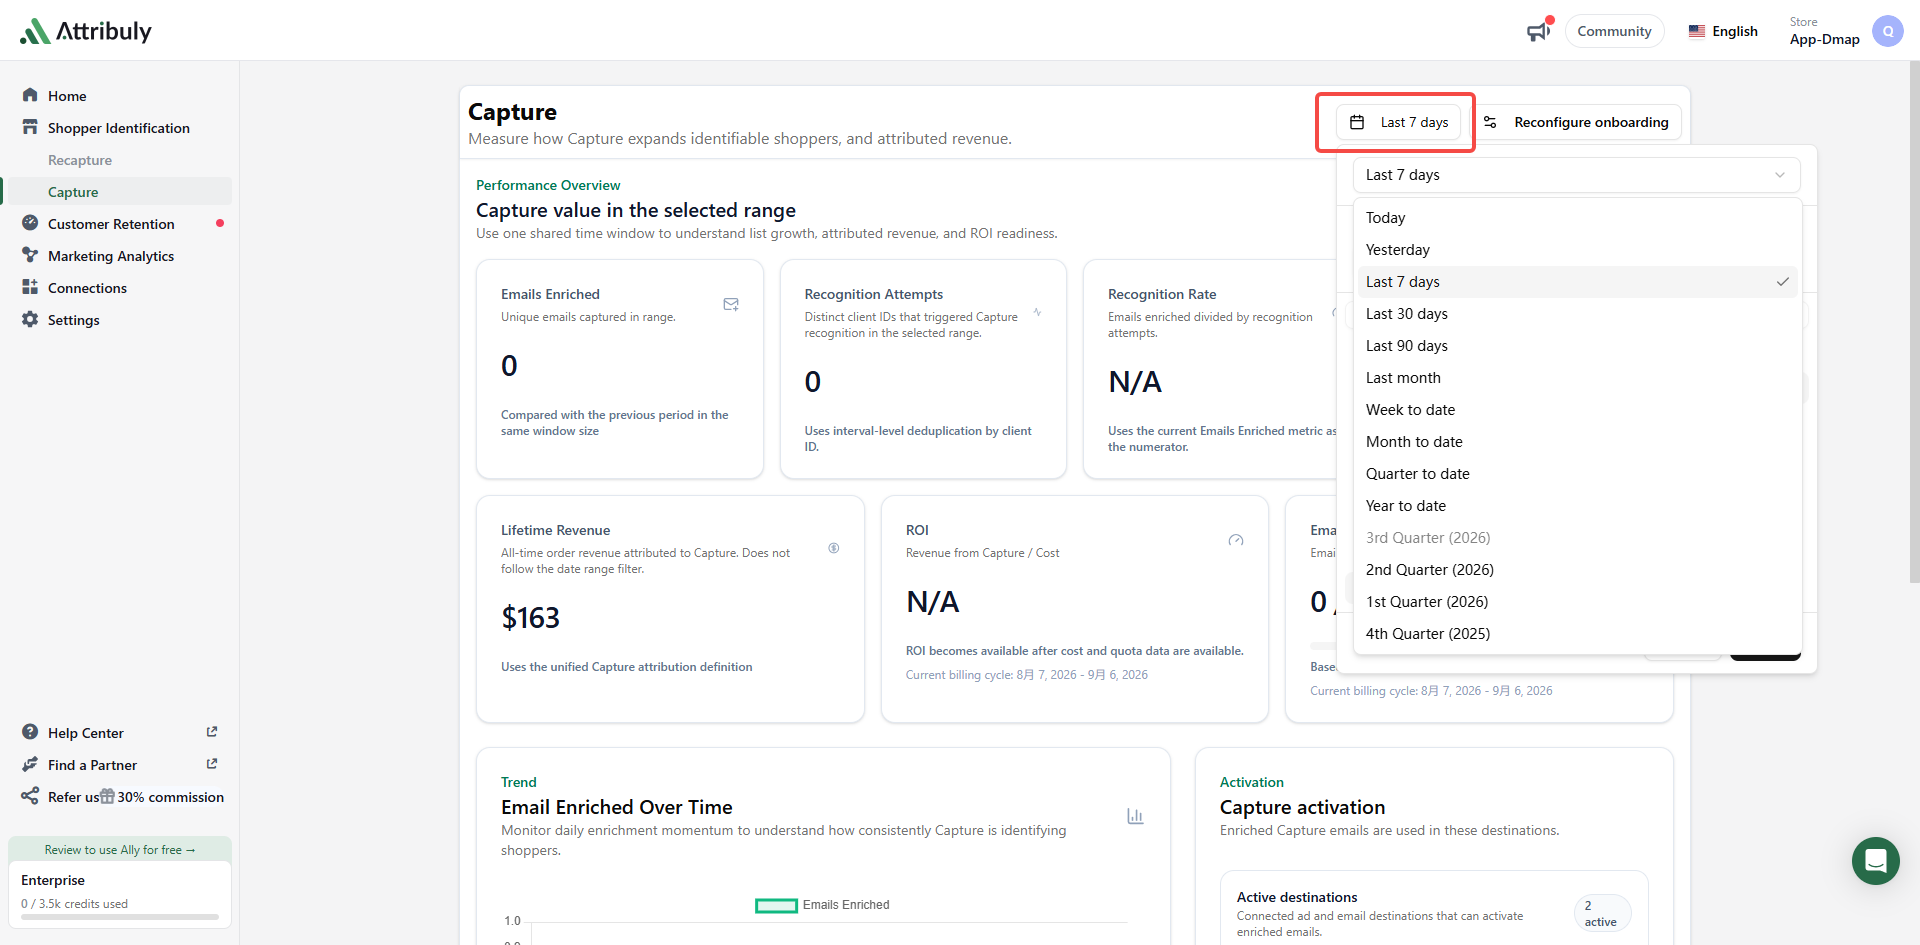
- No data on the first day: Capture may not yet have identified an email, and the default Past 7 days range does not include today.
- Enable app embed prompt: follow the Shopify app embed guide.
 See Capture Privacy & Compliance.