
How to Set Up the Meta Conversions API on Shopify (No‑Code, Official App)
Step-by-step no-code guide to enable Meta Advanced Matching + Conversions API on Shopify via the official Facebook & Instagram by Meta app—test events, dedupe, and verify EMQ.
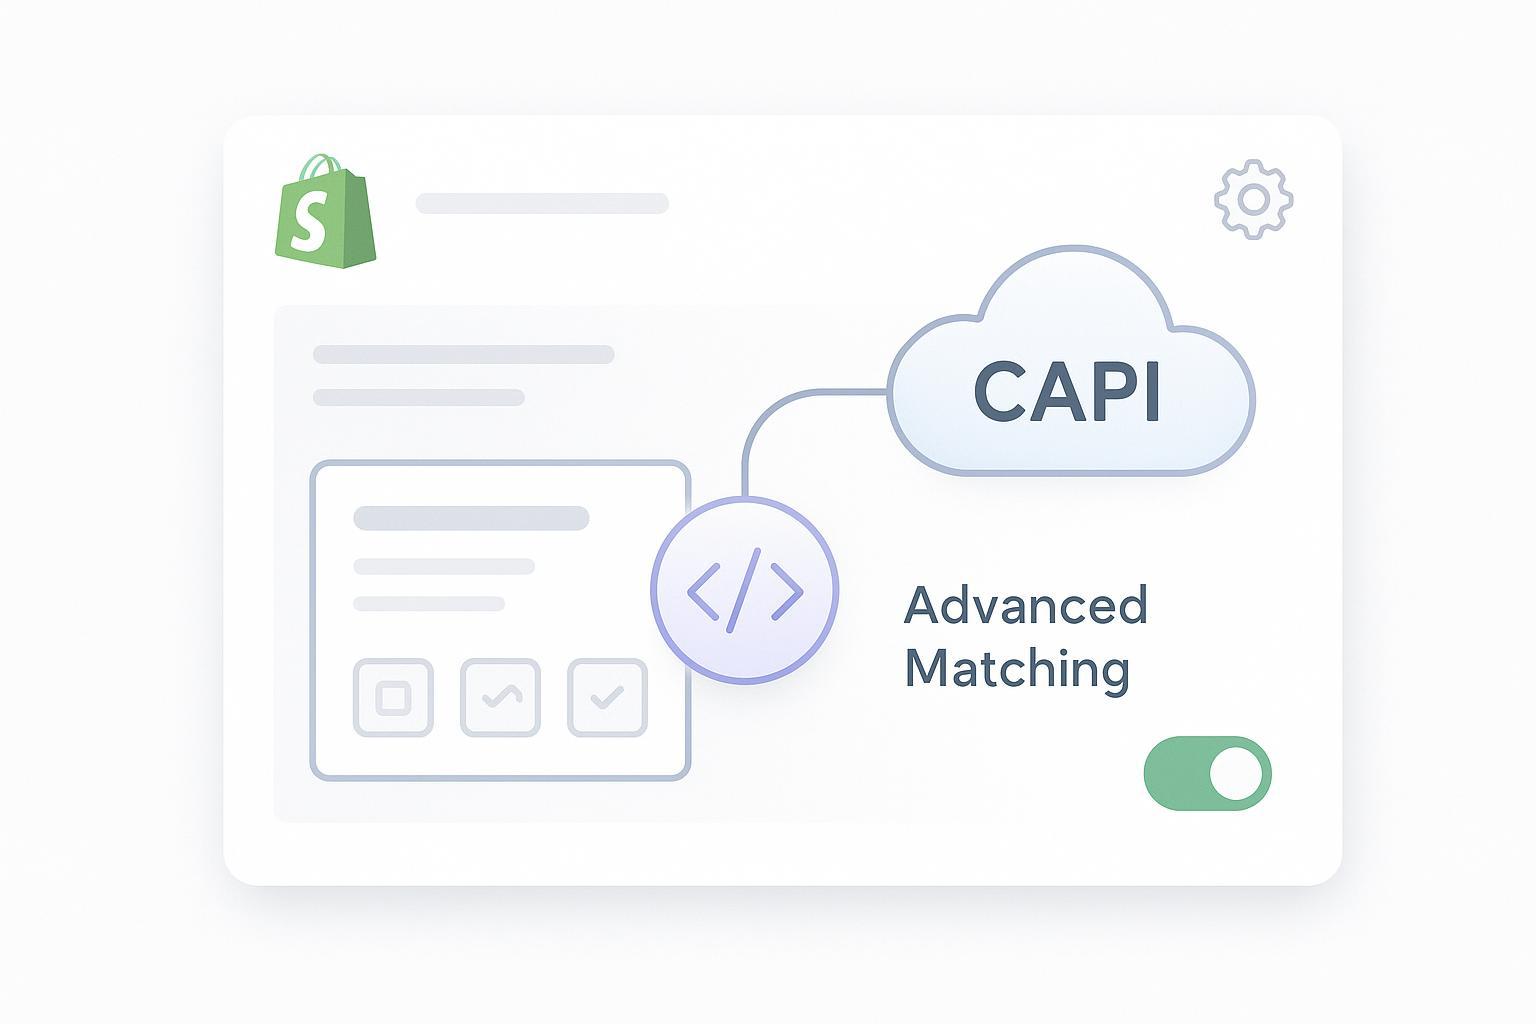
If you’ve heard “Meta Enhanced Conversions,” here’s the deal: that’s a Google Ads term. On Meta, you’re looking for two things working together—Advanced Matching (Pixel-side identifier enrichment) and the Conversions API (server-side events). In this guide, we’ll set up both on Shopify using the official Facebook & Instagram by Meta sales channel—no developer required—and then verify everything in Events Manager, including deduplication, Diagnostics, and Event Match Quality (EMQ).
Key takeaways
“Meta Enhanced Conversions” isn’t a Meta feature; you want Advanced Matching + Conversions API.
The fastest no-code path is Shopify’s official Facebook & Instagram by Meta sales channel.
Set Customer data sharing to Maximum to enable the Conversions API for server events.
In Events Manager, enable Automatic Advanced Matching and verify browser + server events in Test Events.
Confirm deduplication via matching event_name + event_id, monitor Diagnostics, and improve EMQ by sending better identifiers.
Prerequisites and permissions
Before you begin, make sure you have the right access and assets selected. UI labels can vary slightly over time, so use the navigation cues below.
Shopify access: Ability to add sales channels and manage channel/app settings.
Meta access: Admin (or equivalent) to the correct Business portfolio with permissions for Data Sources (Pixel), Ad Account, Page, and Domains.
Domain ownership: Plan to verify your primary domain in Meta Business Settings (Domains) if you haven’t already.
Asset discipline: Decide which Business Manager, Pixel/Data Source, Ad Account, and Page you intend to connect. Picking the wrong pixel is a top failure mode.
Helpful references:
Shopify explains Standard, Enhanced, and Maximum data sharing levels in its guide to Facebook data sharing; Enhanced/Maximum also send events via the Conversions API. See the explanation in Shopify’s article on the three data sharing levels: “Facebook data sharing”.
If you need the step-by-step install path for the channel, Shopify has an official setup doc for the Facebook & Instagram by Meta sales channel: “Setting up Facebook & Instagram by Meta”.
Step 1 — Install and connect the Facebook & Instagram by Meta sales channel in Shopify
Time: 10–20 minutes • Difficulty: Beginner
In Shopify admin, open Settings → Sales channels. Click “Add sales channel,” search for “Facebook & Instagram by Meta,” and add it.
Launch the channel and follow the guided setup to connect the correct Meta Business portfolio, Page, Ad Account, and Pixel/Data Source.
When prompted, connect your product catalog (if applicable). Finish the onboarding flow.
What to double-check after saving:
The connected Business portfolio and Pixel/Data Source are the ones you planned to use.
You don’t have any legacy apps or hard-coded Pixel snippets still active in your theme.
For background on the channel install steps, see Shopify’s setup doc: “Setting up Facebook & Instagram by Meta”.
Step 2 — Turn on Customer data sharing = Maximum (this enables CAPI)
Time: 2–5 minutes • Difficulty: Beginner
In Shopify admin, go to the Facebook & Instagram by Meta channel → open its Settings or Overview page.
Find Customer data sharing. Choose Maximum (Enhanced also enables CAPI, but Maximum shares the richest compliant signal set).
Save settings.
Why this matters: Shopify documents that Enhanced and Maximum levels send server-side events through the Conversions API alongside the Pixel. See Shopify’s official explanation of the three levels in “Facebook data sharing”.
Quick check: After saving, wait 5–30 minutes. You’ll validate server events in Events Manager shortly.
Step 3 — In Events Manager, enable Advanced Matching and confirm partner CAPI
Time: 5–10 minutes • Difficulty: Beginner
Go to Meta Events Manager and select the Pixel/Data Source you connected in Shopify.
Open Settings and turn on Automatic Advanced Matching. This lets Meta use hashed identifiers (such as email or phone) to improve matching.
Keep this Pixel selected; you’ll use Test Events next to confirm both browser (Pixel) and server (CAPI) events are flowing.
Meta’s guidance on Advanced Matching, identifiers, and where to manage them is available in Meta’s developer/docs pathways about advanced matching within the signals and gateway context: “Enhance Events with Advanced Matching”.
Verify your Meta Conversions API Shopify setup in Test Events
Time: 15–60 minutes • Difficulty: Intermediate
In Events Manager, with your Pixel selected, open Test Events.
In a separate browser tab, visit your storefront, view a product, add it to cart, start checkout, and (optionally) complete a test purchase.
Watch Test Events for each action (ViewContent, AddToCart, InitiateCheckout, Purchase). You should see origins labeled browser and server.
Open an event in Events Manager and look for the event identifier: the Pixel’s eventID should match the server event’s event_id for the same event_name. That’s how Meta deduplicates browser+server copies of one action.
Meta details the dedup rule—matching event_name with identical event_id pair—in its developer documentation: “Deduplicate Pixel and Server Events”. The Test Events workflow is described here: “Using the Conversions API (Test Events)”.
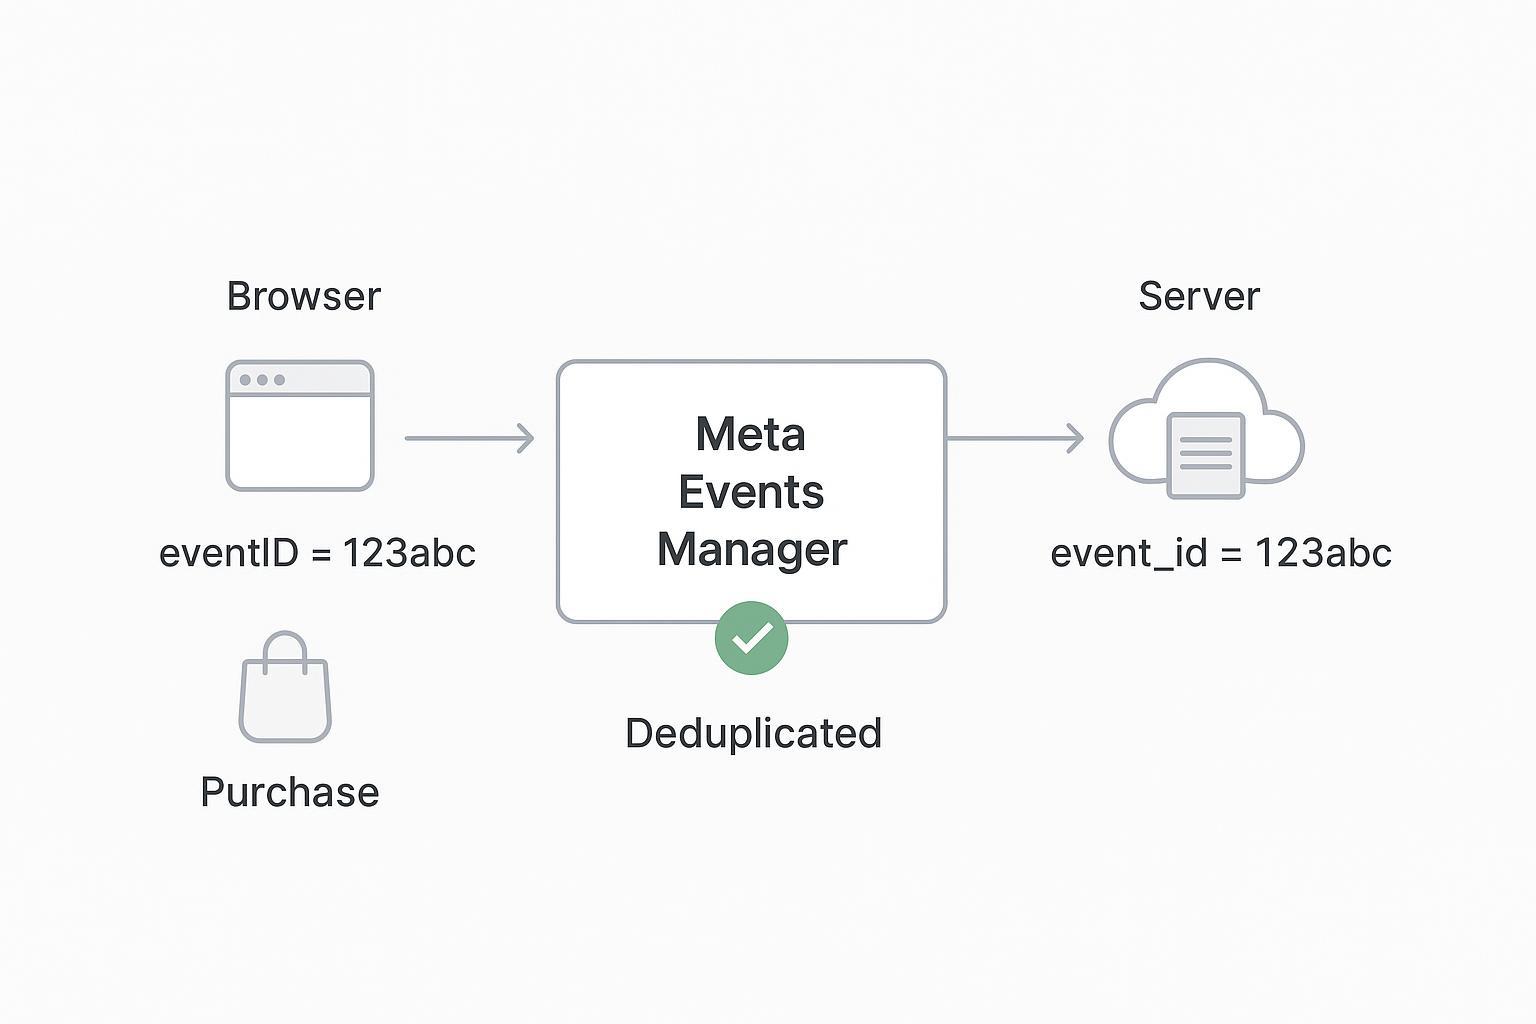
What success looks like: Each key funnel event appears from both browser and server within minutes of the trigger. Purchase includes value, currency, and product identifiers (content_ids/contents). Event Match Quality (EMQ) starts at reasonable levels and improves over time as identifiers are consistently present.
Troubleshooting and common pitfalls (quick fixes you can run)
Use this section when Test Events or Diagnostics don’t look right.
Wrong pixel or business selected
Symptom: Events show up on an unexpected Pixel, or nowhere.
Fix: Reopen the Shopify channel and re-run the asset selection flow to pick the correct Business portfolio and Pixel/Data Source. Confirm in Events Manager you’re viewing the same dataset.
No server (CAPI) events showing
Symptom: Only browser events appear.
Fix: In the Shopify channel, set Customer data sharing to Maximum (or Enhanced). Wait 5–30 minutes and retest. See Shopify’s data sharing levels in the official guide. Use Test Events following Meta’s procedure in the Conversions API docs.
Duplicate purchases or double counting
Symptom: Purchases appear twice or are flagged as duplicates.
Fix: Remove hard-coded Pixels in theme.liquid and disable legacy tracking apps that also send Pixel/CAPI. Ensure the same event_id is used for the browser and server copies for the same event_name. See Meta’s guidance on deduplication: “Deduplicate Pixel and Server Events”.
Low Event Match Quality (EMQ)
Symptom: EMQ score is low in Events Manager.
Fix: Turn on Advanced Matching; confirm Maximum data sharing in Shopify; ensure email/phone/name/address are present where possible and compliant. Meta outlines EMQ and improvement tips in “Conversions API Best Practices”.
Missing value/currency or product IDs on Purchase
Symptom: Purchases lack value, currency, or content_ids.
Fix: Ensure your store currency is correctly configured in Shopify; confirm catalog sync where relevant. Retest Purchase and inspect the event parameters in Events Manager.
Domain not verified or not assigned
Symptom: Warnings in Events Manager about domain ownership; issues with event prioritization.
Fix: Verify your primary domain in Meta Business Settings (Domains) using DNS TXT. Shopify’s domain verification walkthrough is here: “Verify domain ownership”.
Permissions or asset access errors
Symptom: You can’t see/edit the Pixel or connect assets in setup.
Fix: Ask a Business Manager admin to grant admin permissions to the Pixel/Data Source, Ad Account, Page, and Domain. Confirm you’re working in the intended Business portfolio.
Propagation delays or stale cache
Symptom: Test Events intermittently don’t appear.
Fix: Clear cache or use an incognito window; wait several minutes; keep the Test Events tab open while triggering actions. Some updates take time to reflect.
Theme or app conflicts still injecting Pixels
Symptom: You’ve set Maximum, but duplicates persist.
Fix: Search your theme code for “fbq” in theme.liquid and main layout files; remove legacy snippets (keep a backup). Remove or disable other marketing apps that also send Meta events.
Headless or custom checkout edge cases
Symptom: Events missing from steps outside the native Online Store/Shopify Checkout.
Fix: The official channel covers Online Store + standard checkout; headless/custom flows may need custom work or partner tooling.
Practical example (tooling): During QA, tools like Attribuly can surface event_id mismatches between Pixel and server streams so you can correct duplicates before scaling spend. Use this only as an aid; the official integration remains your system of record.
Brief alternatives (context only)
If you require deeper control over payloads, headers, or routing, server-side Google Tag Manager or gateway solutions are options. A reference overview is available here: “How to set up Facebook Conversions API (server)” by Stape. For most Shopify stores, the official sales channel is the fastest, lowest-maintenance path.
Appendix A — Sample Purchase event payloads with matching event_id
Browser (Pixel) example — note eventID casing:
{
    "event_name": "Purchase",
    "eventID": "shopify-abc123-7890",
    "value": 49.99,
    "currency": "USD",
    "content_ids": ["SKU-123"],
    "contents": [{"id": "SKU-123", "quantity": 1}],
    "content_type": "product",
    "num_items": 1
  }
Server (CAPI) example — note event_id casing and parity with browser eventID:
{
    "event_name": "Purchase",
    "event_id": "shopify-abc123-7890",
    "action_source": "website",
    "custom_data": {
      "value": 49.99,
      "currency": "USD",
      "content_ids": ["SKU-123"],
      "contents": [{"id": "SKU-123", "quantity": 1}],
      "content_type": "product",
      "num_items": 1
    }
  }
Deduplication requires the same event_name and the matching eventID/event_id across browser and server. Meta documents the rule here: “Deduplicate Pixel and Server Events”.
Appendix B — EMQ quick-improvement checklist
Turn on Automatic Advanced Matching in Events Manager.
Use Customer data sharing = Maximum in the Shopify channel.
Ensure hashed identifiers (email, phone, name, address components) are available and consented where applicable.
Eliminate duplicate Pixel sources in theme/apps; rely on the official partner integration.
Validate Purchase has value, currency, and product identifiers consistently.
Monitor Diagnostics and Test Events, then retest after each change; EMQ often improves over 24–72 hours.
What you’ve accomplished
You set up the official Shopify → Meta connection, enabled Maximum data sharing to turn on the Conversions API, switched on Advanced Matching, verified browser + server events in Test Events, confirmed deduplication, and learned how to troubleshoot common pitfalls. Keep an eye on Diagnostics and EMQ as you spend. When in doubt, retest a simple ViewContent → AddToCart → Purchase flow to validate signal health.